Setting up Apple developer certificates with push notifications can be very frustrating, I hope this guide helps someone.
Advertisement:
Guide Assumptions: You have played with Corona Labs, setup an Apple Developer account/certificates on your Mac and have created a few test apps before.
What is OneSignal?
One Signal ( http://www.onesignal.com ) is a company that allows you to send push notifications to mobile and web apps.
What is Corona Labs?
Corona Labs ( https://coronalabs.com/ ) is a company that makes the Corona SDK that allows you to make mobile and desktop apps. Corona SDK is really strong on Physics, Graphics sound based apps. Corona SDK can compile apps for iOS (iPhone and iPad), Android (phones and tablets), Windows Phones and even OSX and Windows desktop apps (in beta) from a single codebase. Corona has awesome guides, easy to use API’s and advanced OpenGL shader support. If you prefer XCode you can even use Corona (via Corona Cards) to layer in Corona apps into XCode.
Creating a Apple Developer App ID, Provisioning Profile with Push Certificates.
1. Login to your Apple Developer Portal: https://developer.apple.com/account/overview.action
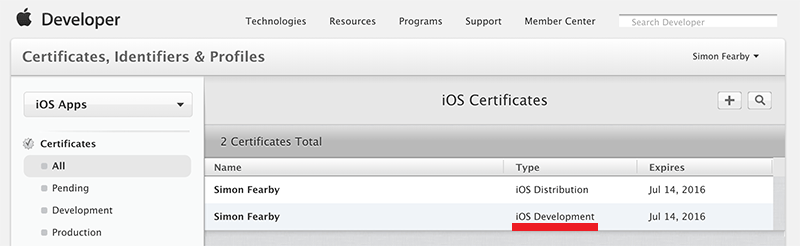
2. Ensure you have valid Developer and Distribution Certificates (some help here Corona Certificate guide: https://docs.coronalabs.com/guide/distribution/iOSBuild/index.html)
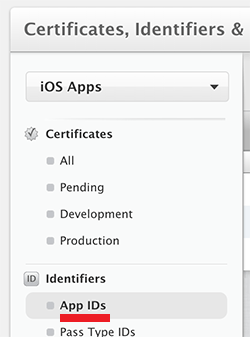
3. Click on App Id’s and then Click the Plus icon
4. Enter you App ID Description: “Your App Name“.
5. Enter you App Bundle ID: “com.yourdomain.yourappname”
6. Tick Push Notifications and any other services you may need (more info on app services here).
7. Click OK and submit your Certificate.
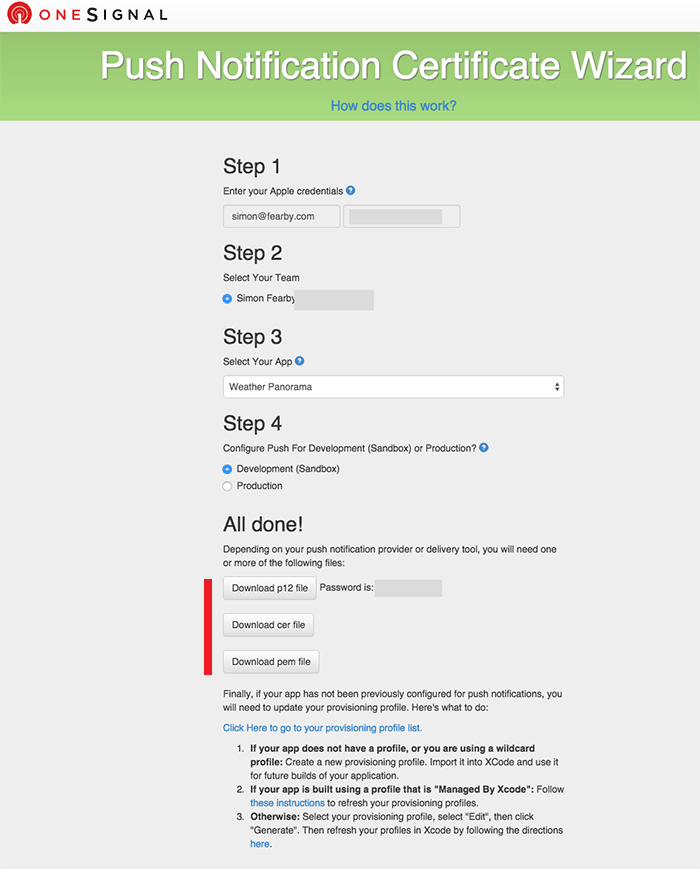
8. Login to https://onesignal.com/provisionator with your Apple ID and select your App ID.
9. Follow the prompts to generate the Development (sandbox) Push Notification Certificates (save the files and password).
10. Follow the guide here: http://documentation.onesignal.com/v2.0/docs/generating-an-ios-push-certificate (Don’t forget to skip to step 4)
11. Create an account at http://www.onesignal.com
12. Go to https://onesignal.com/apps/new and create a new app.
13. Open your One Signal app container and select Application Settings then click Configure next to Apple (APNS)
14. Select the *.p12 file that was generated earlier and enter the *.p12 password.
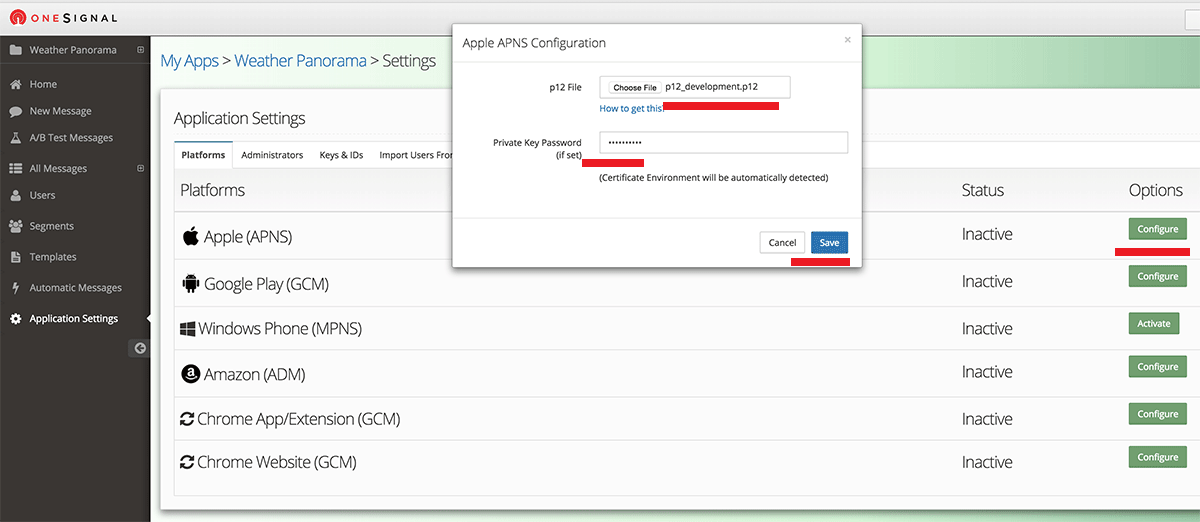
15. You should now see something like: Active Expires August 02, 2016
16. Now log back into the Apple Developer portal and click Development under Provisioning Profiles.
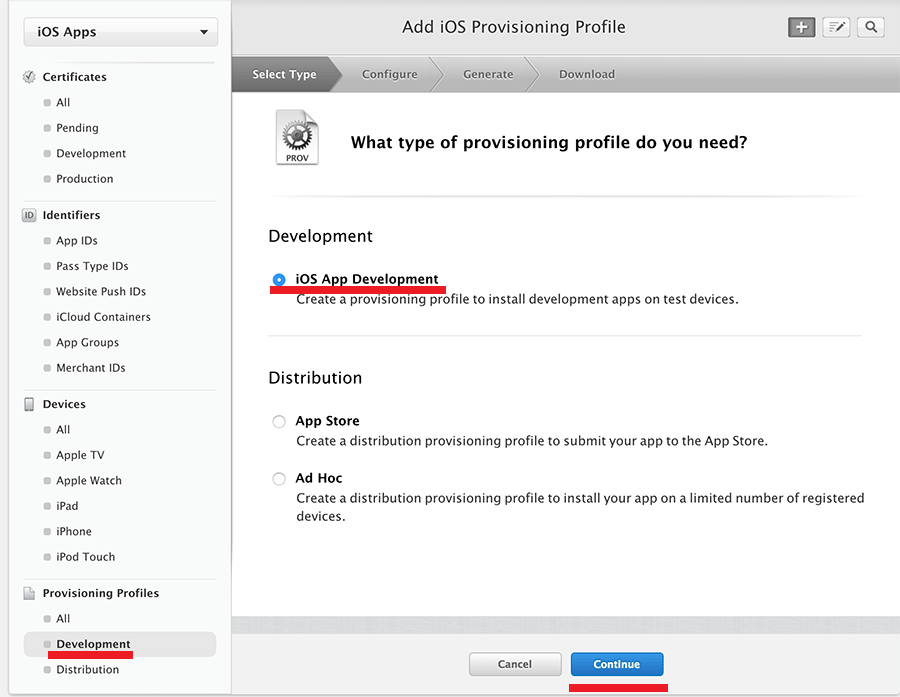
17. Select your App ID and click Continue
18. Select your Team Certificate
19. Select the Devices you wish to test on.
20. Name your Provisioning Profile: e.g “Your App Name – Development wPush”
21. Save the Profile, (back it up), Double click on it to add it to tour iPhone Configuration utility.
Creating the app (and using the certificate).
1. Download the latest build for Corona: http://coronalabs.com
2. Open Corona and open a sample app and goto File, Build then iOS and see if your certificate is loaded (if not you have stuffed up, go back and try again or ask on the https://forums.coronalabs.com/).
3. Read this guide for setting up a project: http://documentation.onesignal.com/v2.0/docs/corona-sdk-installation
4. Copy the starter “Hello World Project” from “/Applications/CoronaSDK/SampleCode/GettingStarted/HelloWorld”
5. Add the required code to build.settings
--
-- For more information on build.settings see the Corona SDK Build Guide at:
-- http://docs.coronalabs.com/guide/distribution/buildSettings/index.html
--

settings =
{
	orientation =
	{
		default = "portrait",
		supported = { "portrait" }
	},
	iphone =
	{
		plist =
		{
			UIBackgroundModes = {"remote-notification"},
			CFBundleIconFiles =
			{
				"Icon.png",
				"[email protected]",
				"Icon-60.png",
				"[email protected]",
				"[email protected]",
				"Icon-72.png",
				"[email protected]",
				"Icon-76.png",
				"[email protected]",
				"Icon-Small.png",
				"[email protected]",
				"[email protected]",
				"Icon-Small-40.png",
				"[email protected]",
				"Icon-Small-50.png",
				"[email protected]",
			},
		},
	},
	window =
	{
		titleText =
		{
			default = "Hello World",
		},
	},

	plugins =
	{
	    ["plugin.OneSignal"] =
	    {
	        publisherId = "com.onesignal",
	    },
	    ["plugin.google.play.services"] =
	    {
	        publisherId = "com.coronalabs",
	        supportedPlatforms = { android=true, ["android-kindle"]=true },
	    },
	}

}
6. Add the required init code to your main.lua (login to onesignal.com, open your app, click the “OneSignal App ID” key)
--
-- Abstract: Hello World sample app, using native iOS font
-- To build for Android, choose an available font, or use native.systemFont
--
-- Version: 1.2
--
-- Sample code is MIT licensed, see http://www.coronalabs.com/links/code/license
-- Copyright (C) 2010 Corona Labs Inc. All Rights Reserved.
--
-- Supports Graphics 2.0
------------------------------------------------------------
local background = display.newImage( "world.jpg", display.contentCenterX, display.contentCenterY )
local myText = display.newText( "Hello, World!", display.contentCenterX, display.contentWidth / 4, native.systemFont, 40 )
myText:setFillColor( 1, 110/255, 110/255 )
-- This function gets called when the user opens a notification or one is received when the app is open and active.
-- Change the code below to fit your app's needs.
function DidReceiveRemoteNotification(message, additionalData, isActive)
if (additionalData) then
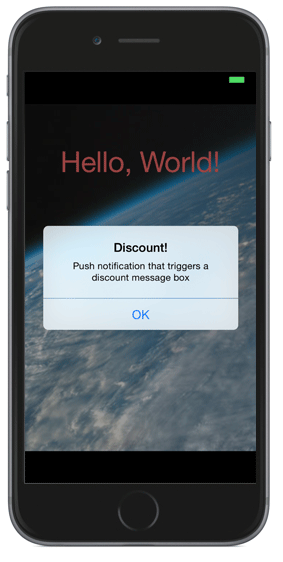
if (additionalData.discount) then
native.showAlert( "Discount!", message, { "OK" } )
-- Take user to your app store
elseif (additionalData.actionSelected) then -- Interactive notification button pressed
native.showAlert("Button Pressed!", "ButtonID:" .. additionalData.actionSelected, { "OK"} )
end
else
native.showAlert("OneSignal Message", message, { "OK" } )
end
end
local OneSignal = require("plugin.OneSignal")
-- Uncomment SetLoggingLevel to debug issues.
-- OneSignal.SetLoggingLevel(4, 4)
OneSignal.Init("YOUR API KEY HERE", "", DidReceiveRemoteNotification)
Building your app
1. Open your project in CoronaSDK
2. Click File, Build then iOS and select your provisioning profile (with push id).
3. I received the following error.
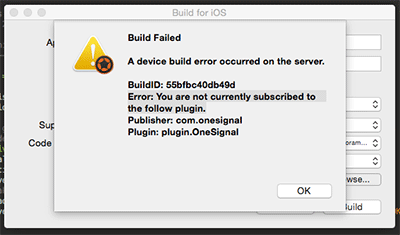
4. To resolve this error go to the Corona plugin director, find the OneSignal plugin and add it to your cart. This activates the plugin.
5. You can review your active plugins here: https://store.coronalabs.com/user/ (fyi: there may be a 30 minute delay between activating the plugin and being able to build with it, see here).
6. Copy your app to your device (I open Code then click View then Devices and drag the app onto your phone).

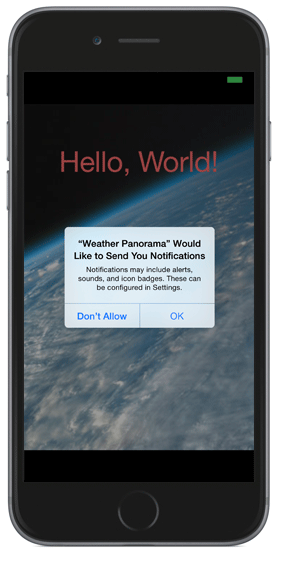
7. Run your App on your device and approve the Push Notification permissions.
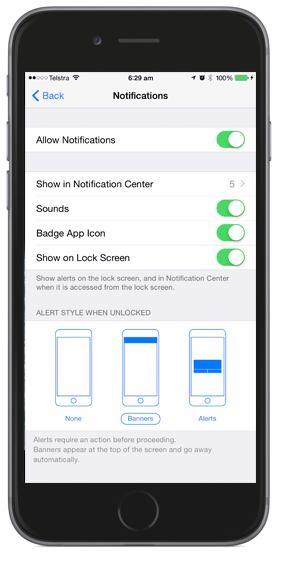
8. Review and change the Push Notification display types (if needed) from the iPhones Settings screen for your app.
Sending your first Push Message
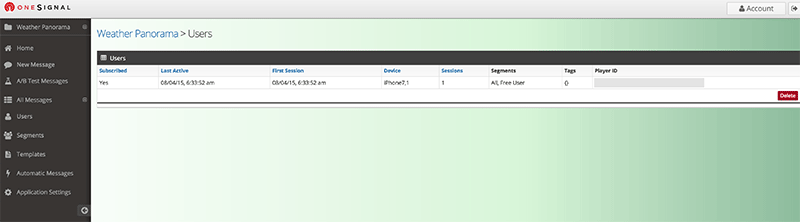
1. Login to OneSignal and open your App container then click Users (you should see one user).
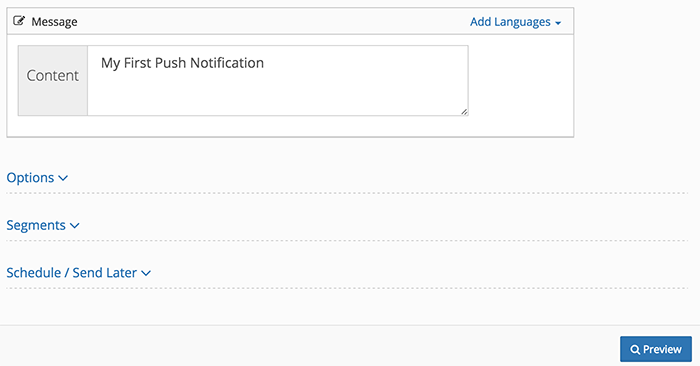
2. In One Signal click New Message.
3. Type a Message then click Preview then Send
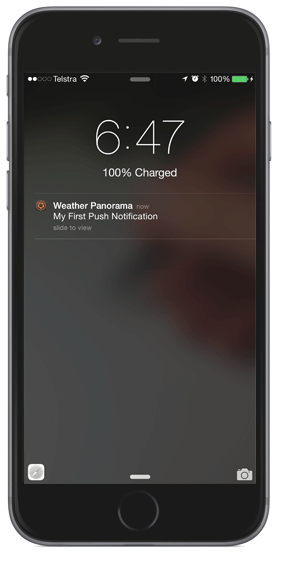
4. Congratulations your message should be send in seconds.
Sending Paramters
You may recall the code to process received data in main.lua that looks for parameters (additional data), You can create you own endpoints (other than “discount” and “actionSelected”).
--
function DidReceiveRemoteNotification(message, additionalData, isActive)
    if (additionalData) then
        if (additionalData.discount) then
            native.showAlert( "Discount!", message, { "OK" } )
            -- Take user to your app store
        elseif (additionalData.actionSelected) then -- Interactive notification button pressed
            native.showAlert("Button Pressed!", "ButtonID:" .. additionalData.actionSelected, { "OK"} )
        end
    else
        native.showAlert("OneSignal Message", message, { "OK" } )
    end
end
Add the additional data of “discount” = “yes” (yes is optional but looks better).
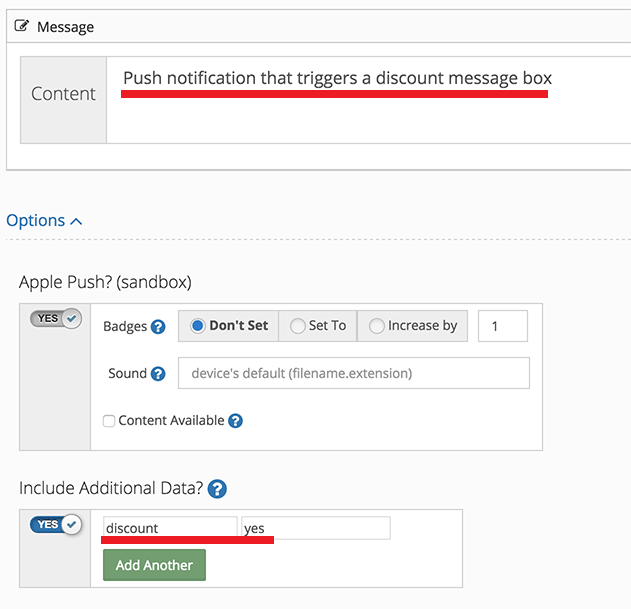
Result:
Up Next: (under construction)
- How to send Action buttons.
- How to trigger sounds.
- How to automate the messages (behind an API).
- How to assign users to a group.
- How to schedule notifications.
- How to add users to groups (segments).
Android setup is quite easy if you follow the OneSignal guide here
Final Tips:
- I use the Sublime Text Editor with the Corona Editor package.
- I use Cornerstone SVN to backup and version my source code.
Donate and make this blog better
Ask a question or recommend an article
[contact-form-7 id=”30″ title=”Ask a Question”]