This post is a work in progress (14/3/2022, v0.9.63 – PCB’s v0.2 Designed and Ordered
Summary
After watching this video from Jeff Geerling (demonstrating how to build a Air Quality Sensor) I have decided to make 2. but why not build something bigger?
I want to make a RaspBerry Pi server with a touch screen to receive data from a dozen other WeMos Sensors that I will build.
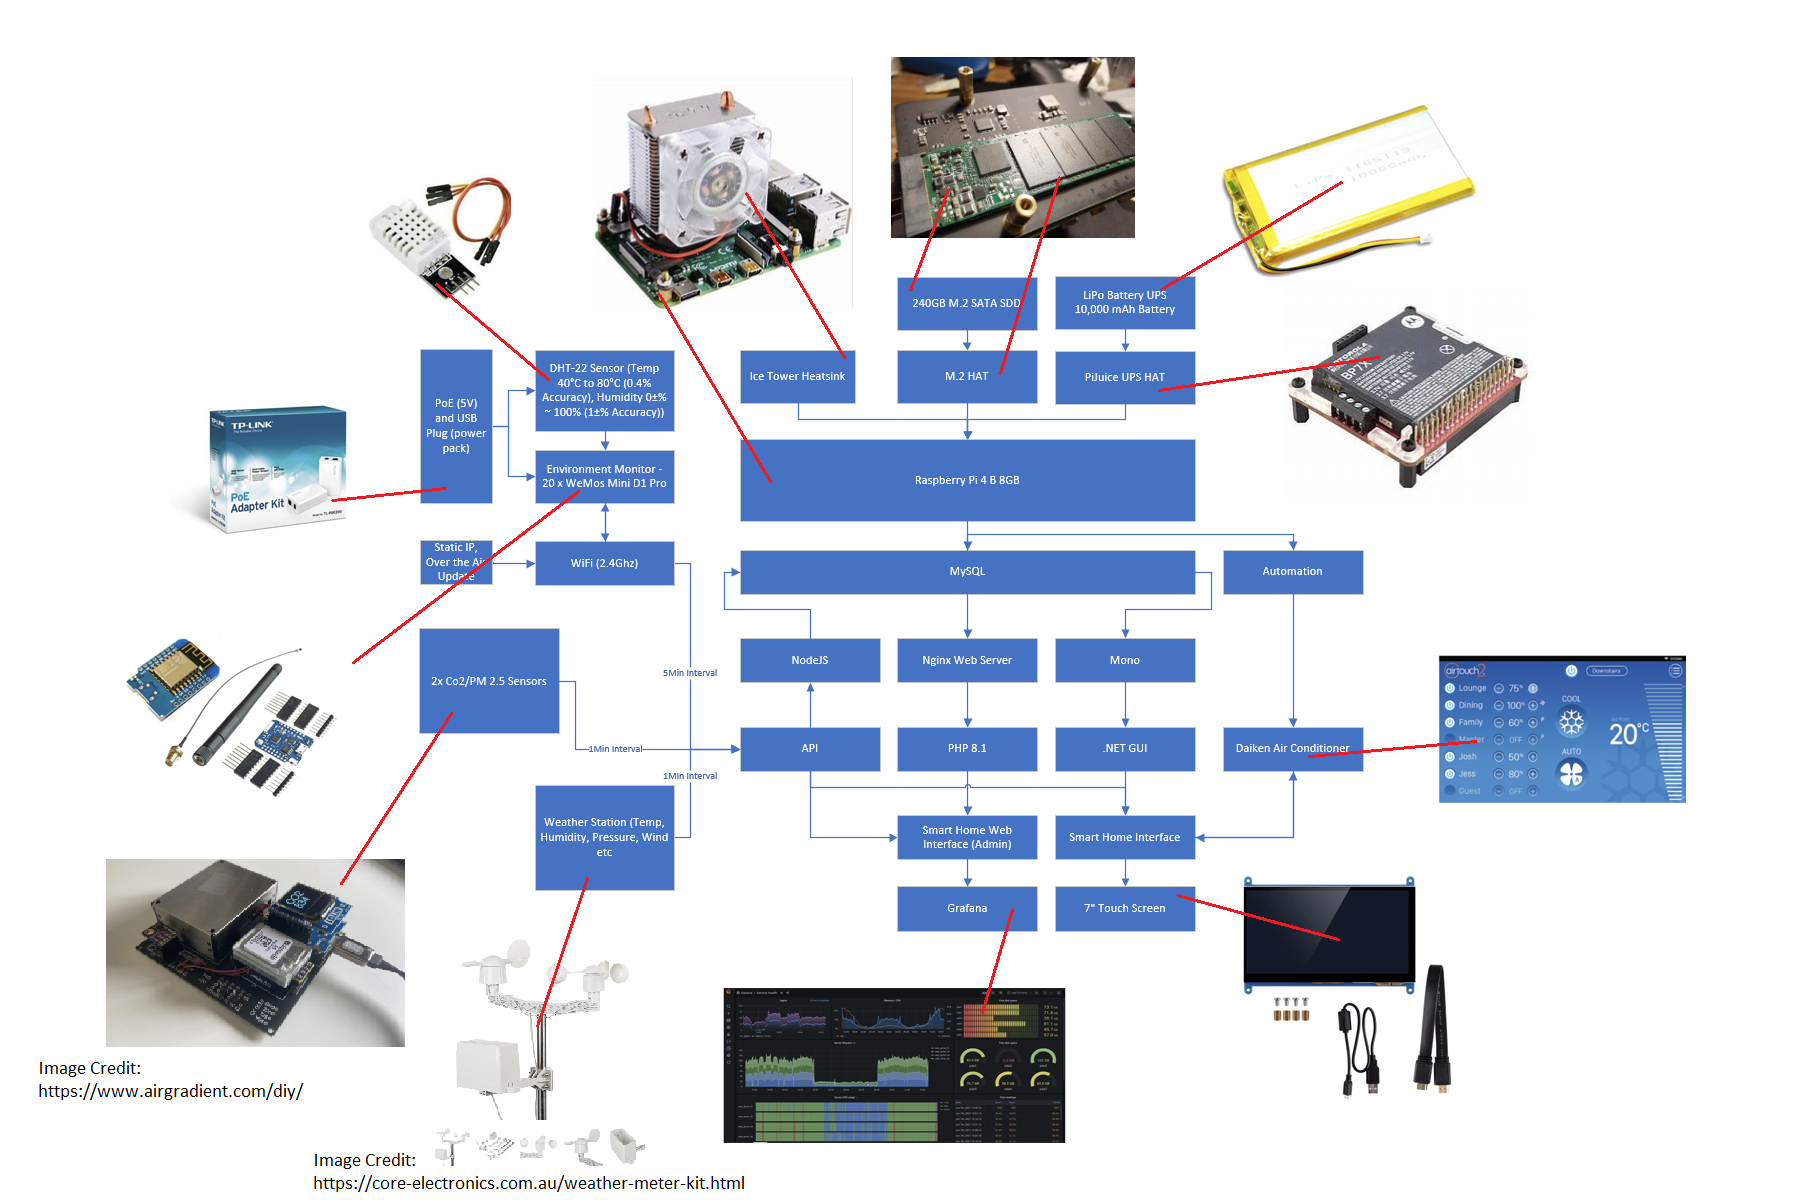
The Plan
Below is a rough plan of what I am building
In a nutshell, it will be 20x WeMos Sensors recording
I ordered all the parts from Amazon, BangGood, AliExpress, eBay, Core Electronics and Kogan.
Fresh Bullseye Install (Buster upgrade failed)
On 21/11/2021 I tried to manually update Buster to Bullseye (without taking a backup first (bad idea)). I followed this guide to reinstall Rasbian from scratch (this with Bullseye)
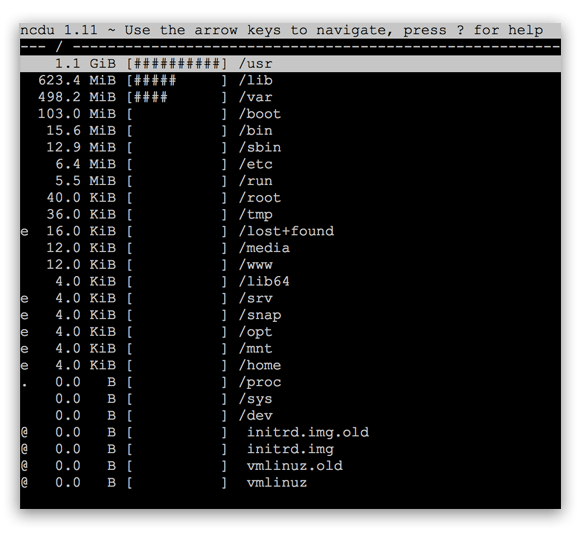
Storage Type
Before I begin I need to decide on what storage media to use on the Raspberry Pi. I hate how unreliable and slow MicroSD cards. I tried using an old 128GB SATA SSD, a 1TB Magnetic Hard Drive, a SATA M.2 SSD and NVME M.2 in a USB caddy.
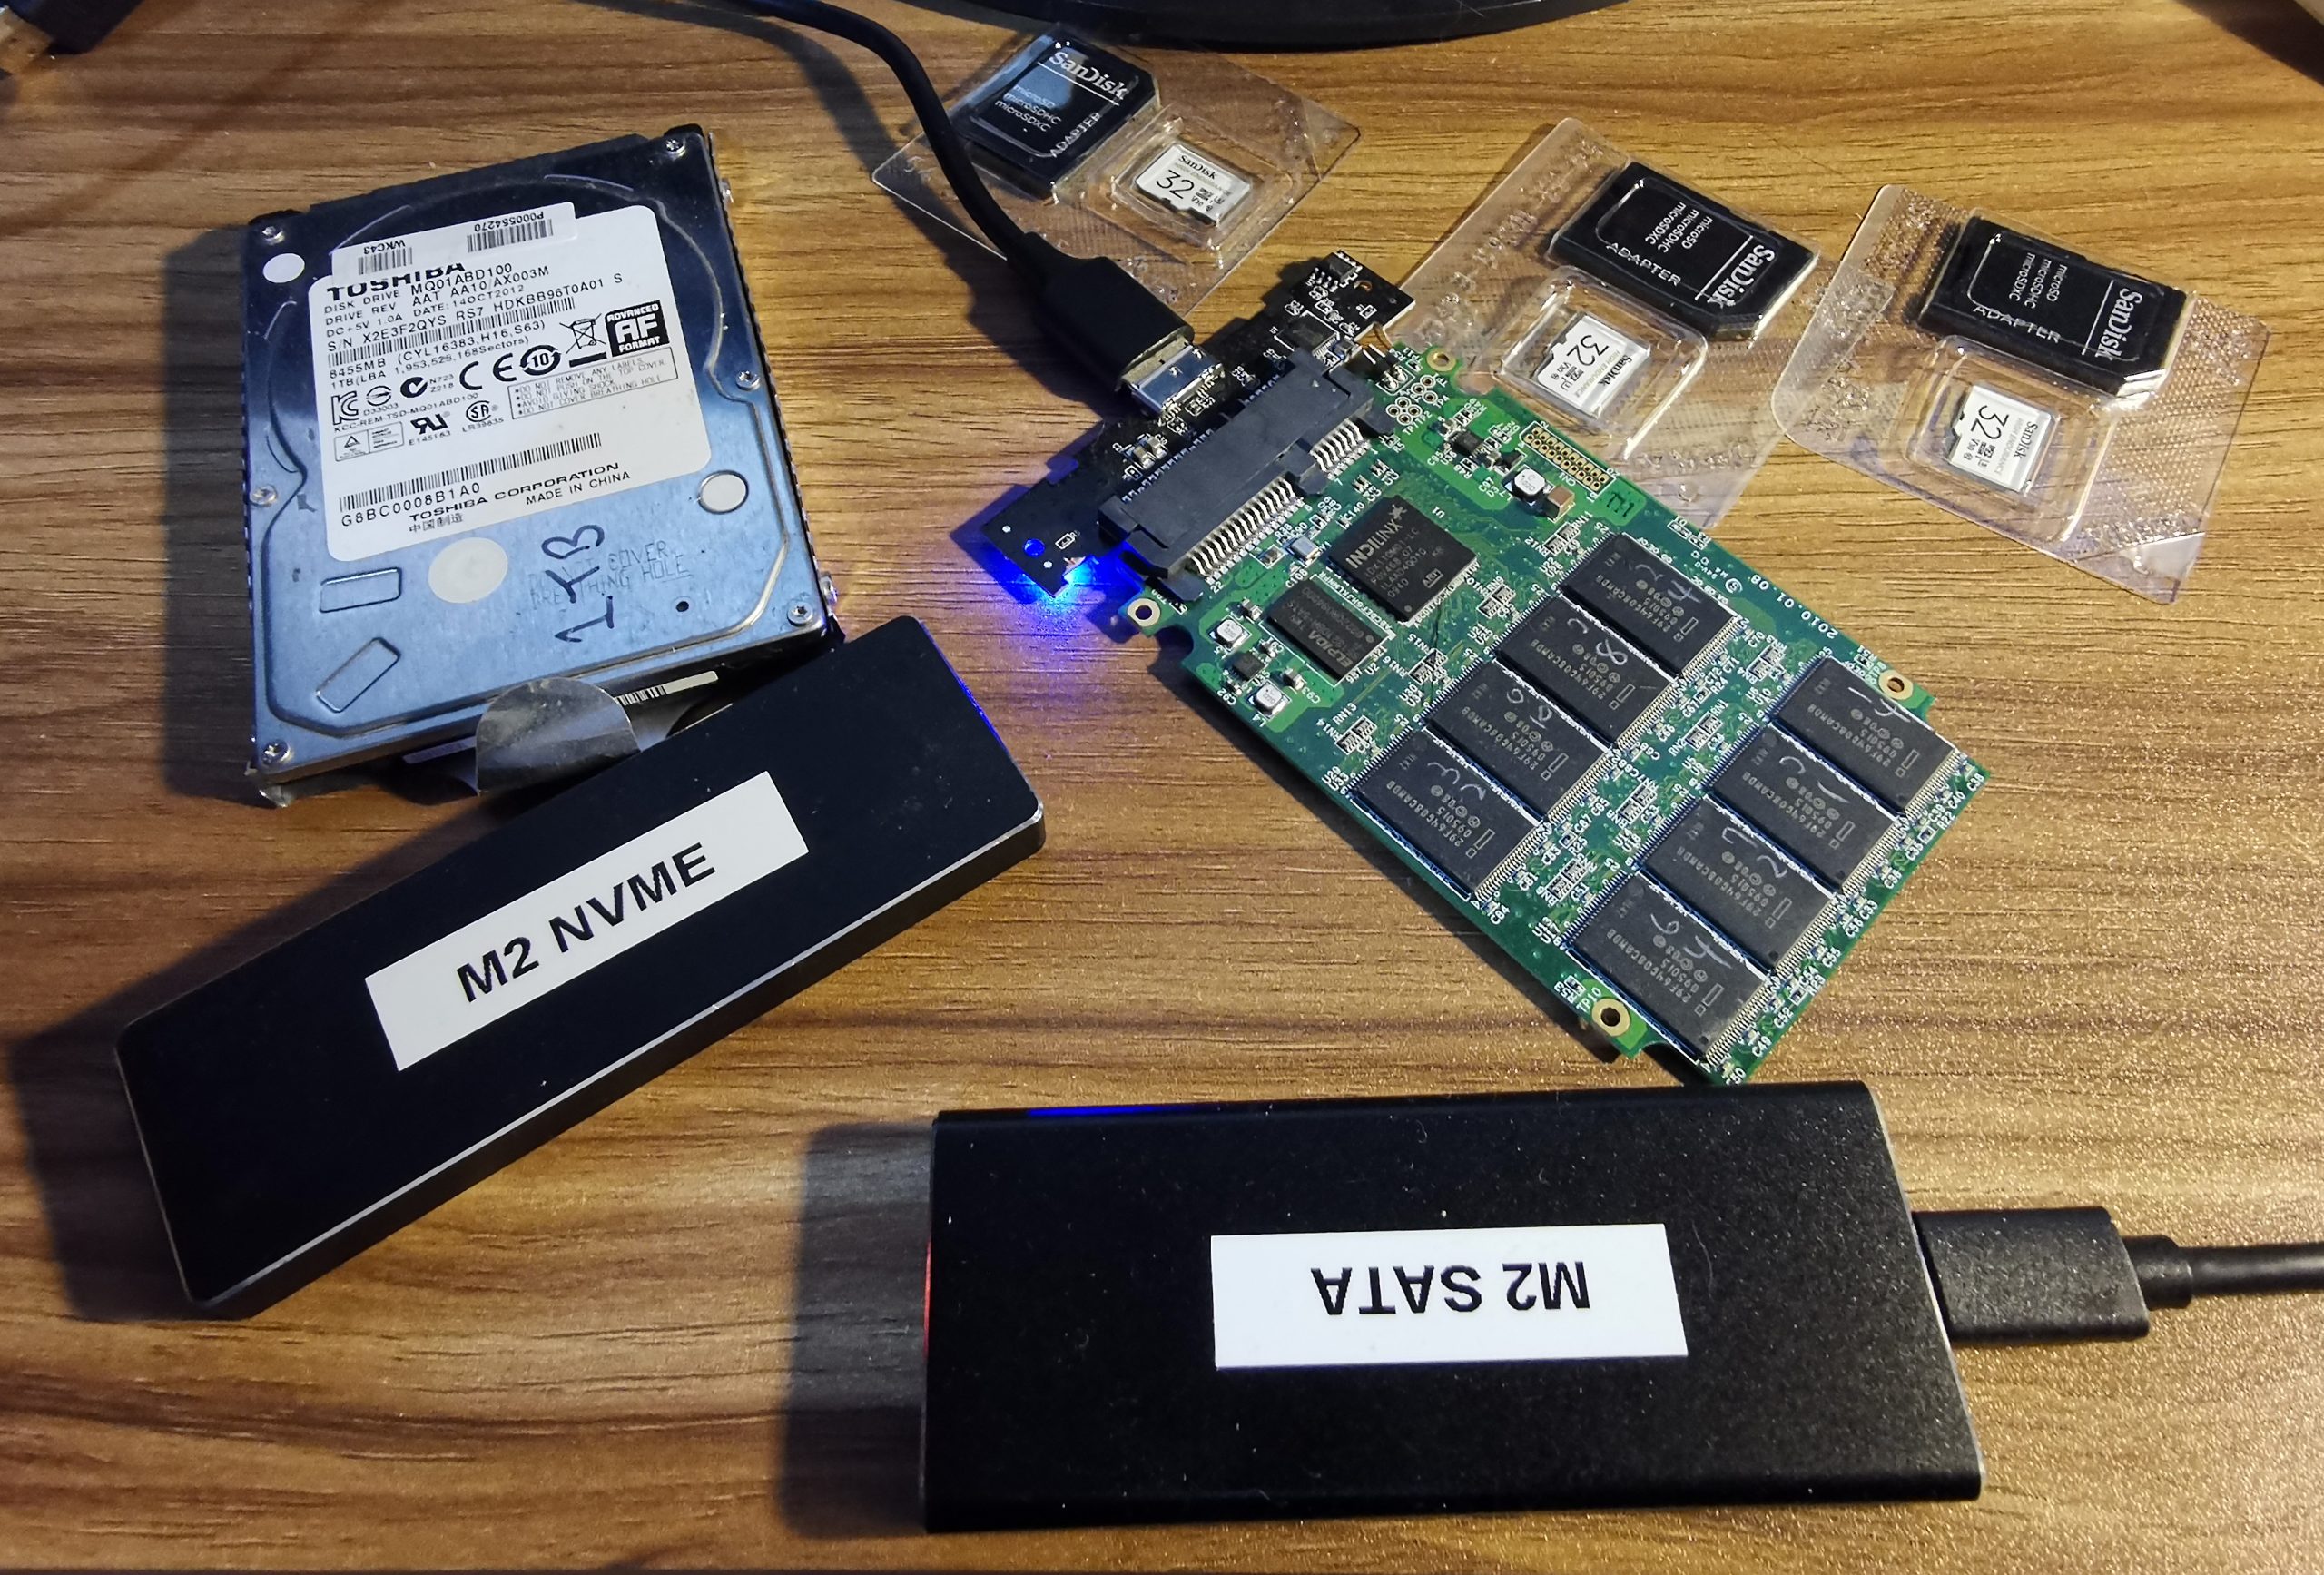
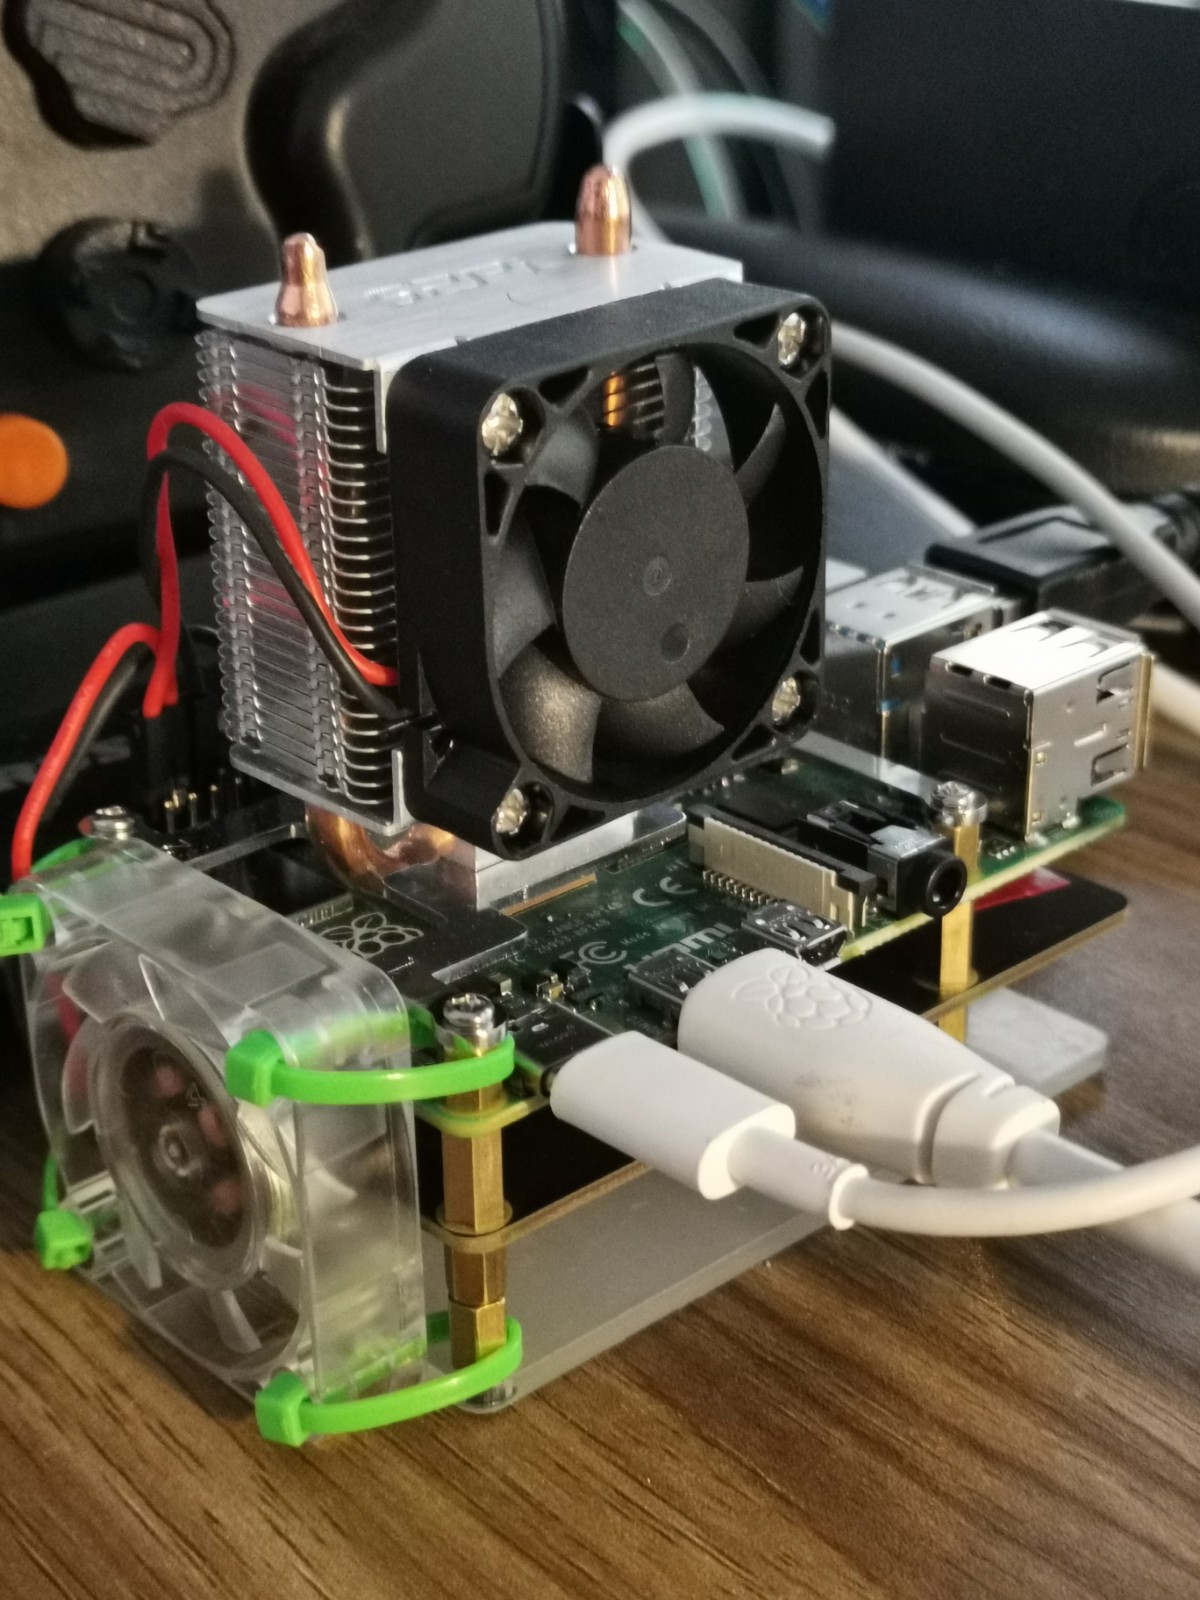
I decided to use a spare 250GB SATA based M.2 Solid State from my son’s PC in Geekworm X862 SATA M.21 Expansion board.

With this board I can bolt the M.2 Solid State Drive into a expansion board under the pi and Power it from the RaspBerry Pi USB Port.
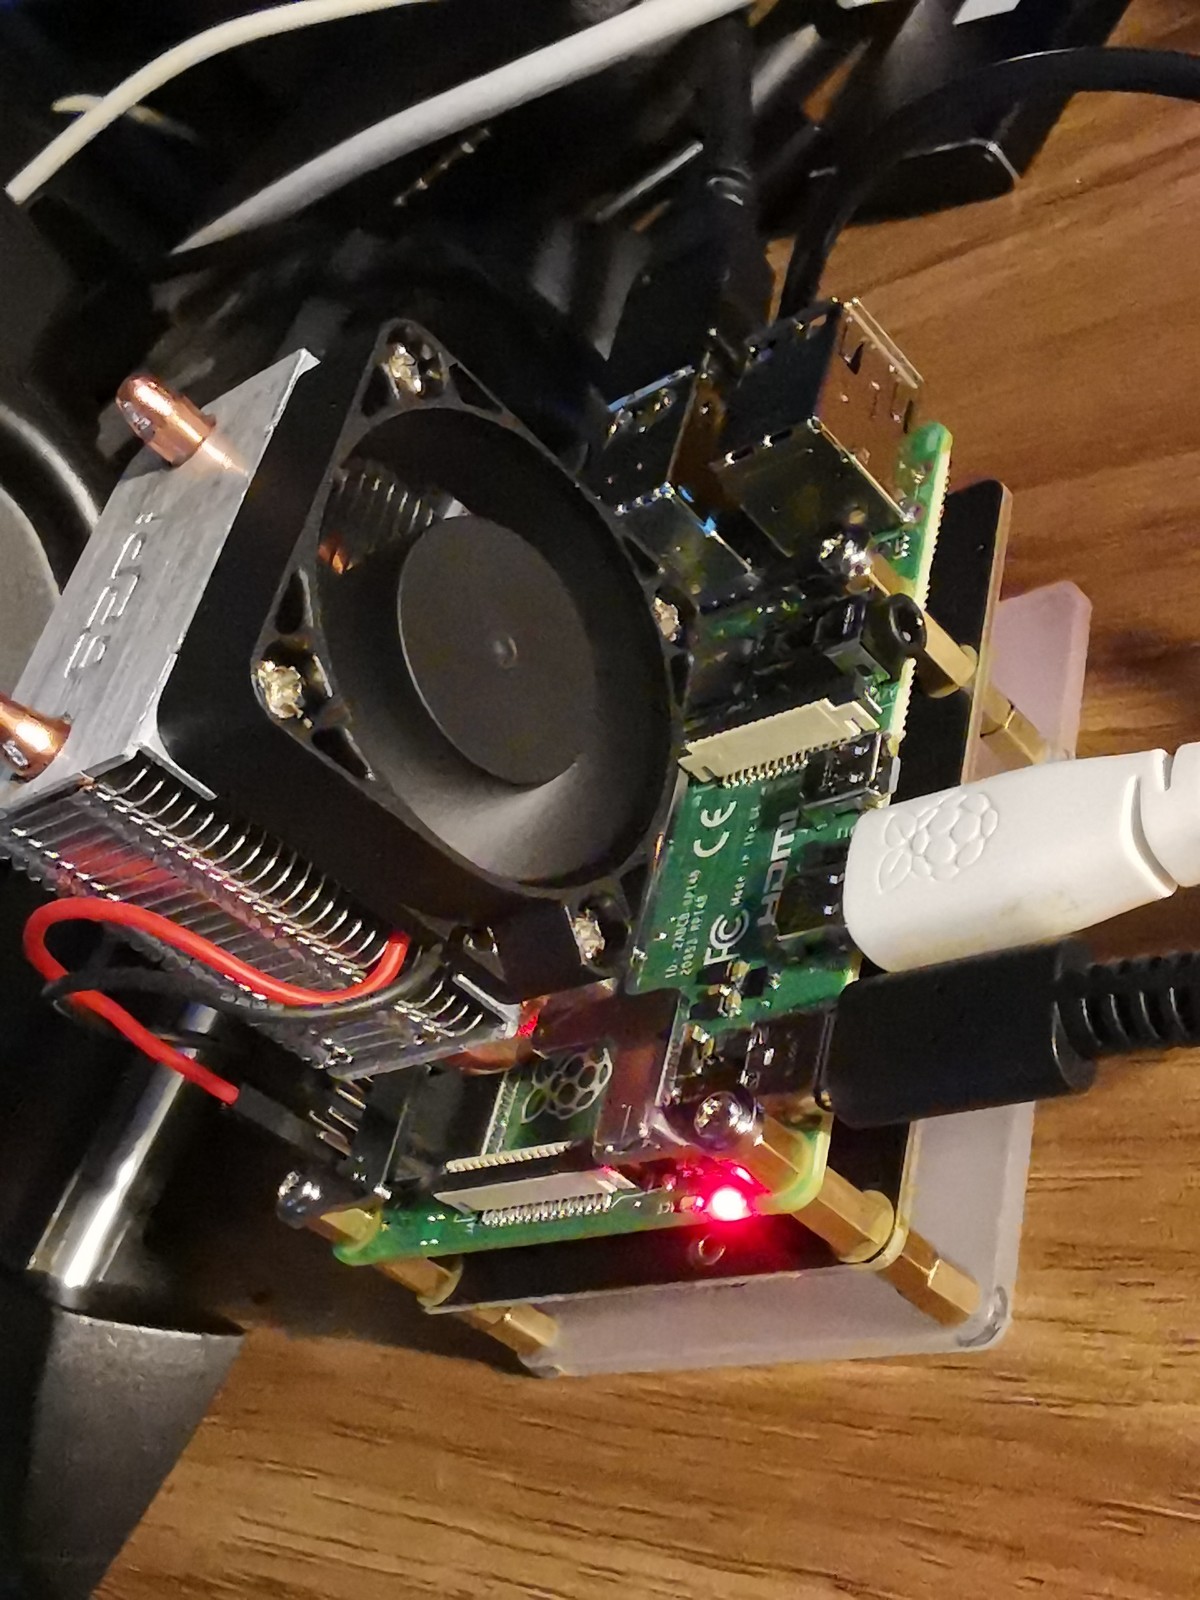
Nice and tidy
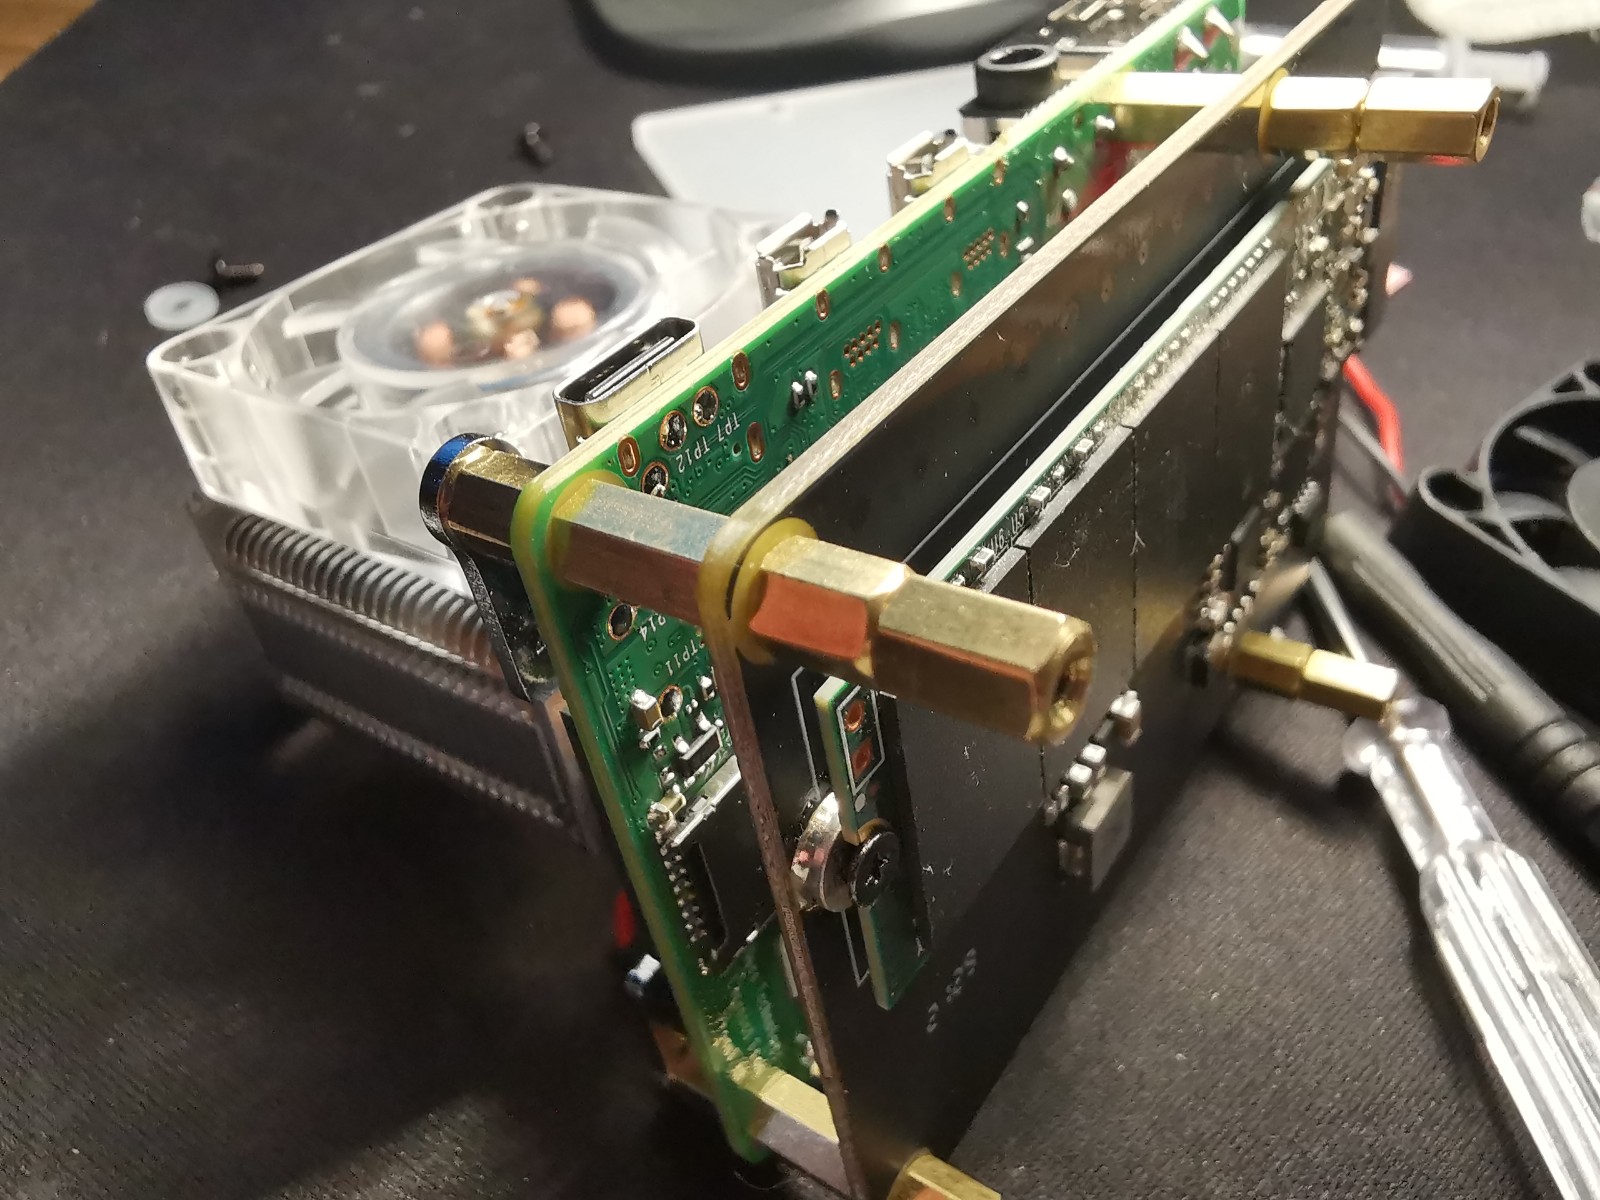
I zip-tied a fan to the side of the boards to add a little extra airflow over the solid state drive
32Bit, 64Bit, Linux or Windows
Before I begin I set up Raspbian on an empty Micro SD card (just to boot it up and flash the firmware to the latest version). This is very easy and documented elsewhere. I needed the latest firmware to ensure boort from USB Drive (not Micro SD card was working).
I ran rpi-update and flashed the latest firmware onto my Raspberry Pi. Good, write up here.
When my Raspberry Pi had the latest firmware I used the Raspberry Pi Imager to install the 32 Bit Raspberry Pi OS.
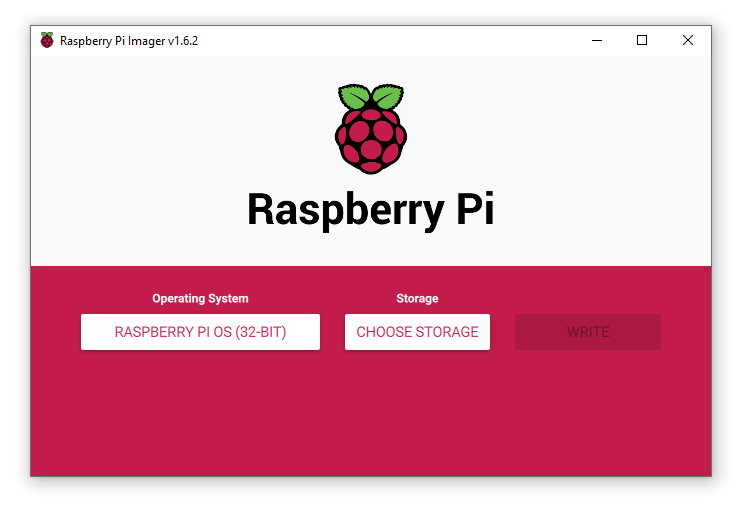
I do have a 8GB Raspberry Pi 4 B, 64Bit Operating Systems do exist but I stuck with 32 bit for compatibility.
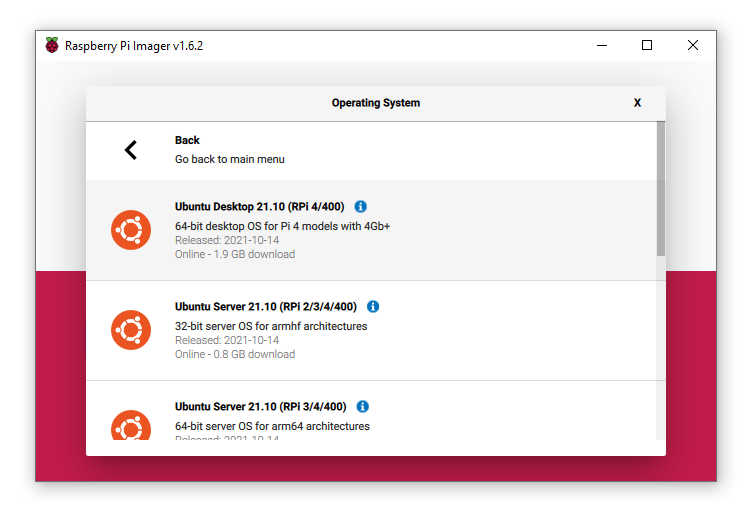
Ubuntu 64bit for Raspberry Pi Links
- Install Ubuntu on a Raspberry Pi | Ubuntu
- Server Setup Links
- Desktop Setup Links
Windows 10 for Raspberry Pi Links
https://docs.microsoft.com/en-us/windows/iot-core/tutorials/quickstarter/prototypeboards
https://docs.microsoft.com/en-us/answers/questions/492917/how-to-install-windows-10-iot-core-on-raspberry-pi.html
https://docs.microsoft.com/en-us/windows/iot/iot-enterprise/getting_started
Windows 11 for Raspberry Pi Links
https://www.youtube.com/user/leepspvideo
https://www.youtube.com/watch?v=WqFr56oohCE
https://www.worproject.ml
Setting up the Raspberry Pi Server
These are the steps I used to setup my Pi
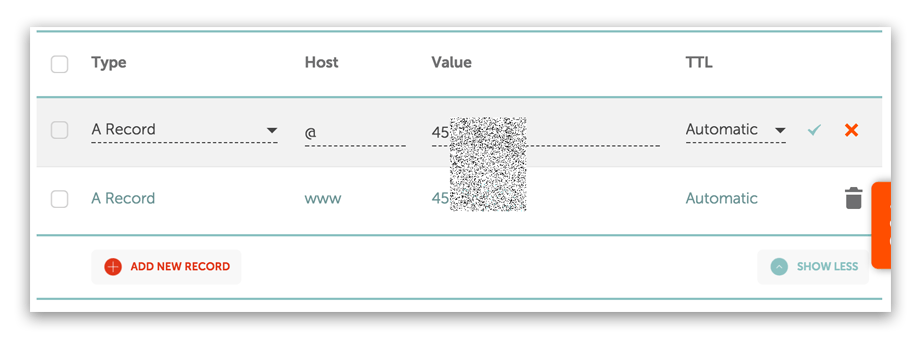
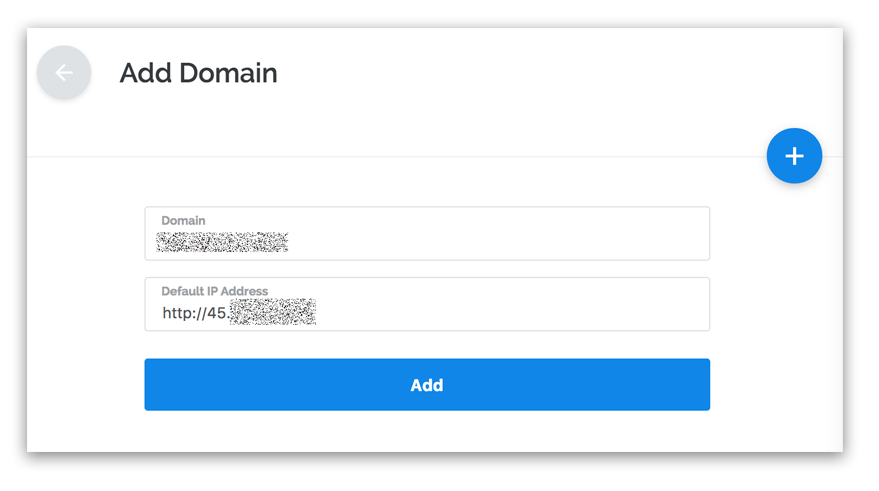
Dedicated IP
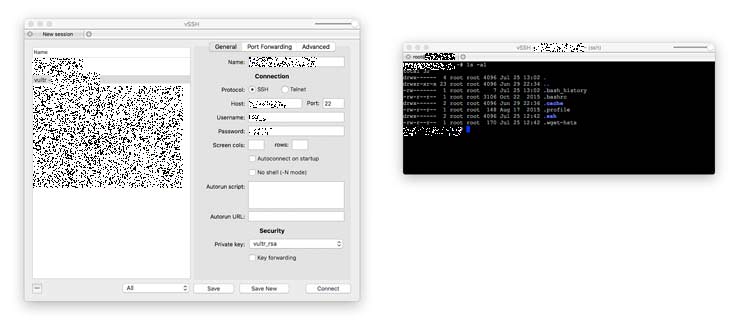
Before I began I ran ifconfig on my Pi to obtain my Raspberry Pi’s wireless cards mac address. I logged into my Router and setup a dedicated IP (192.168.0.50), this way I can have a IP address thta remains the same.
Hostname
I set my hostname here
sudo nano /etc/hosts
sudo nano /etc/hostname
I verified my hostname with this command
hostnameI verified my IP address with this command
hostname -ISamba Share
I setup the Samba service to allow me to copy files to and from the Pi
sudo apt-get install samba samba-common-bin
sudo apt-get update
I made a folder to share files
mkdir ~/shareI edited the Samba config file
sudo nano /etc/samba/smb.confIn the config file I set my workgroup settings
workgroup = Hyrule
wins support = yes
I defined a share at the bottom of the config file (and saved)
[PiShare]
comment=Raspberry Pi Share
path=/home/pi/share
browseable=Yes
writeable=Yes
only guest=no
create mask=0777
directory mask=0777
public=no
I set a smb password
sudo smbpasswd -a pi
New SMB password: ********
Retype new SMB password: ********
I tested the share froma Windows PC
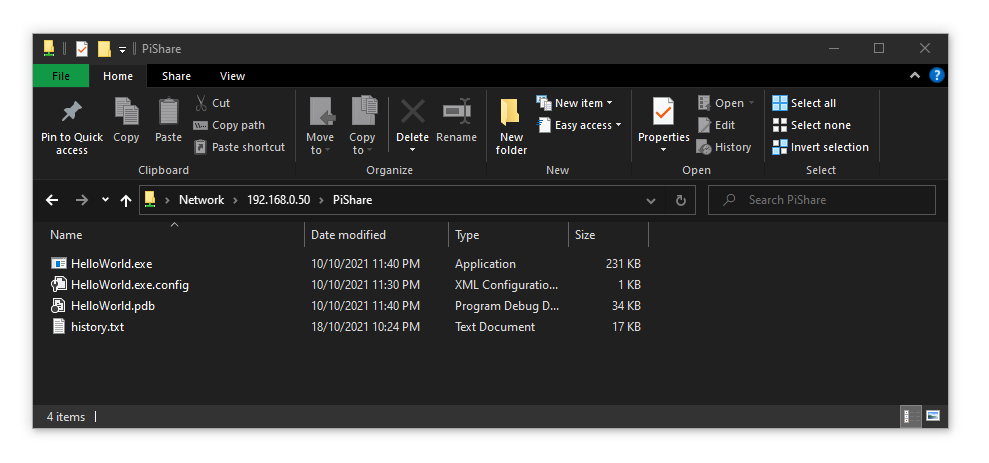
And the share is accessible on the Raspberry Pi
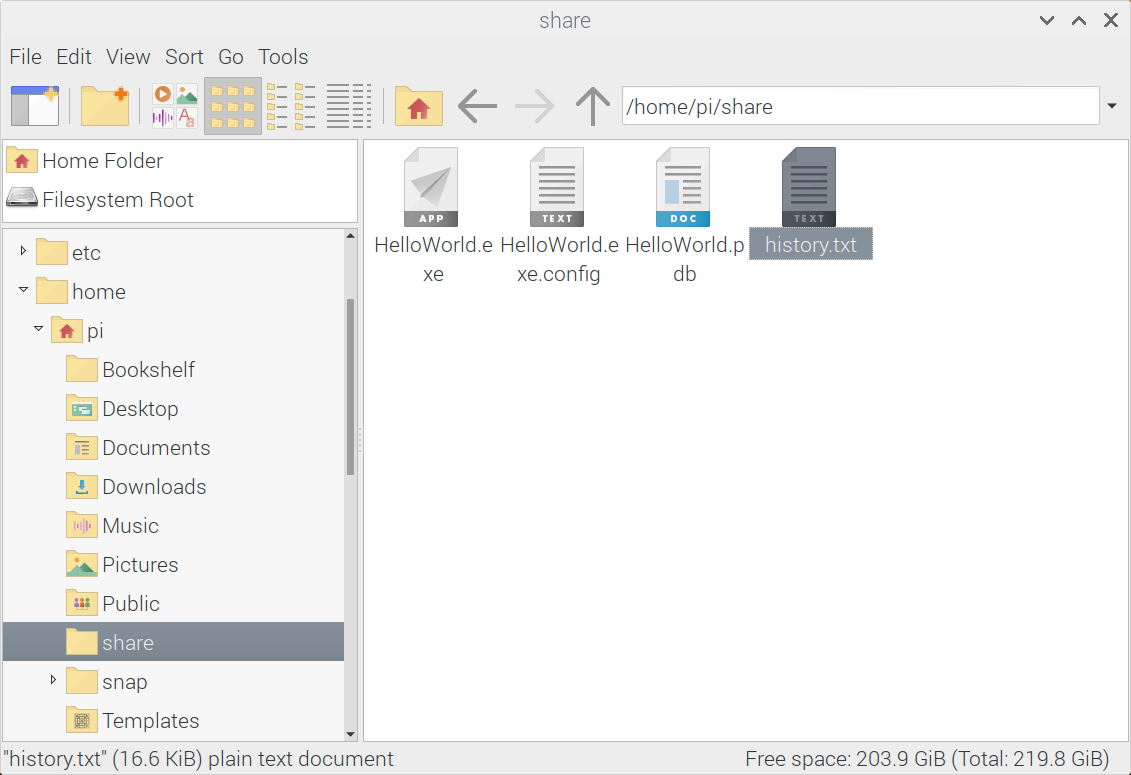
Great, now I can share files with drag and drop (instead of via SCP)
Mono
I know how to code C# Windows Executables, I have 25 years experince. I do nt want to learn Java or Python to code a GUI application for a touch screen if possible.
I setup Mono from Home | Mono (mono-project.com) to be anbe to run Windows C# EXE’s on Rasbian
sudo apt install apt-transport-https dirmngr gnupg ca-certificates
sudo apt-key adv --keyserver hkp://keyserver.ubuntu.com:80 --recv-keys 3FA7E0328081BFF6A14DA29AA6A19B38D3D831EF
echo "deb https://download.mono-project.com/repo/debian stable-raspbianbuster main" | sudo tee /etc/apt/sources.list.d/mono-official-stable.list
sudo apt update
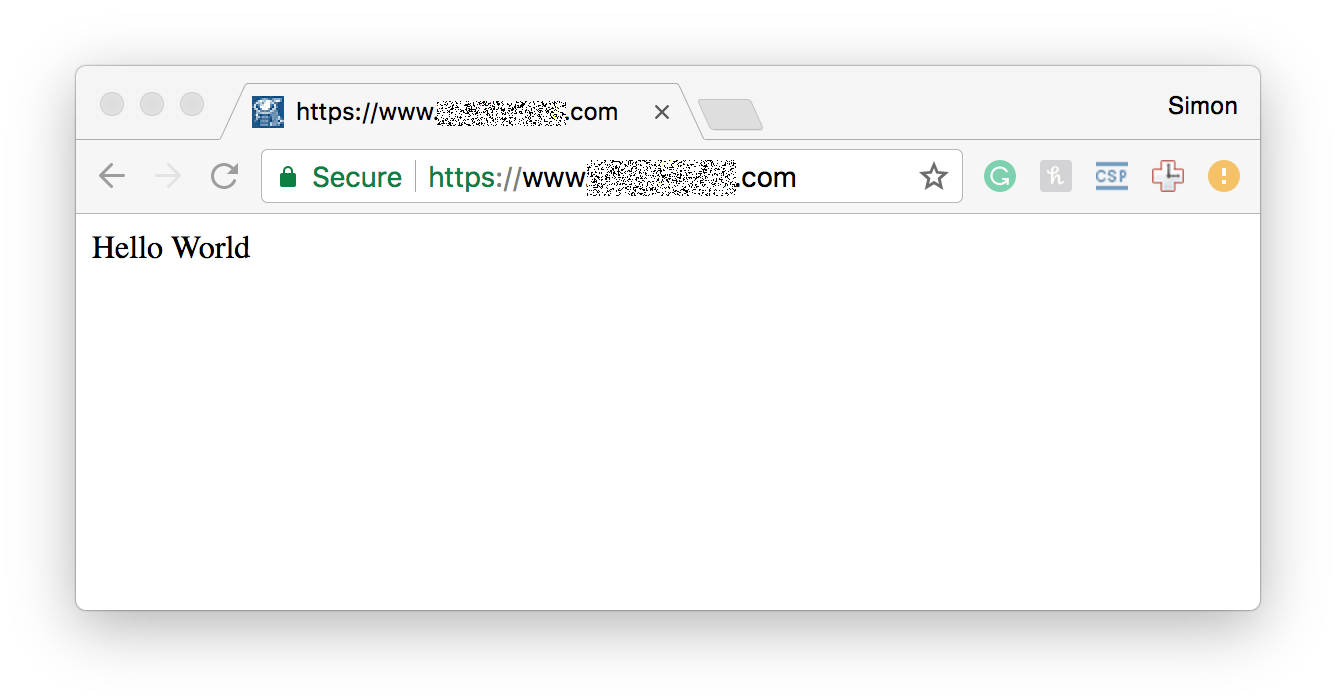
sudo apt install mono-develI copied an EXE I wrote in C# on Windows and ran it with Mono
sudo mono ~/HelloWorld.exe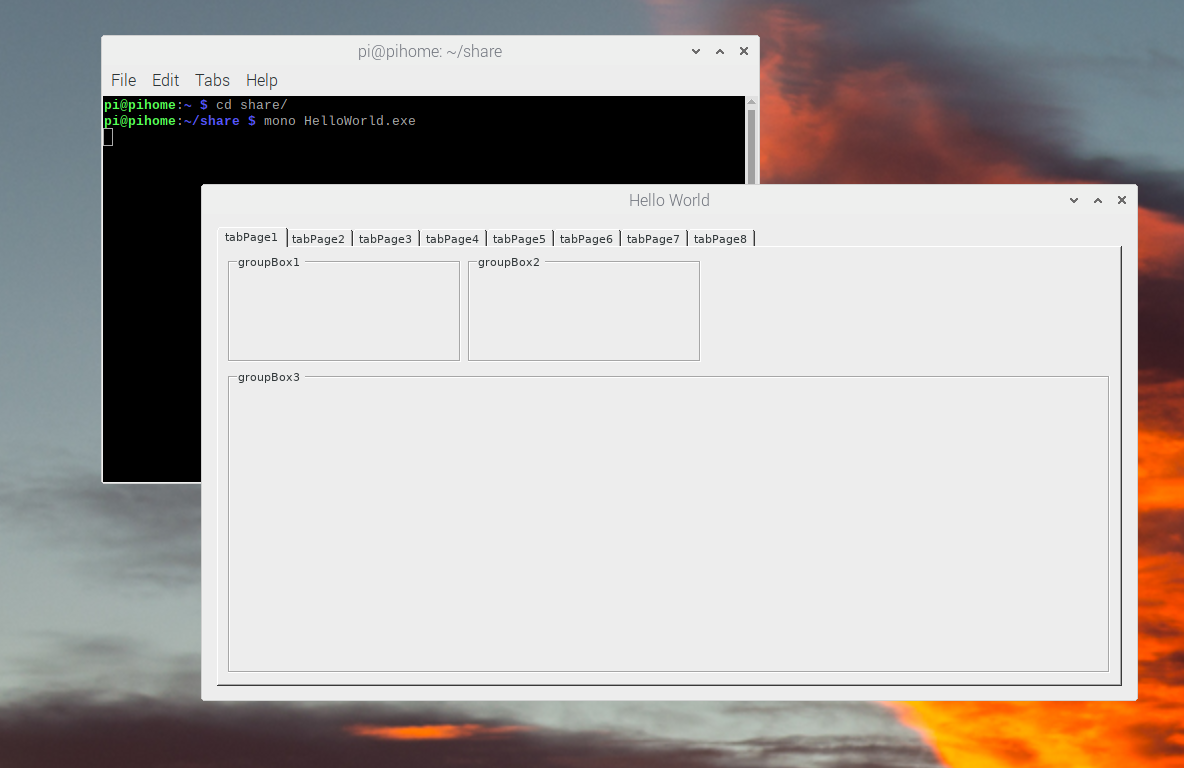
This worked.
Nginx Web Server
I Installed NginX and configured it
sudo apt-get install nginxI created a /www folder for nginx
sudo mkdir /wwwI created a place-holder file in the www root
sudo nano /wwww/index.htmlI set permissions to allow Nginx to access /www
sudo chown -R www-data:www-data /wwwI edited the NginX config as required
sudo nano /etc/nginx/sites-enabled/default
sudo nano /etc/nginx/nginx.conf
I tested and reloaded the nginx config
sudo nginx -t
sudo nginx -s reload
sudo systemctl start nginx
I started NginX
sudo systemctl start nginxI tested nginx in a web browser
NodeJS/NPM
I installed NodeJS
sudo apt update
sudo apt install nodejs npm -y
I verified Node was installed
nodejs --version
> v12.22.5
PHP
I installed PHP
sudo wget -O /etc/apt/trusted.gpg.d/php.gpg https://packages.sury.org/php/apt.gpg
echo "deb https://packages.sury.org/php/ $(lsb_release -sc) main" | sudo tee /etc/apt/sources.list.d/php.list
sudo apt update
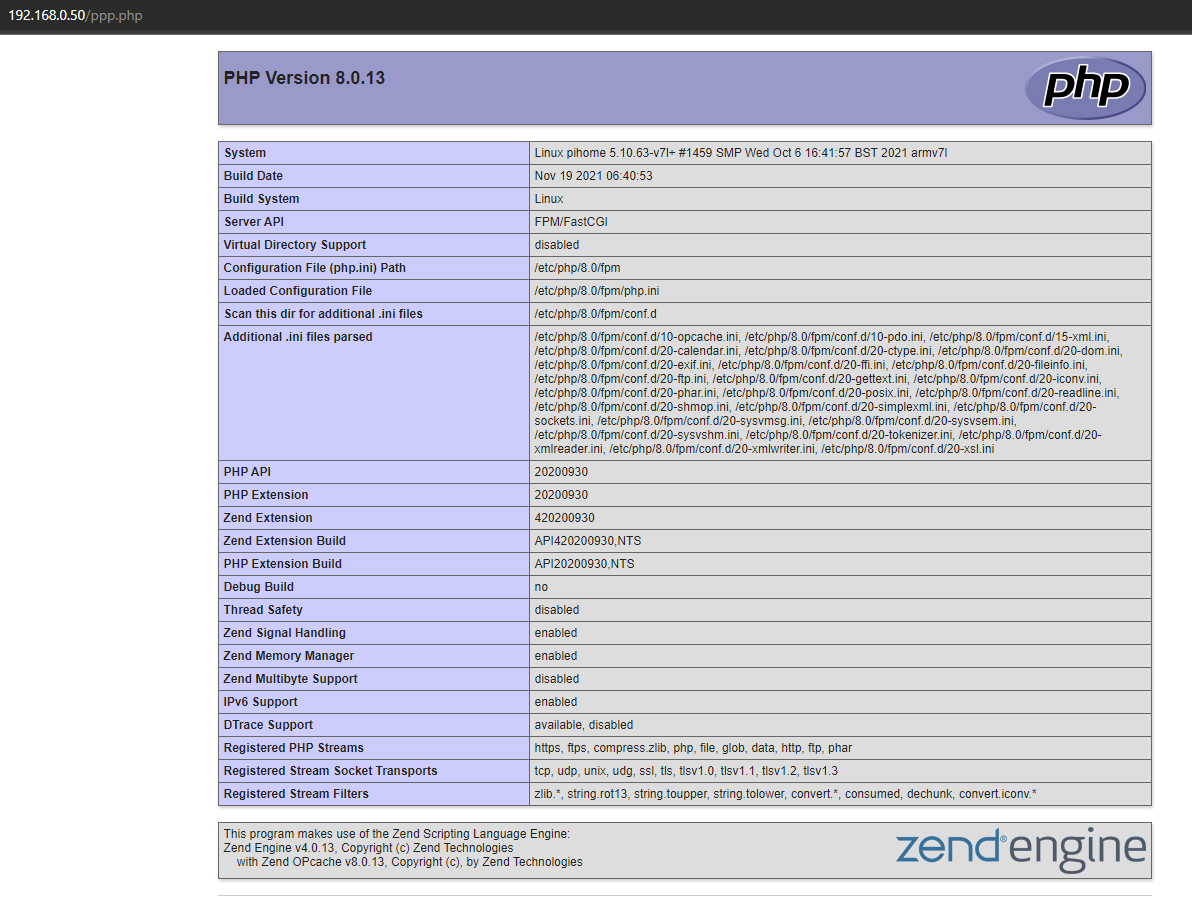
sudo apt install -y php8.0-common php8.0-cli php8.0-xmlI verified PHP with this command
php --version

> PHP 8.0.13 (cli) (built: Nov 19 2021 06:40:53) ( NTS )
Copyright (c) The PHP Group
Zend Engine v4.0.13, Copyright (c) Zend Technologies
    with Zend OPcache v8.0.13, Copyright (c), by Zend Technologies
I installed PHP-FPM
sudo apt-get install php8.0-fpmI verified the PHP FPM sock was available before adding it to the NGINX Config
sudo ls /var/run/php*/**.sock
> /var/run/php/php8.0-fpm.sock  /var/run/php/php-fpm.sock
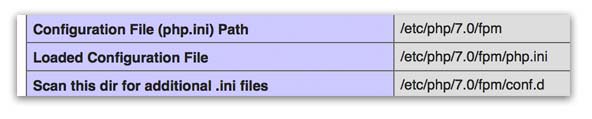
I reviewed PHP Settings
sudo nano /etc/php/8.0/cli/php.ini
sudo nano /etc/php/8.0/fpm/php.ini
I created a /www/ppp.php file with this contents
<?php
  phpinfo(); // all info
  // module info, phpinfo(8) identical
  phpinfo(INFO_MODULES);
?>
PHP is working
I changed these php.ini settings (fine for local development).
max_input_vars = 1000
memory_limit = 1024M
max_file_uploads = 20M
post_max_size = 20M
display_errors = on
MySQL Database
I installed MariaDB
sudo apt install mariadb-serverI updated my pi password
passwdI ran the Secure MariaDB Program
sudo mysql_secure_installationAfter setting each setting I want to run mysql as root to test mysql
PHPMyAdmin
I installed phpmyadmin to be able to edit mysql databases via the web
I followed this guide to setup phpmyadmin via lighthttp and then via nginx
I then logged into MySQL, set user permissions, create a test database and changes settings as required.
NginX to NodeJS API Proxy
I edited my NginX config to create a NodeAPI Proxy
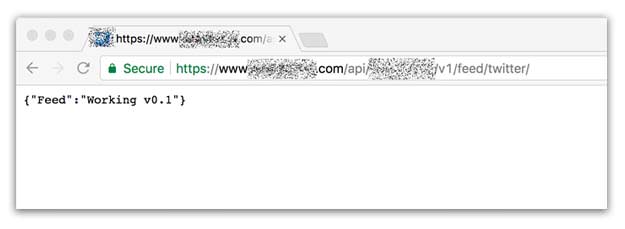
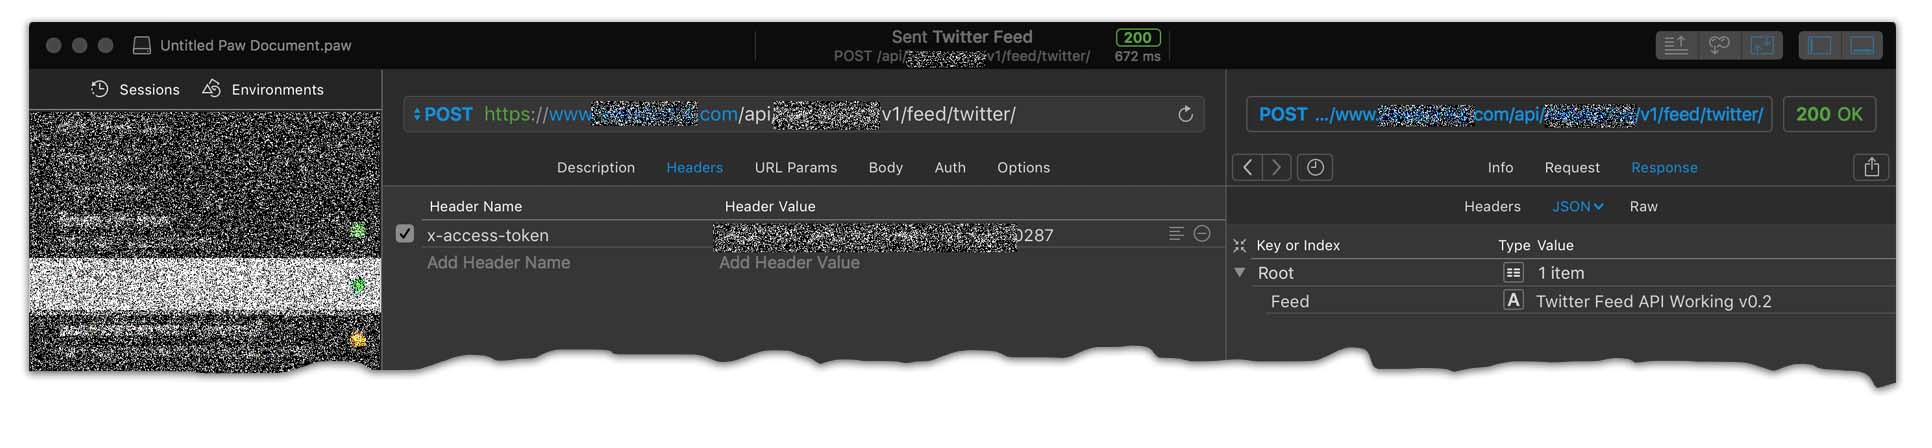
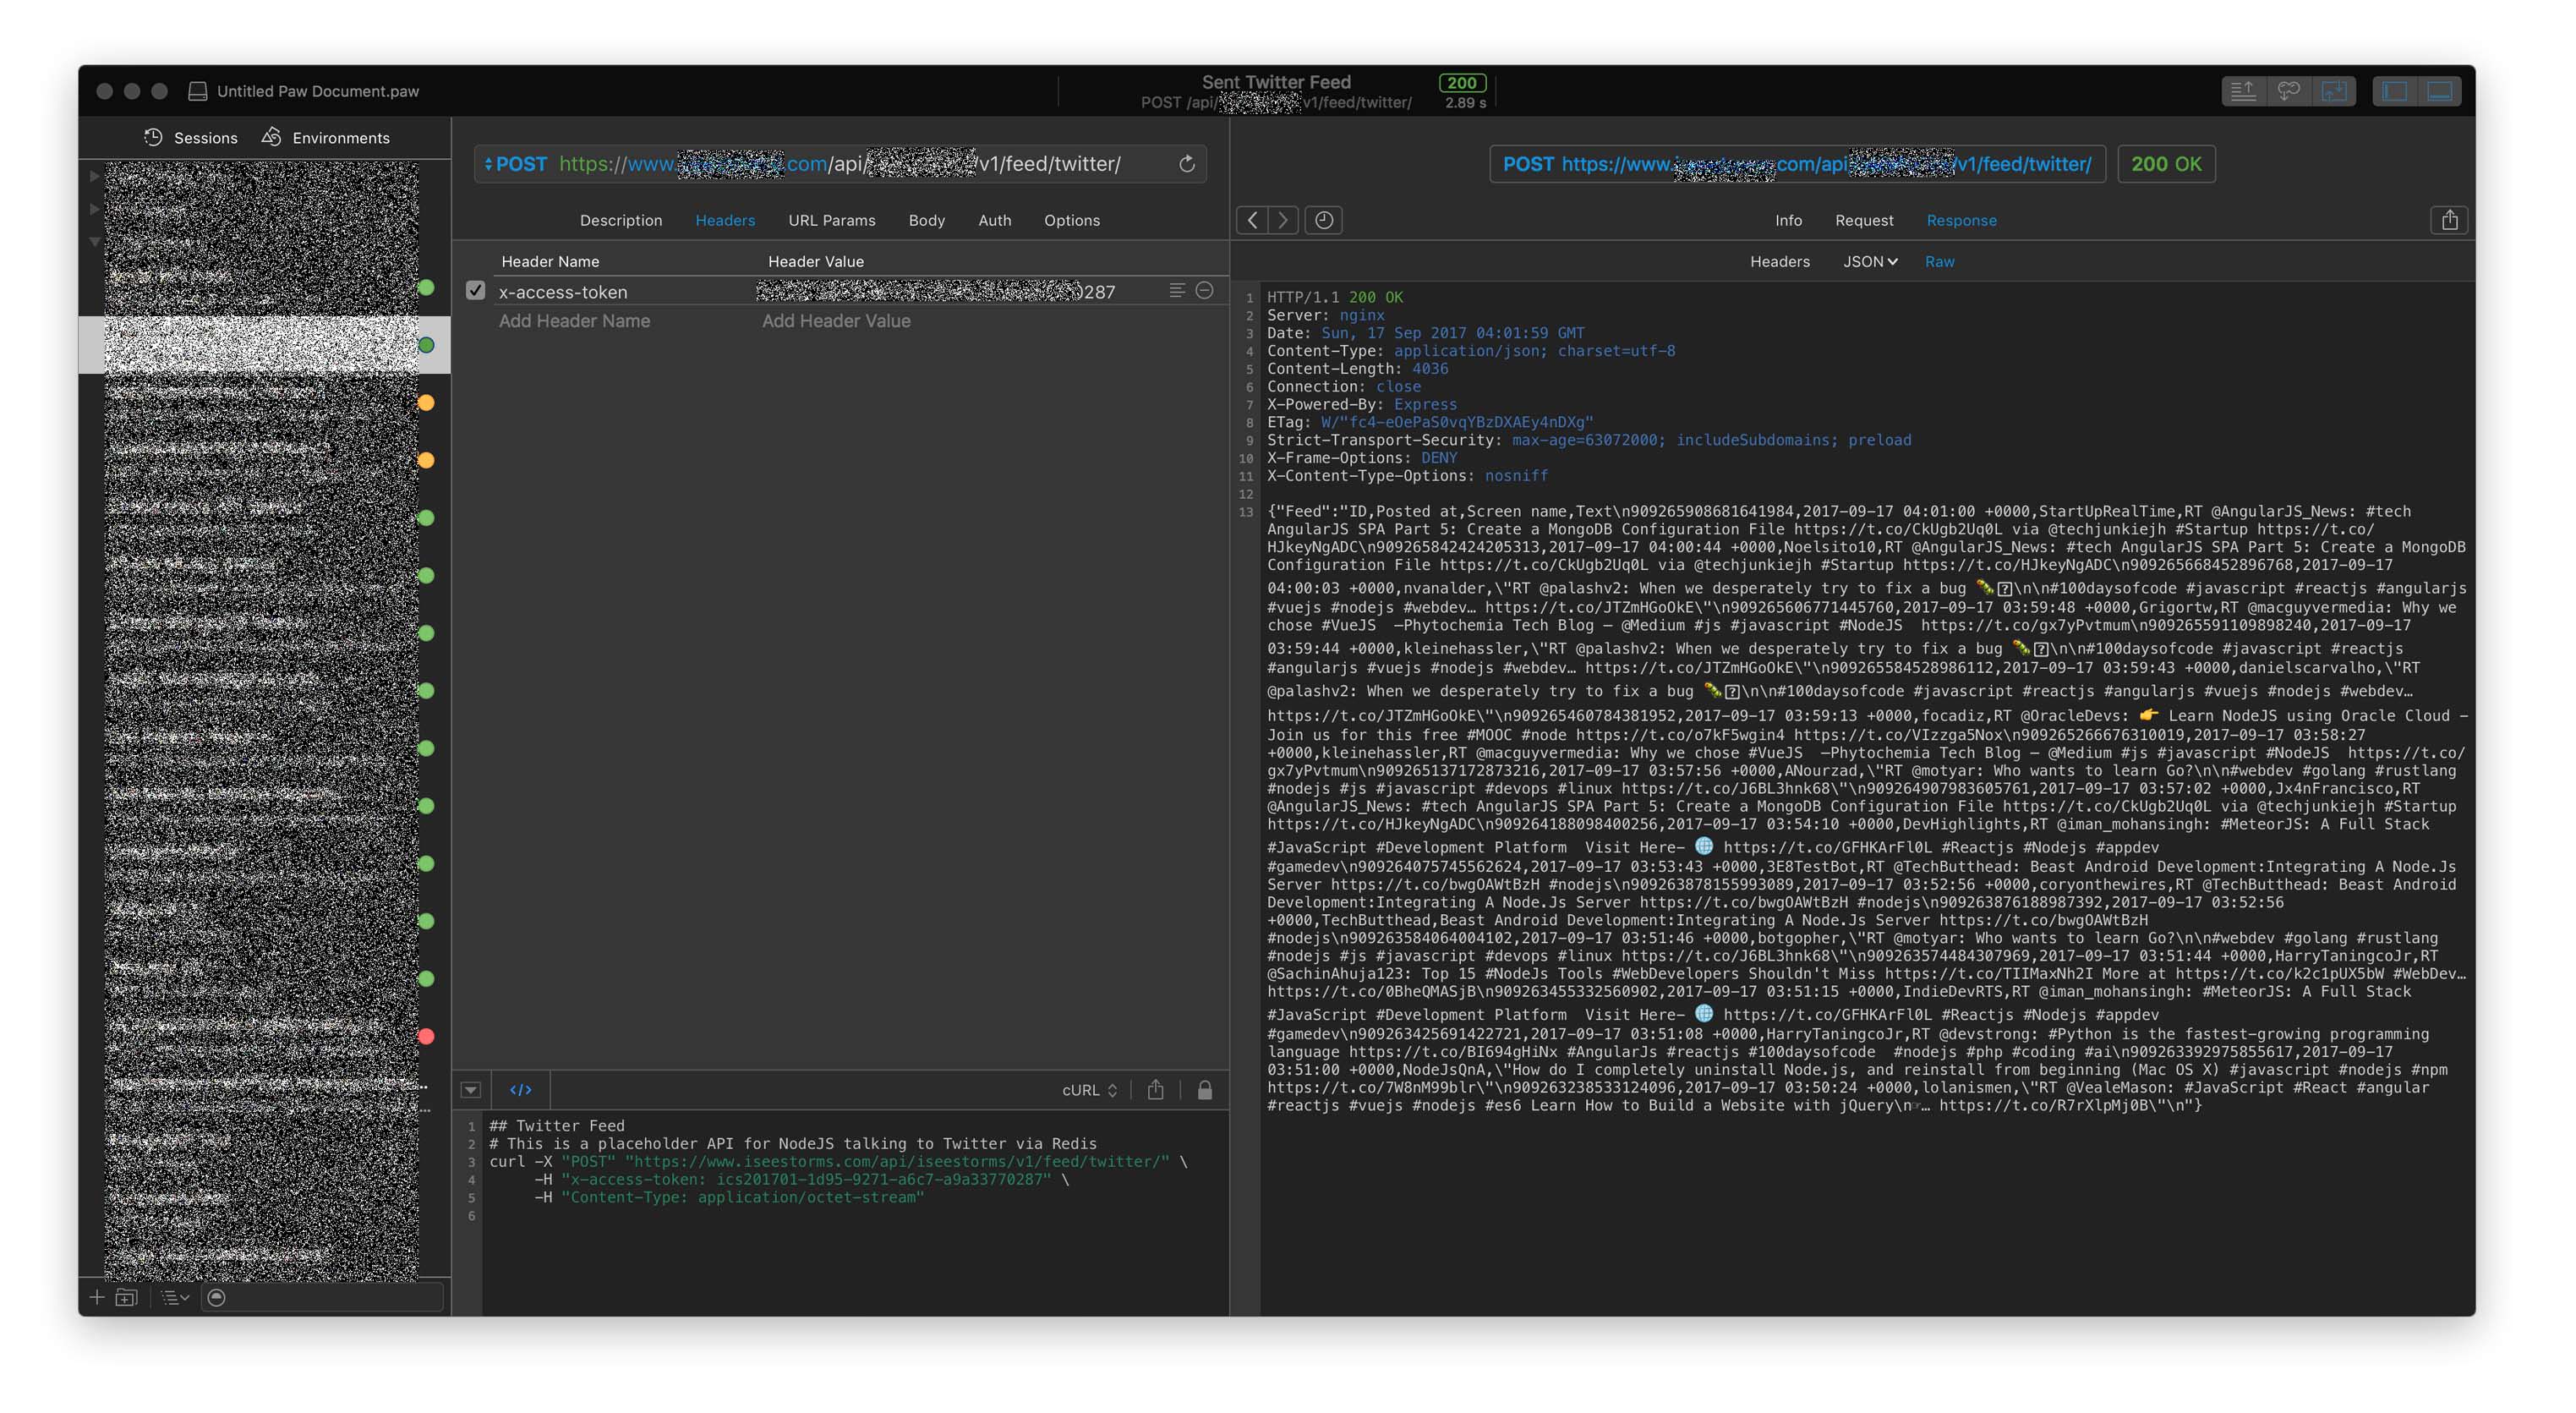
Test Webpage/API
Todo
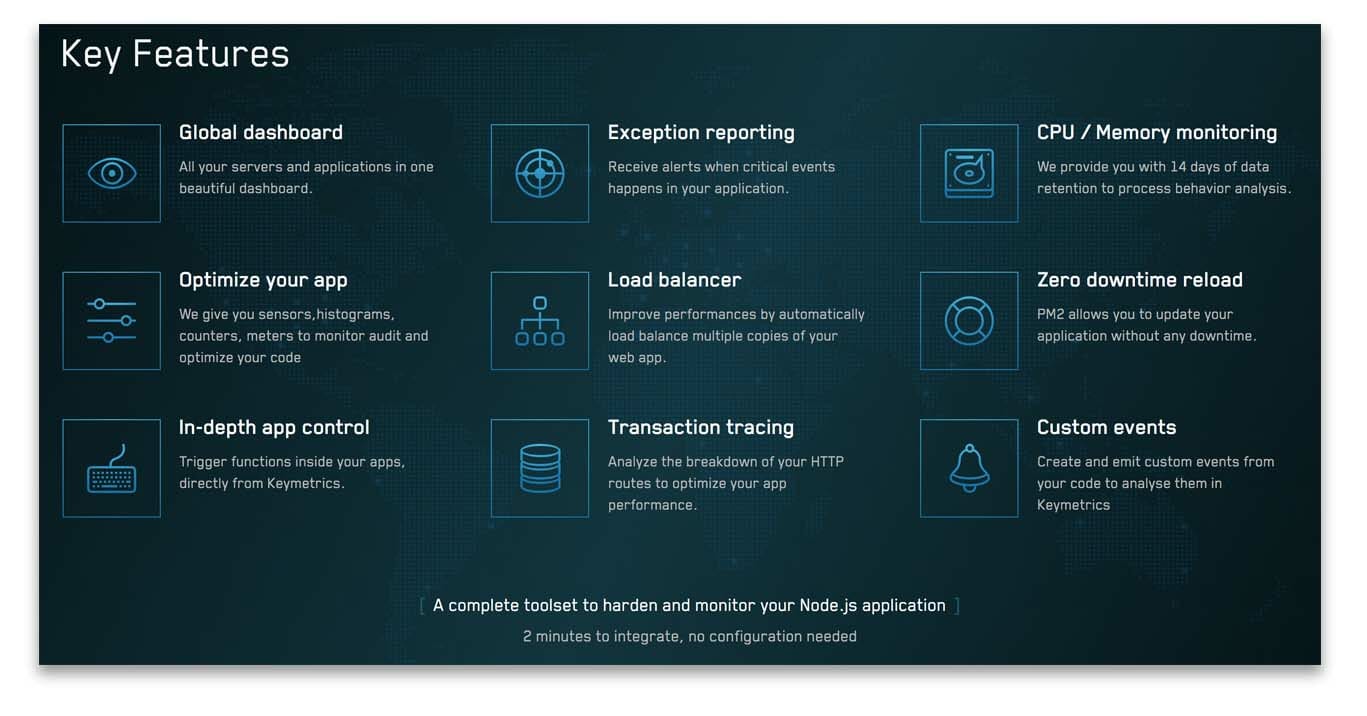
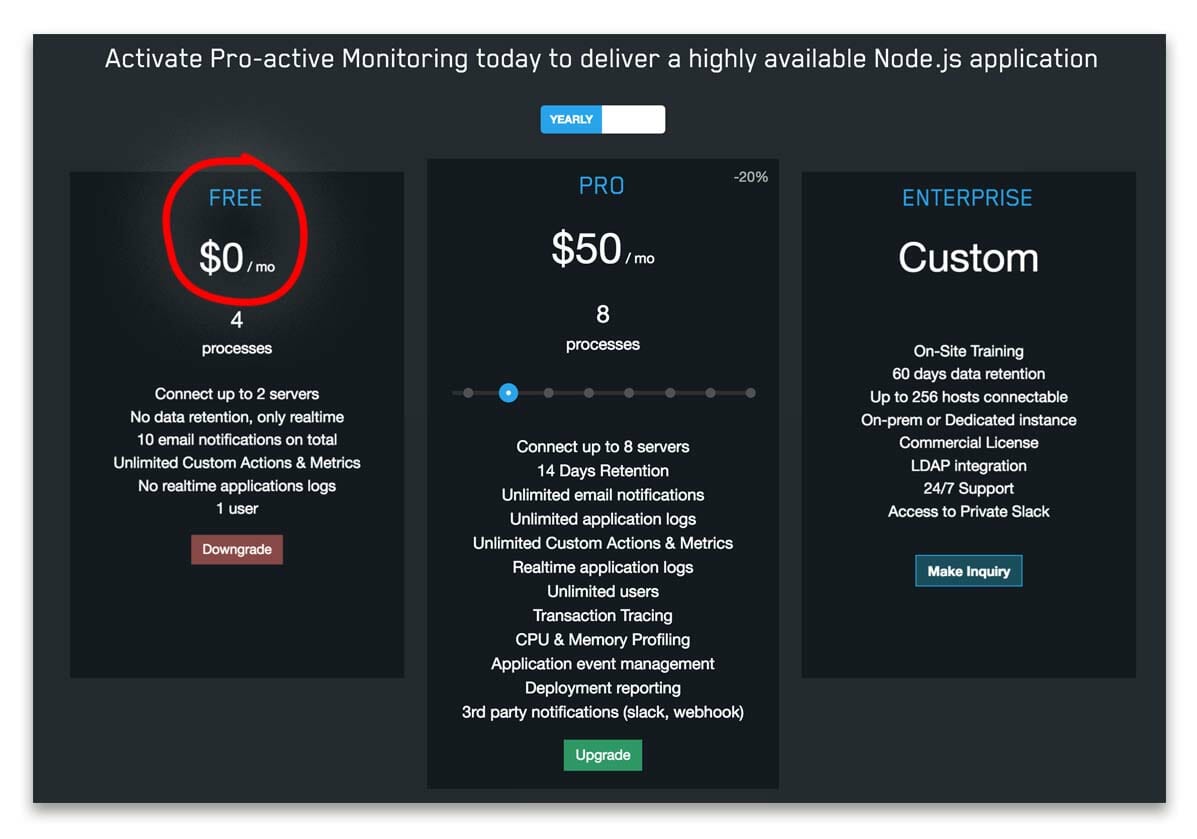
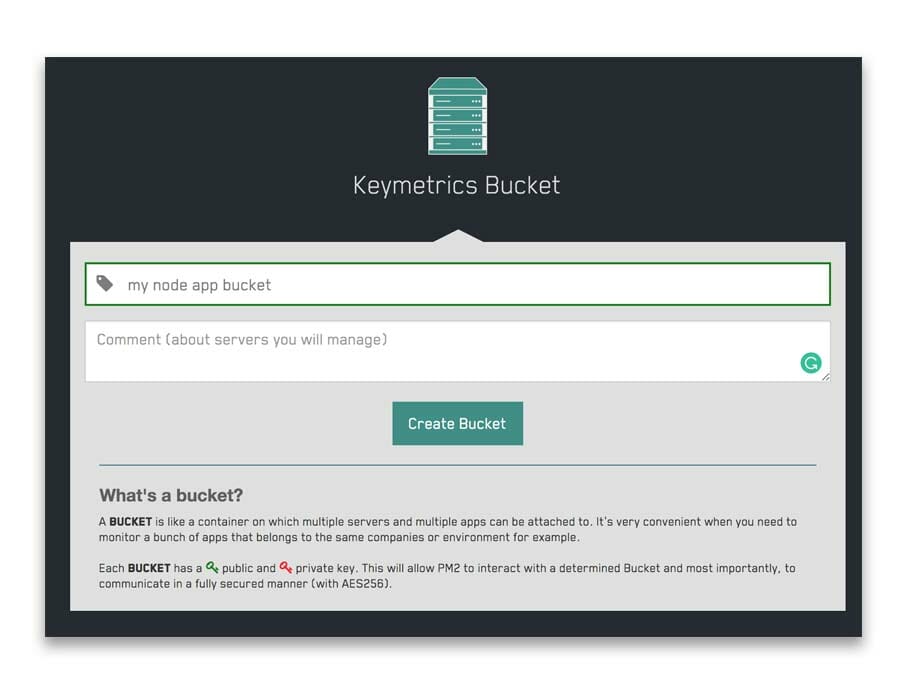
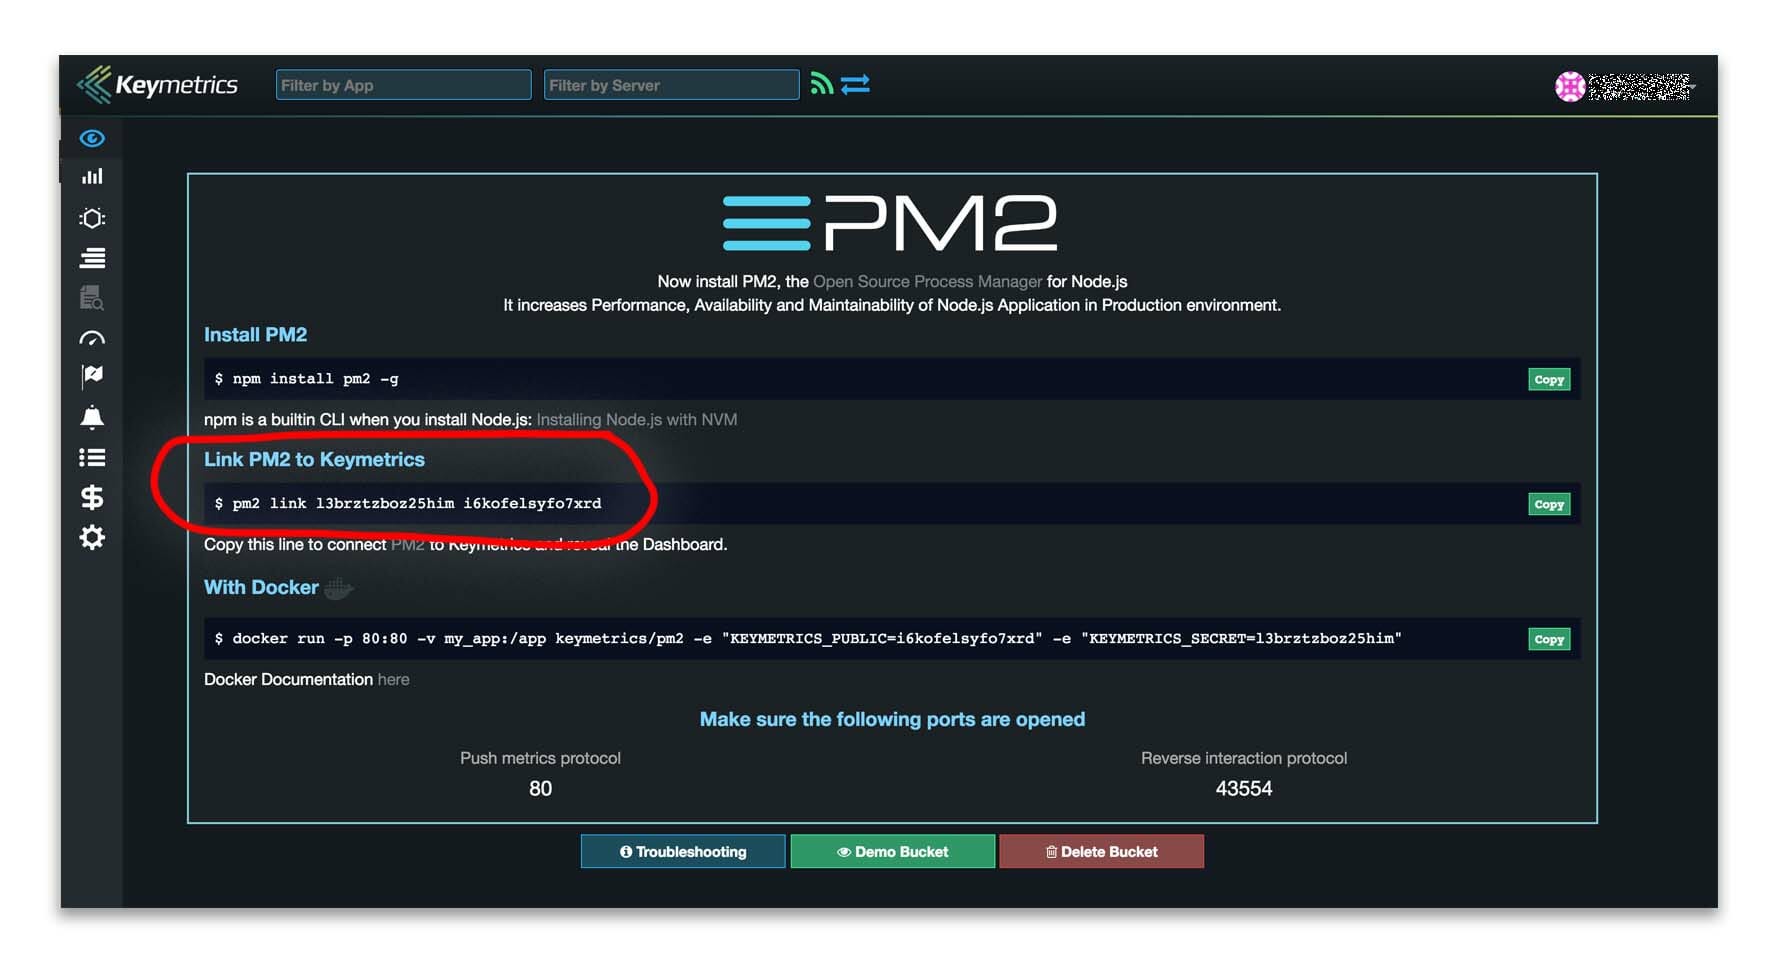
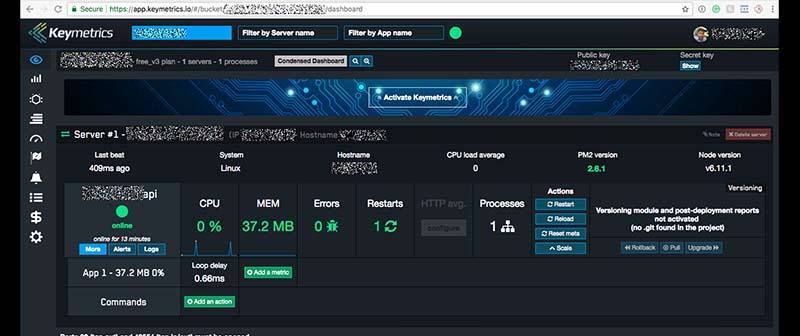
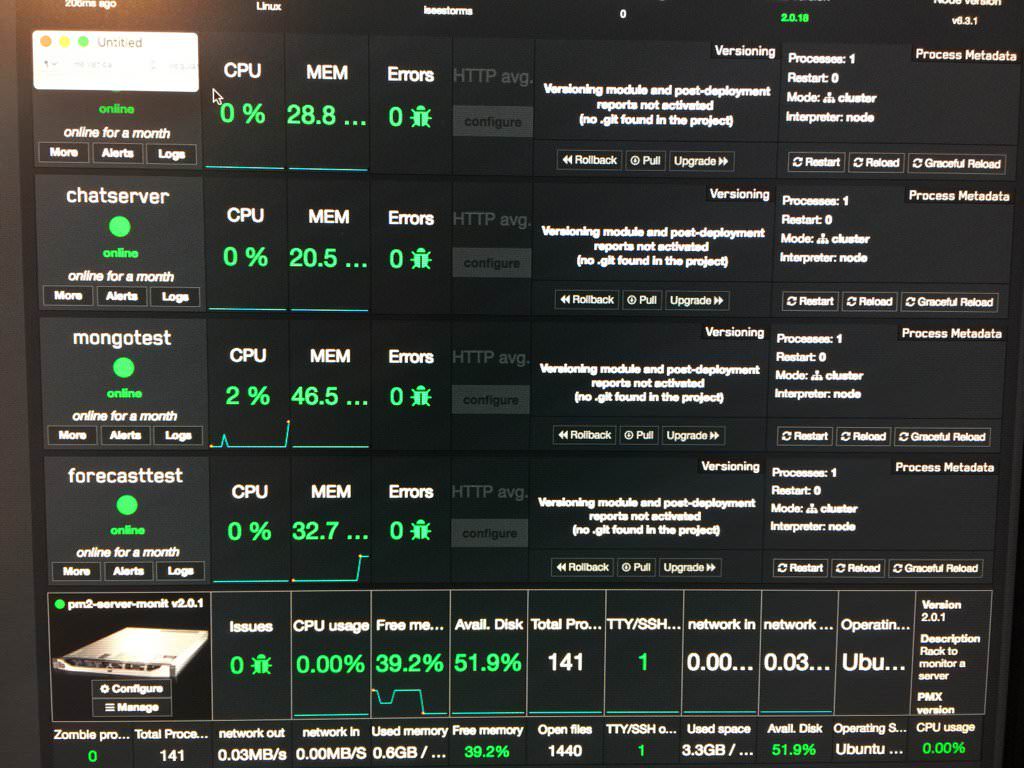
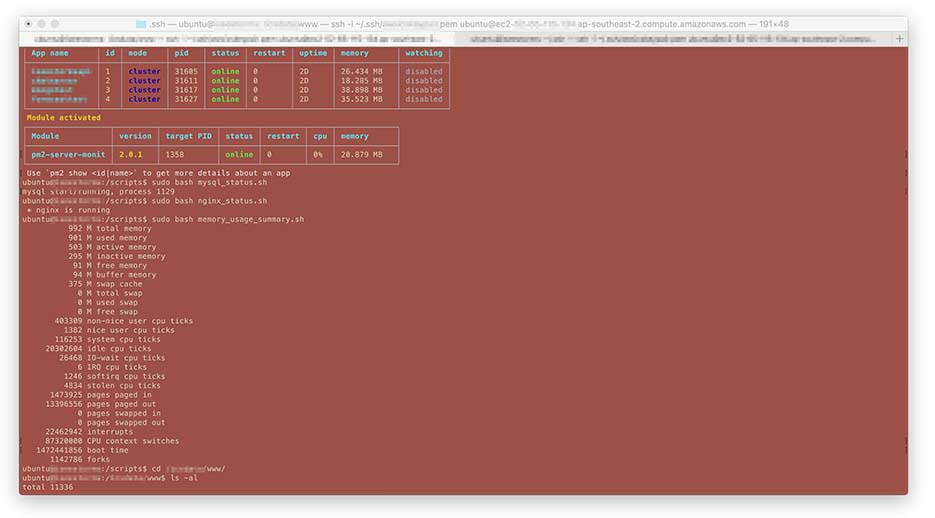
I installed PM2 the NodeJS agent software
sudo npm install -g pm2 Node apps can be started as a service from cli
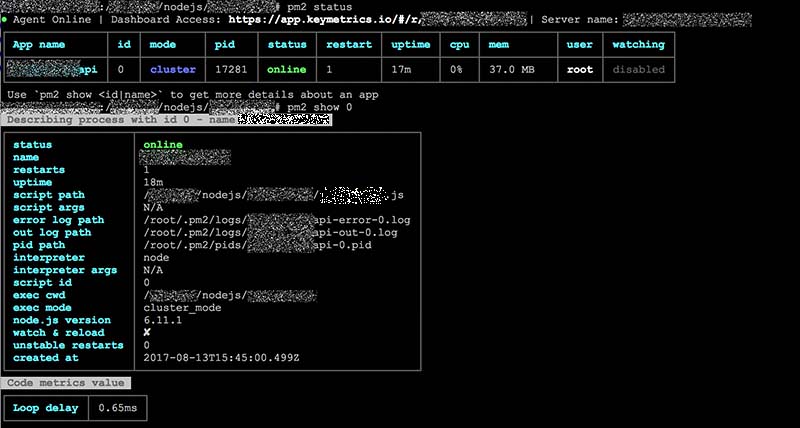
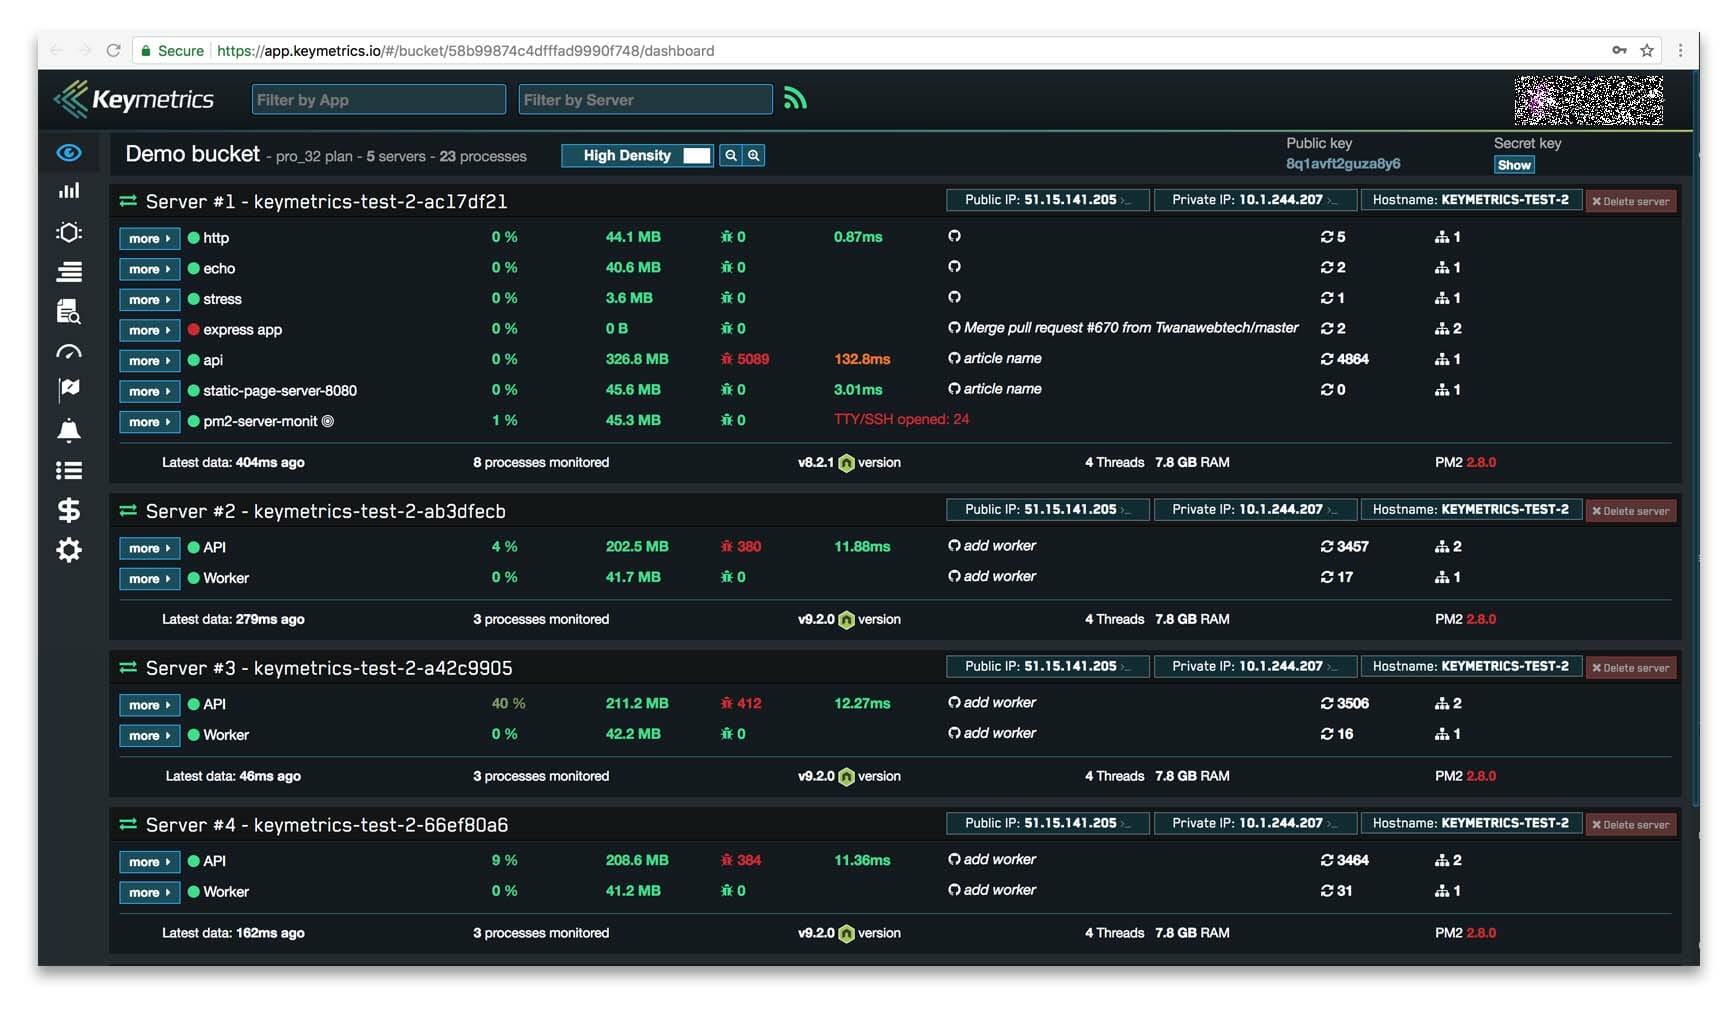
pm2 start api_v1.jsPM2 status
pm2 statusYou can delete node apps from PM2 (if desired)
pm2 delete api_v1.jsSending Email from CLI
I setup send email to allow emails to be sent from the cli with these commands
sudo apt-get install libio-socket-ssl-perl libnet-ssleay-perl sendemail I logged into my GSuite account and setup an alias and app password to use.
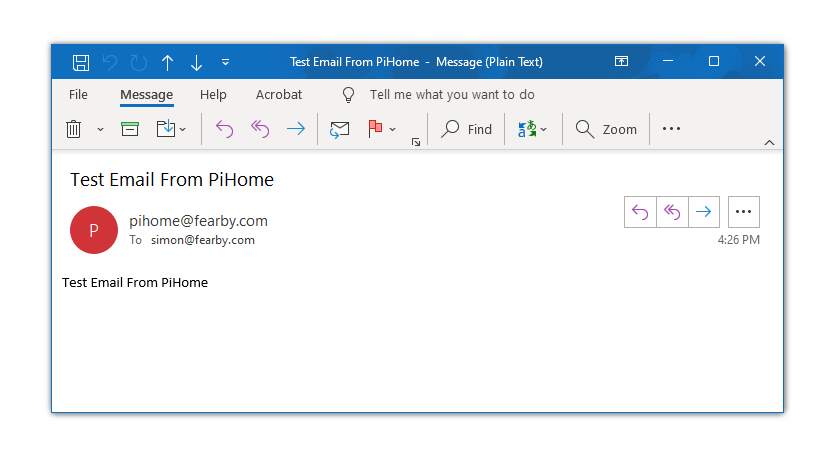
Now I can send emails from the CLI
sudo sendemail -f [email protected] -t [email protected] -u "Test Email From PiHome" -m "Test Email From PiHome" -s smtp.gmail.com:587 -o tls=yes -xu [email protected] -xp **************I added this to a Bash script (“/Scripts/Up.sh”) and added an event to send an email every 6 hours
7 Inch Full View LCD IPS Touch Screen 1024*600
I purchased a 7″ Touch screen from Banggood. I got a head up from the following Video.
I plugged in the touch USB cable to my Pi’s USB3 port. I pliugged the HDMI adapter into the screen and the pi (with the supplied mini plug).

I turned on the pi and it work’s and looks amazing.
This is displaying a demo C# app I wrote. It’s running via mono.
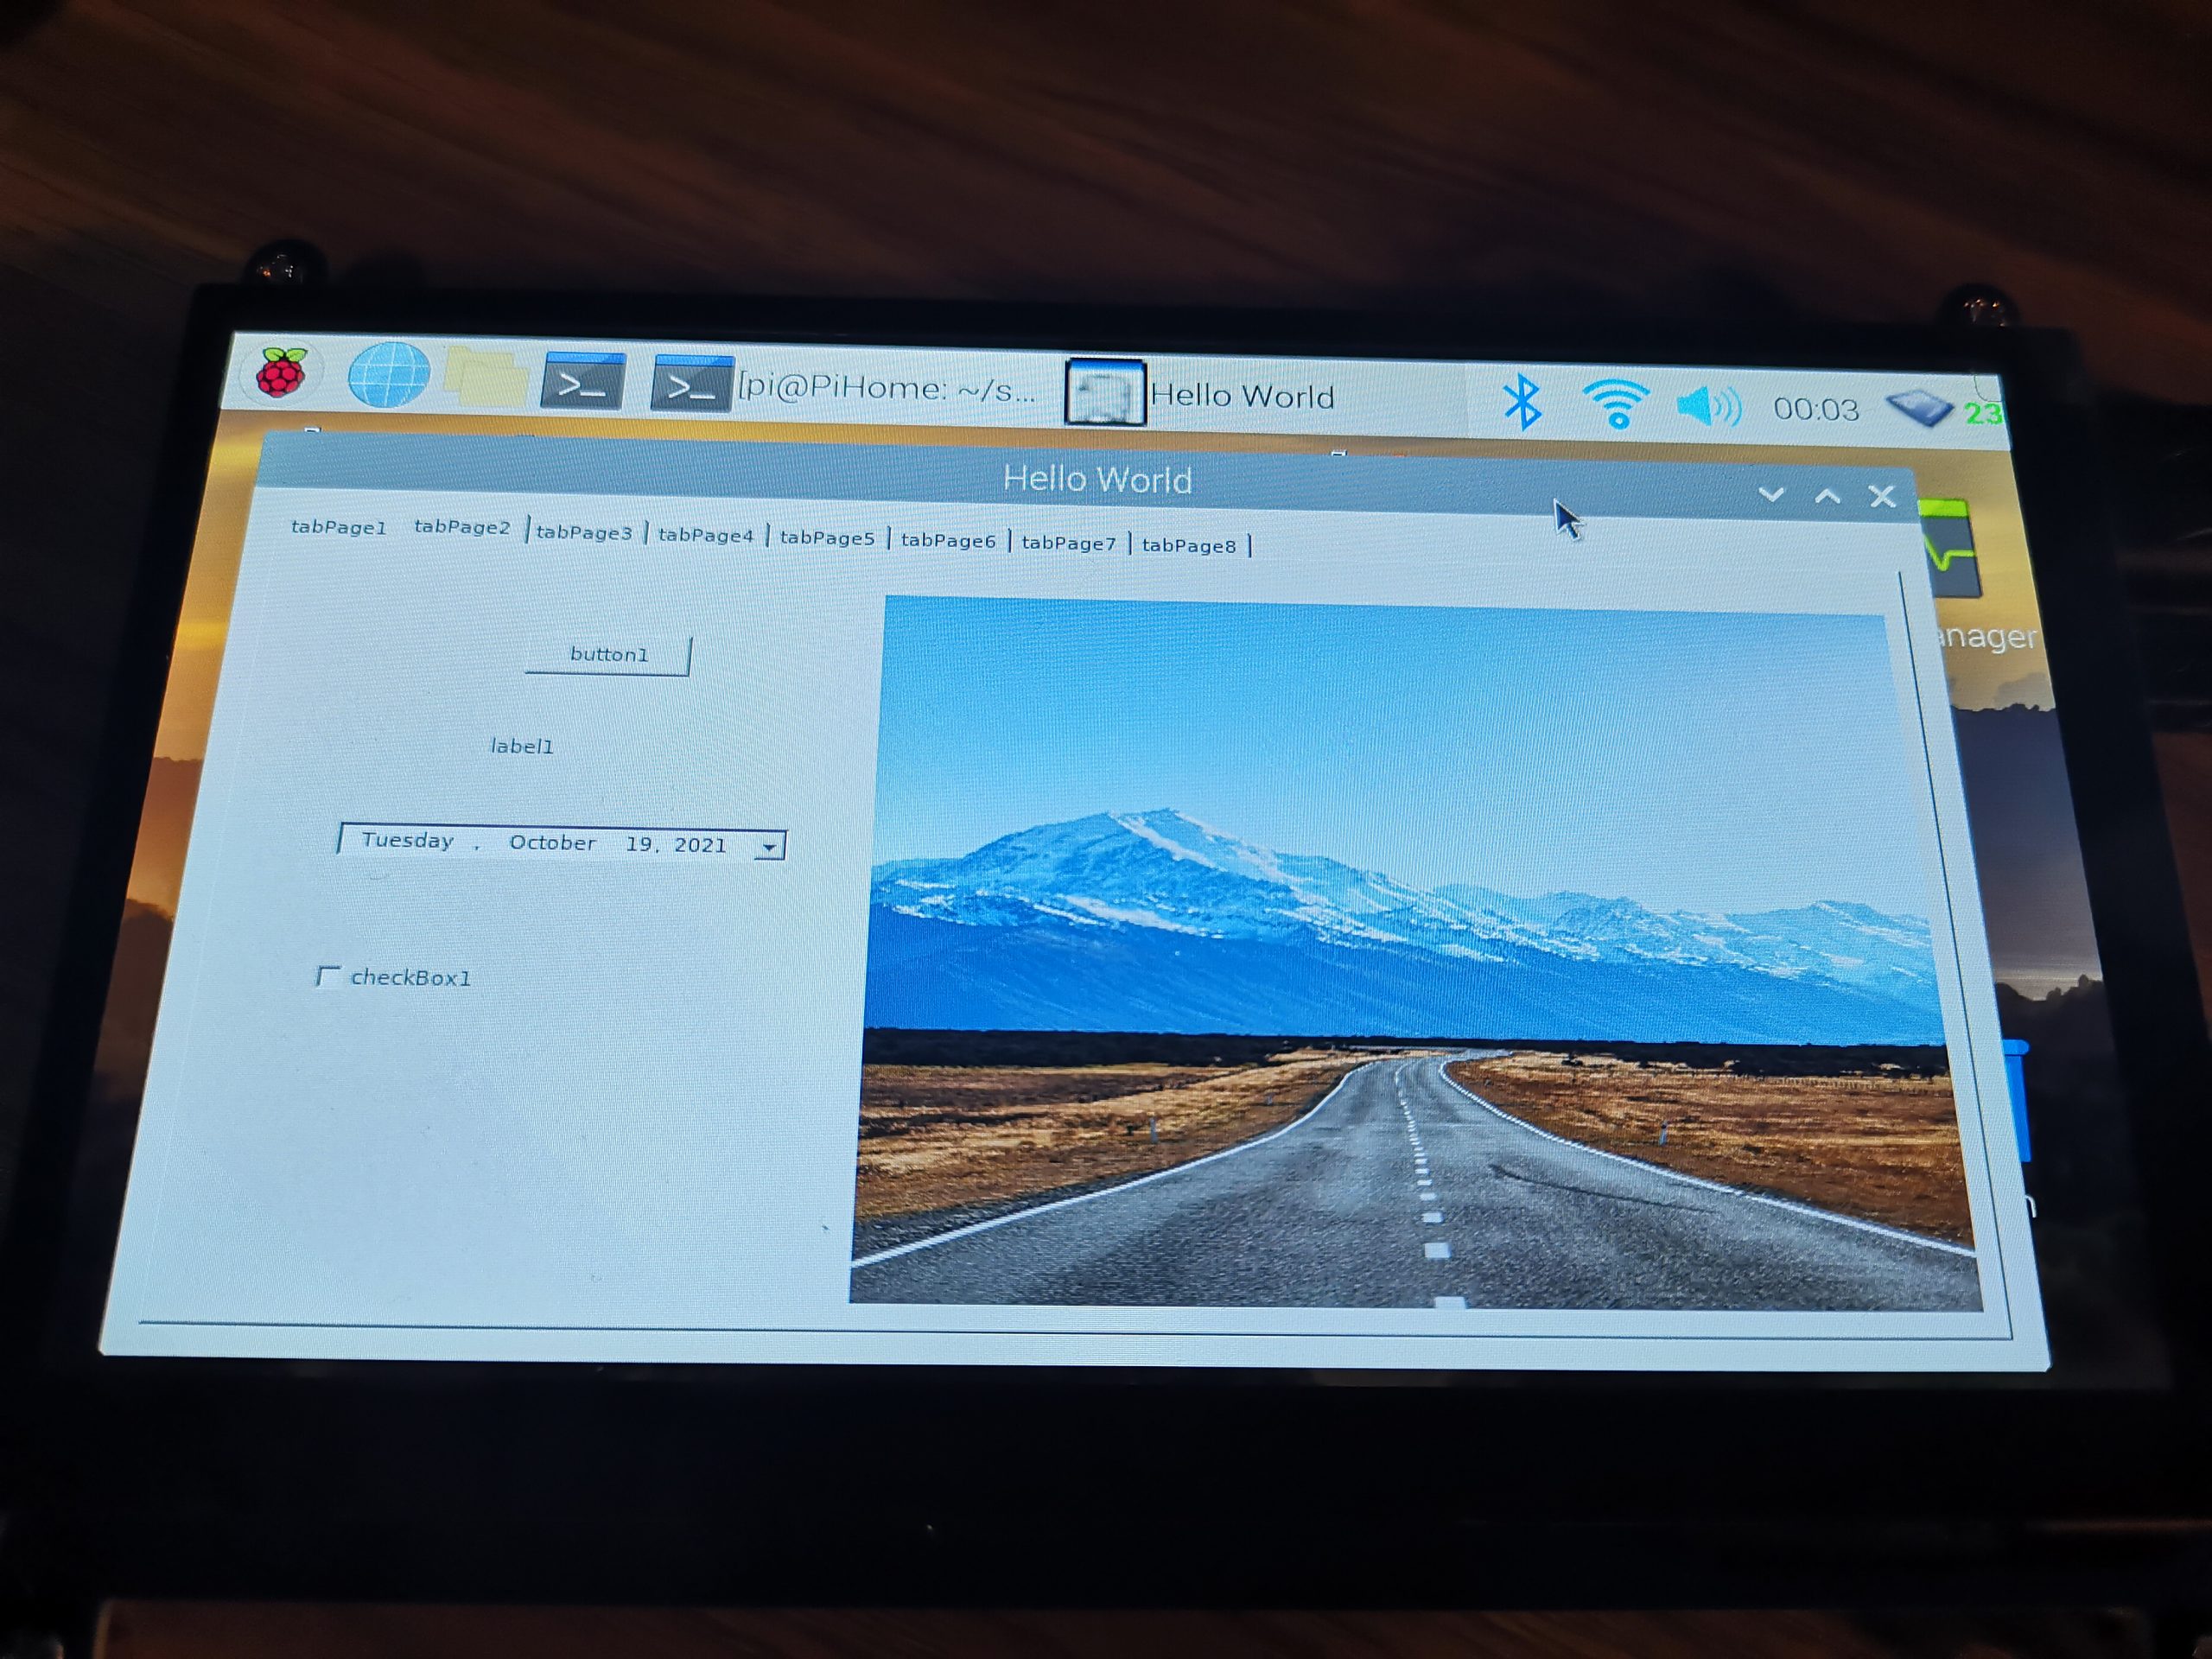
I did have to add the following to config.txt to bet native resolution. The manual on the supplied CD was helpful (but I did not check it at first).
max_usb_current=1
hdmi_force_hotplug=1
config_hdmi_boost=7
hdmi_group=2
hdmi_mode=1
hdmi_mode=87
hdmi_drive=1
display_rotate=0
hdmi_cvt 1024 600 60 6 0 0 0
framebuffer_width=1024
framebuffer_height=600
PiJuice UPS HAT
I purchased an external LiPi UPS to keep the raspberry pi fed with power (even when the power goes out)
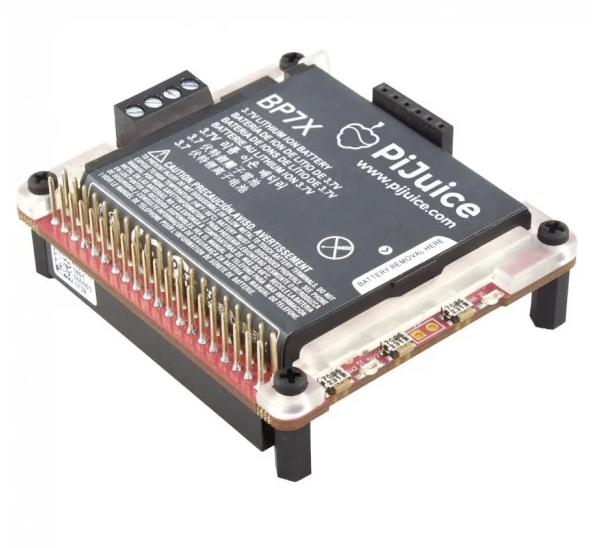
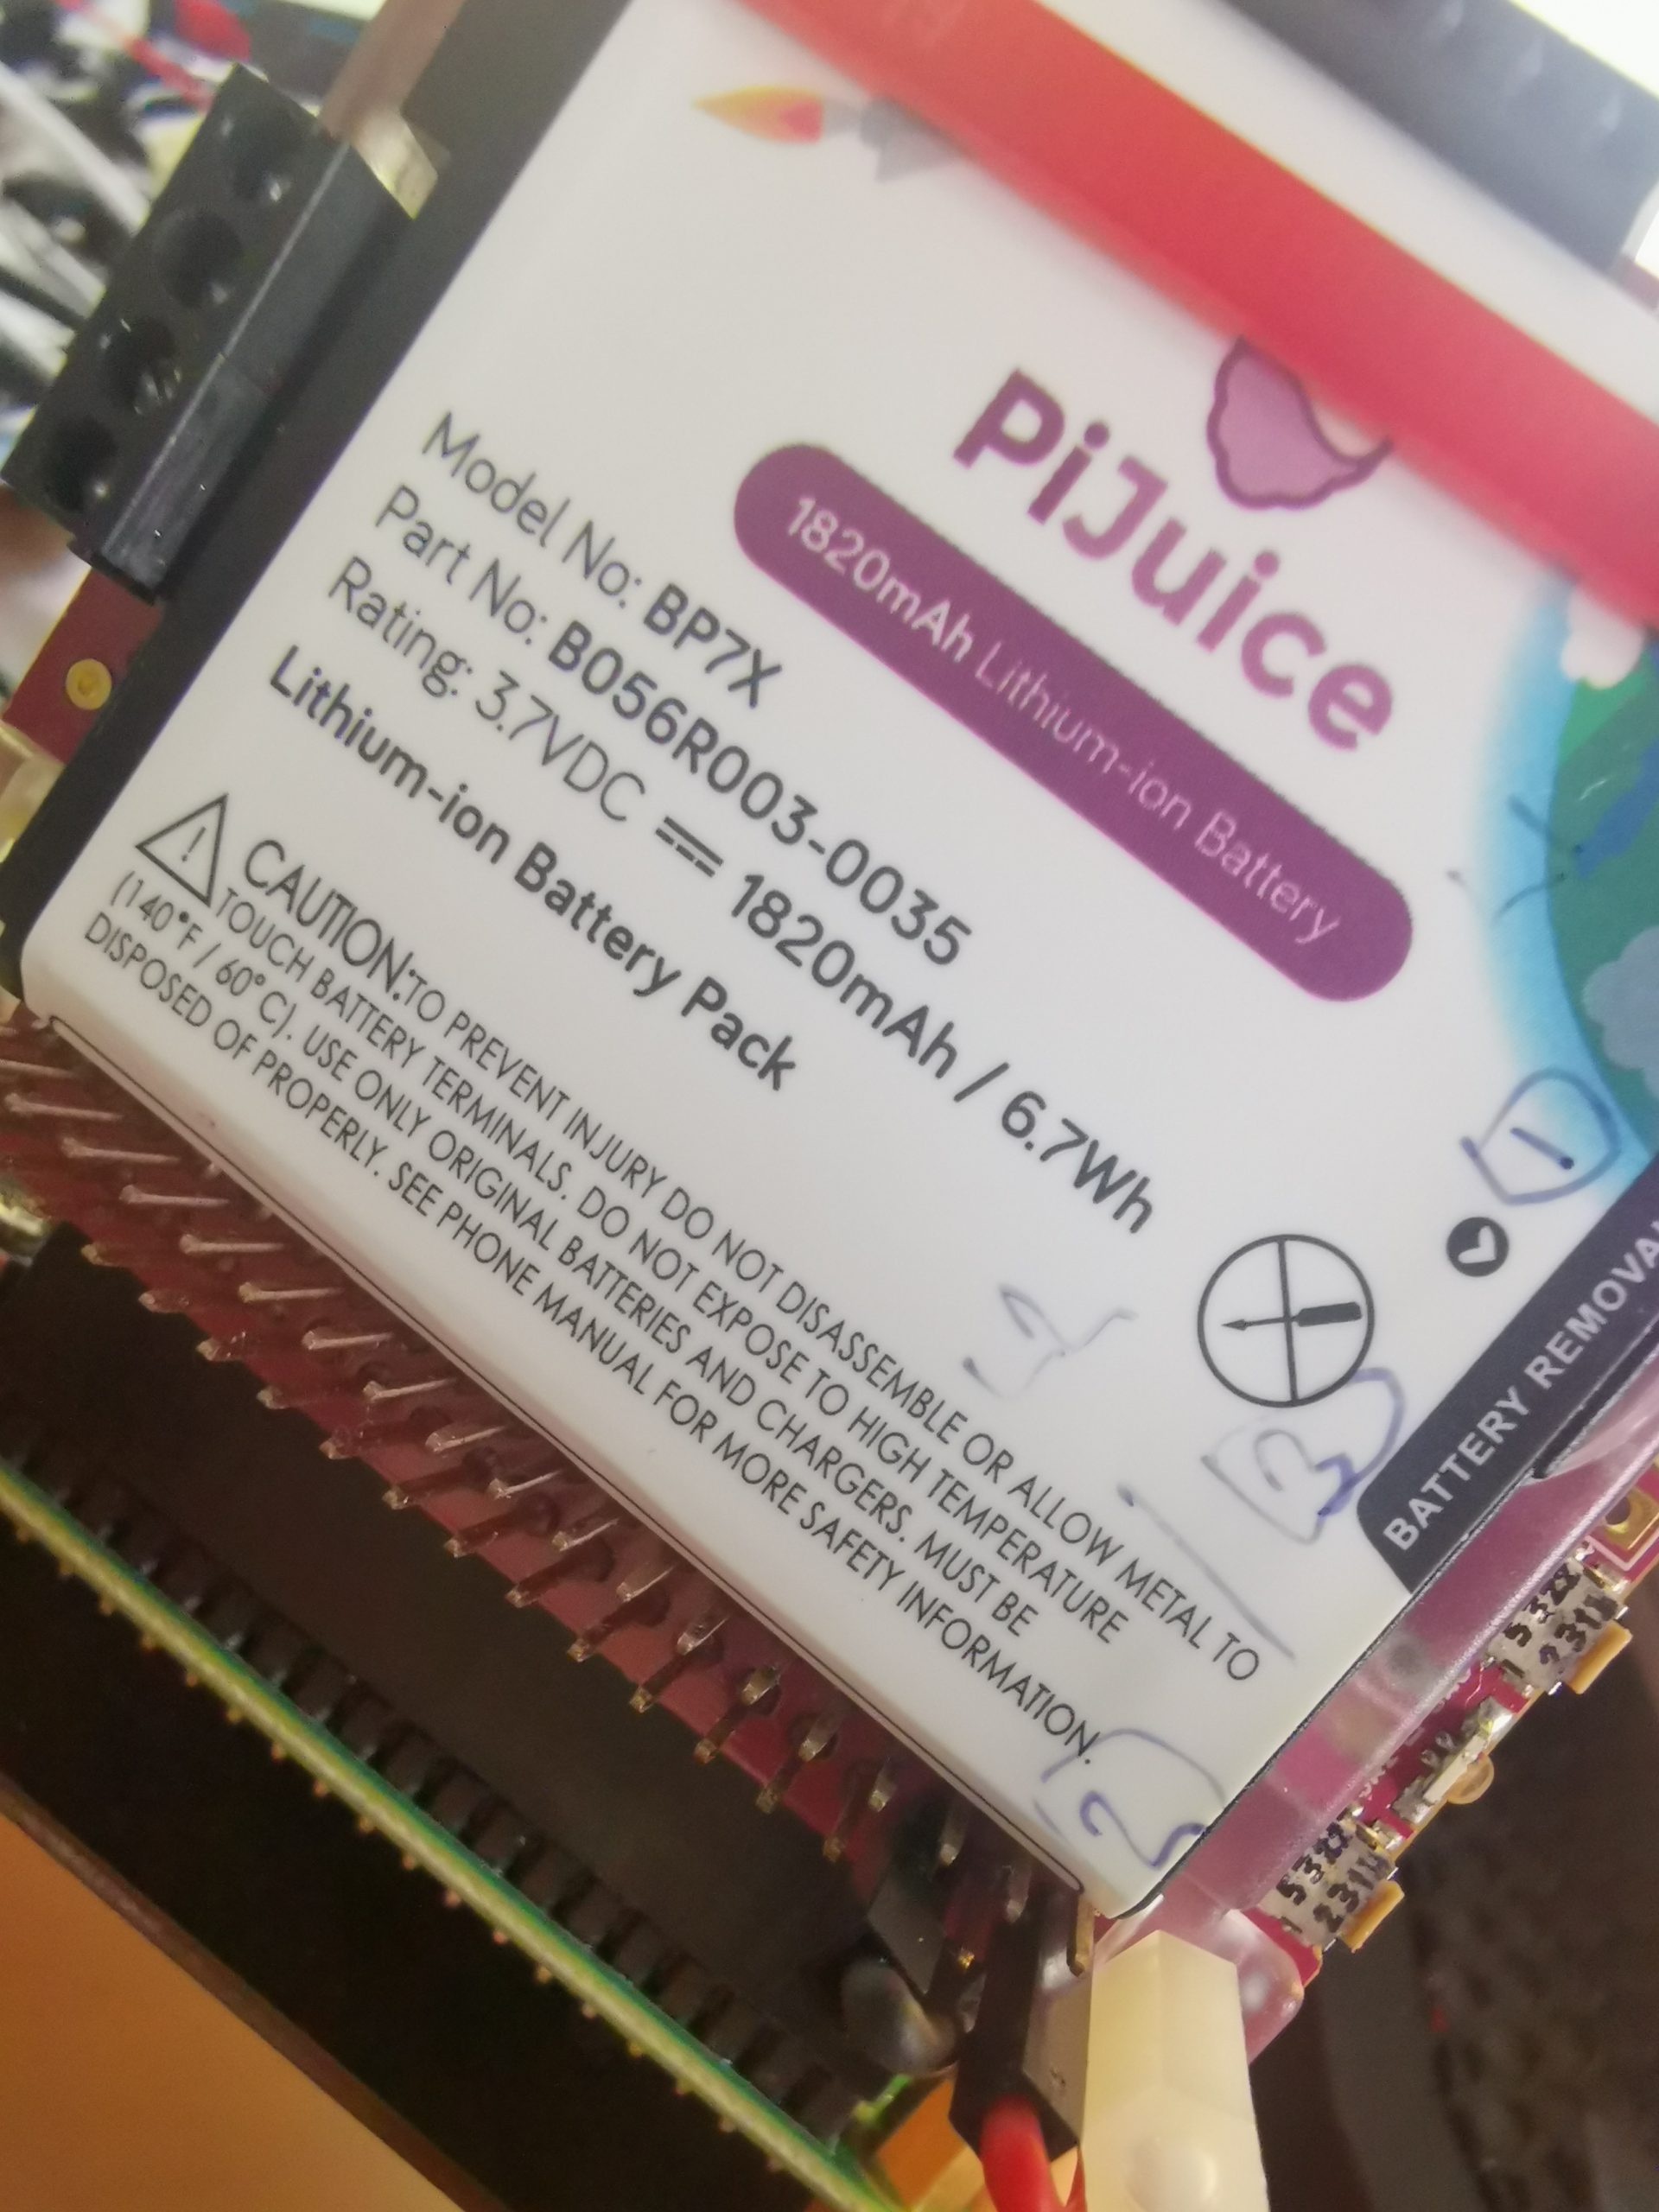
The stock battery was not charged and was quite weak when I first installed it. Do fully charge the battery before testing.

Stock Battery = 3.7V @ 1820mAh
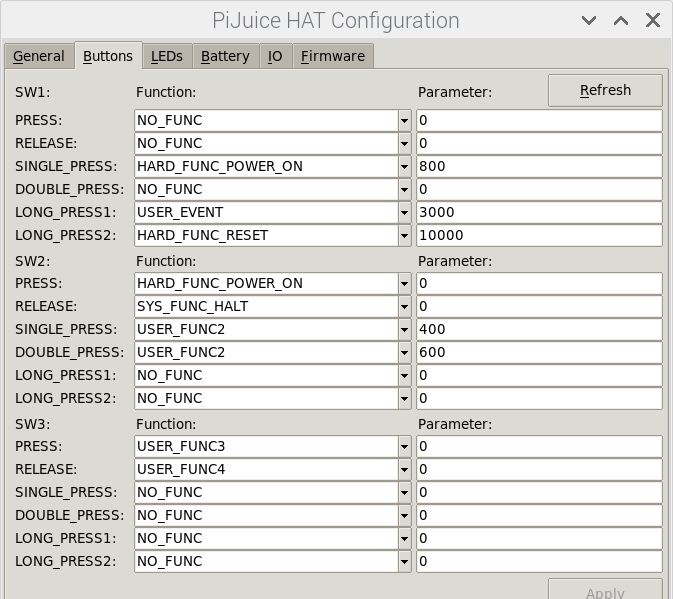
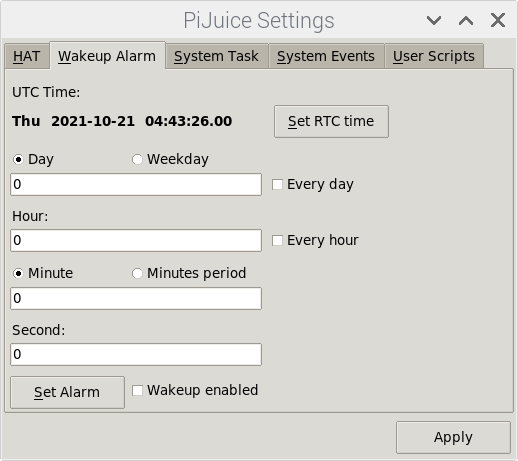
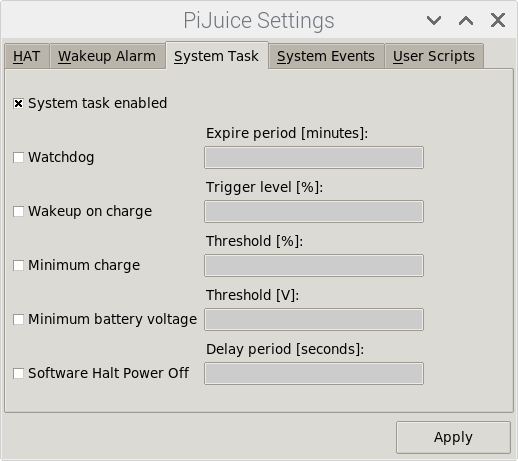
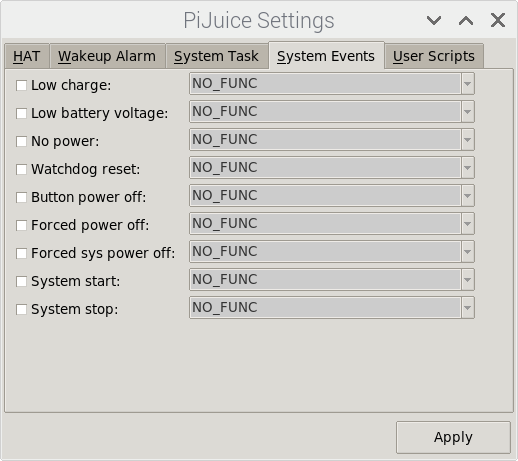
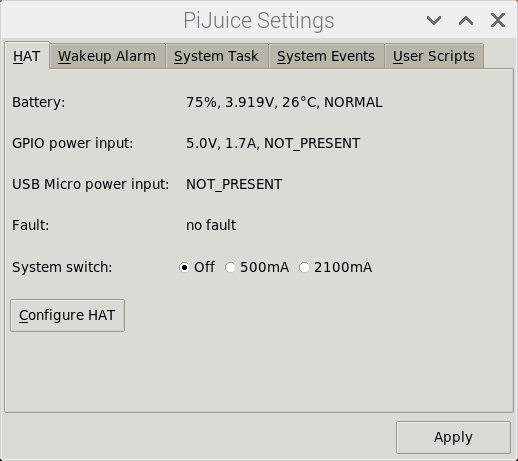
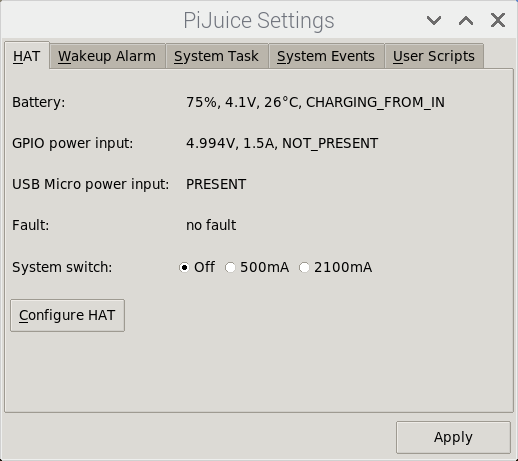
Below are screenshots so the PIJuice Setup.
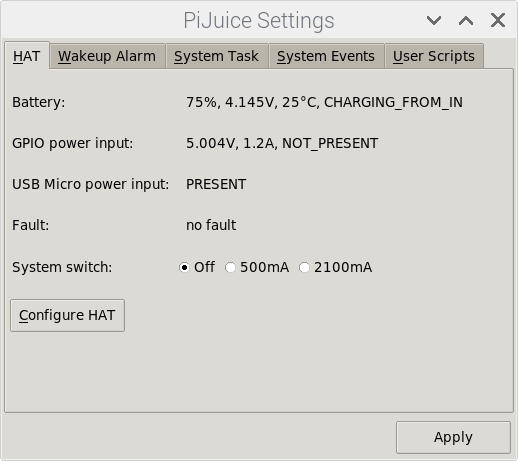
PiJuice General Settings
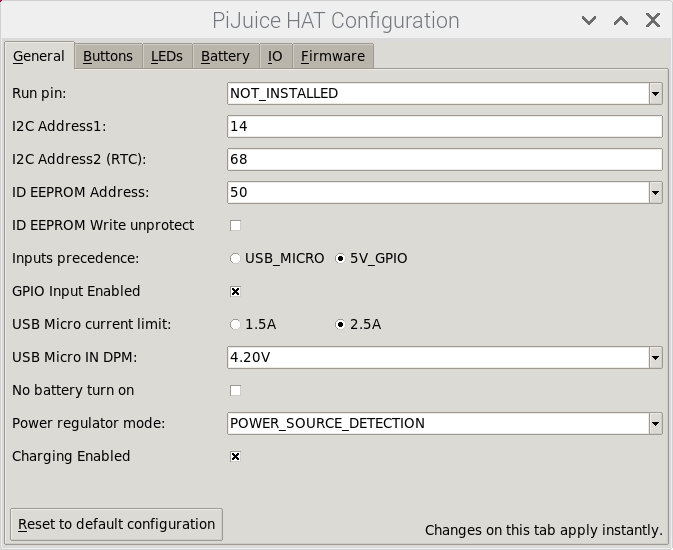
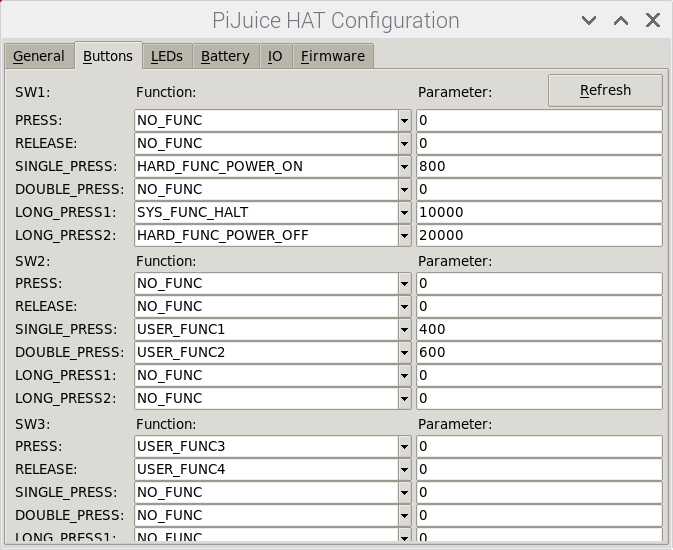
There is an option to set events for every button
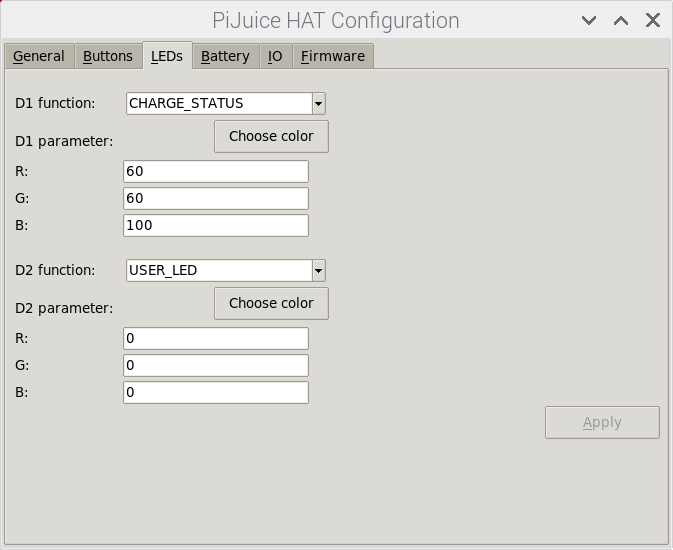
LED Status color and function
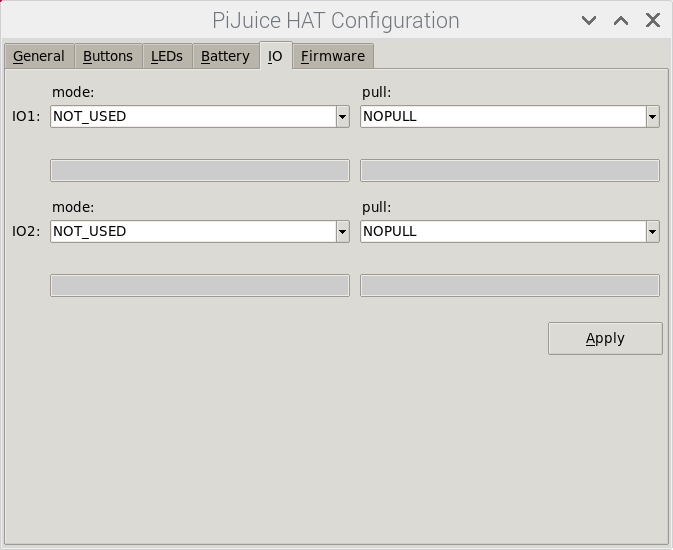
IO for the PiJuice Input. I will sort this out later.
A new firmware was available. I had v1.4
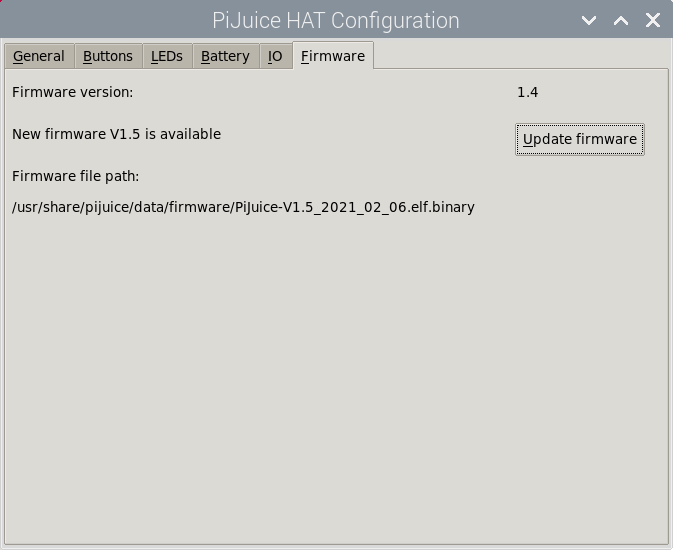
I updated the firmware
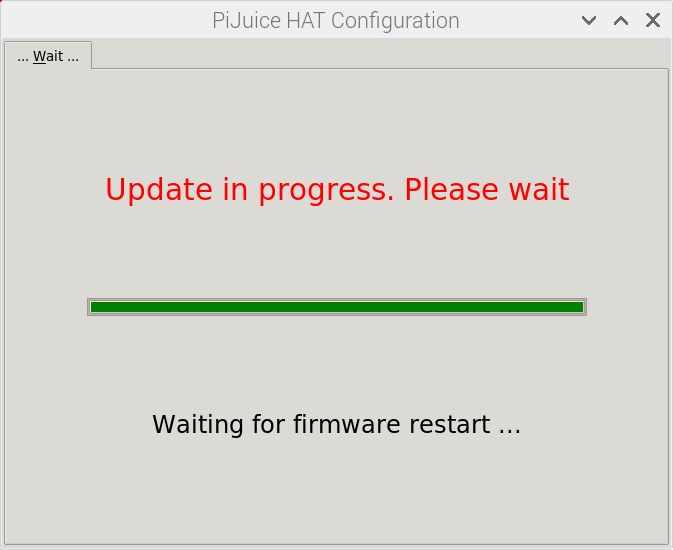
Firmware update worked
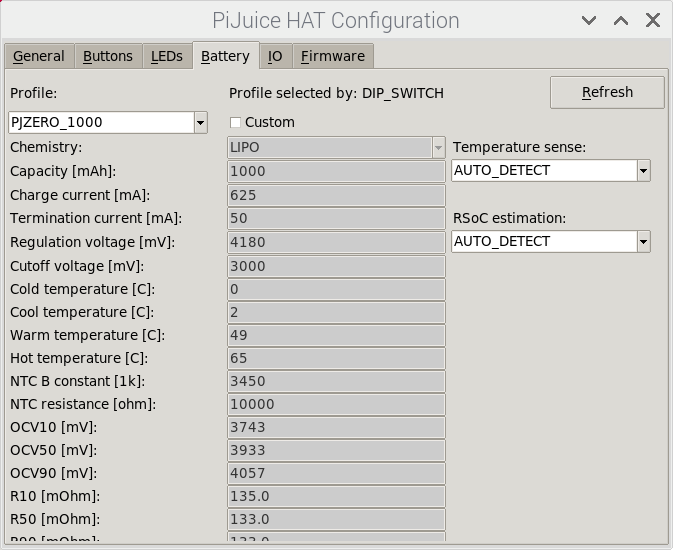
Battery settings
PiJuice Button Config
Wake Up Alarm time and RTC
System Settings
System Events
User Scripts
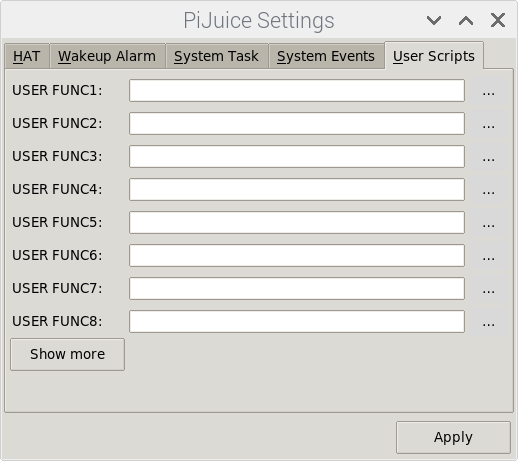
I ordered a bigger battery as my Screen, M.2, Fan and UPS consume near the maximum of the stock battery.

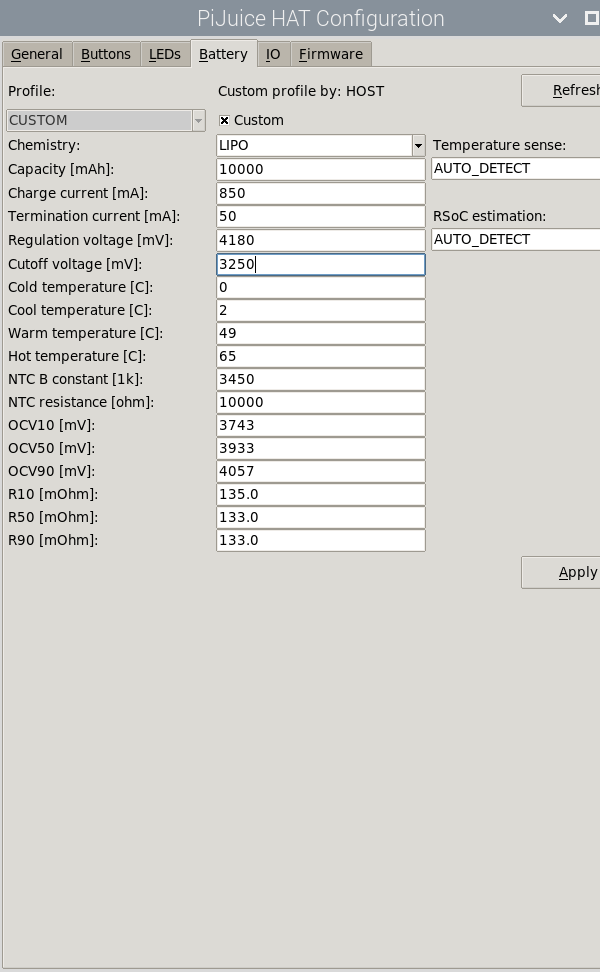
After talking with the seller of the battery they advised I setup the 10,000mAh battery using the 1,000mAh battery setup in PiJuice but change the Capacity and Charge Current
- Capacity = 10000C
- cutoff voltage
And for battery longevity set the
- Cutoff voltage: 3,250mv
Final Battery Setup
WeMos Setup
I orderd 20x Wemos Mini D1 Pro (16Mbit) clones to use to run the sensors. I soldered the legs on in batches of 8
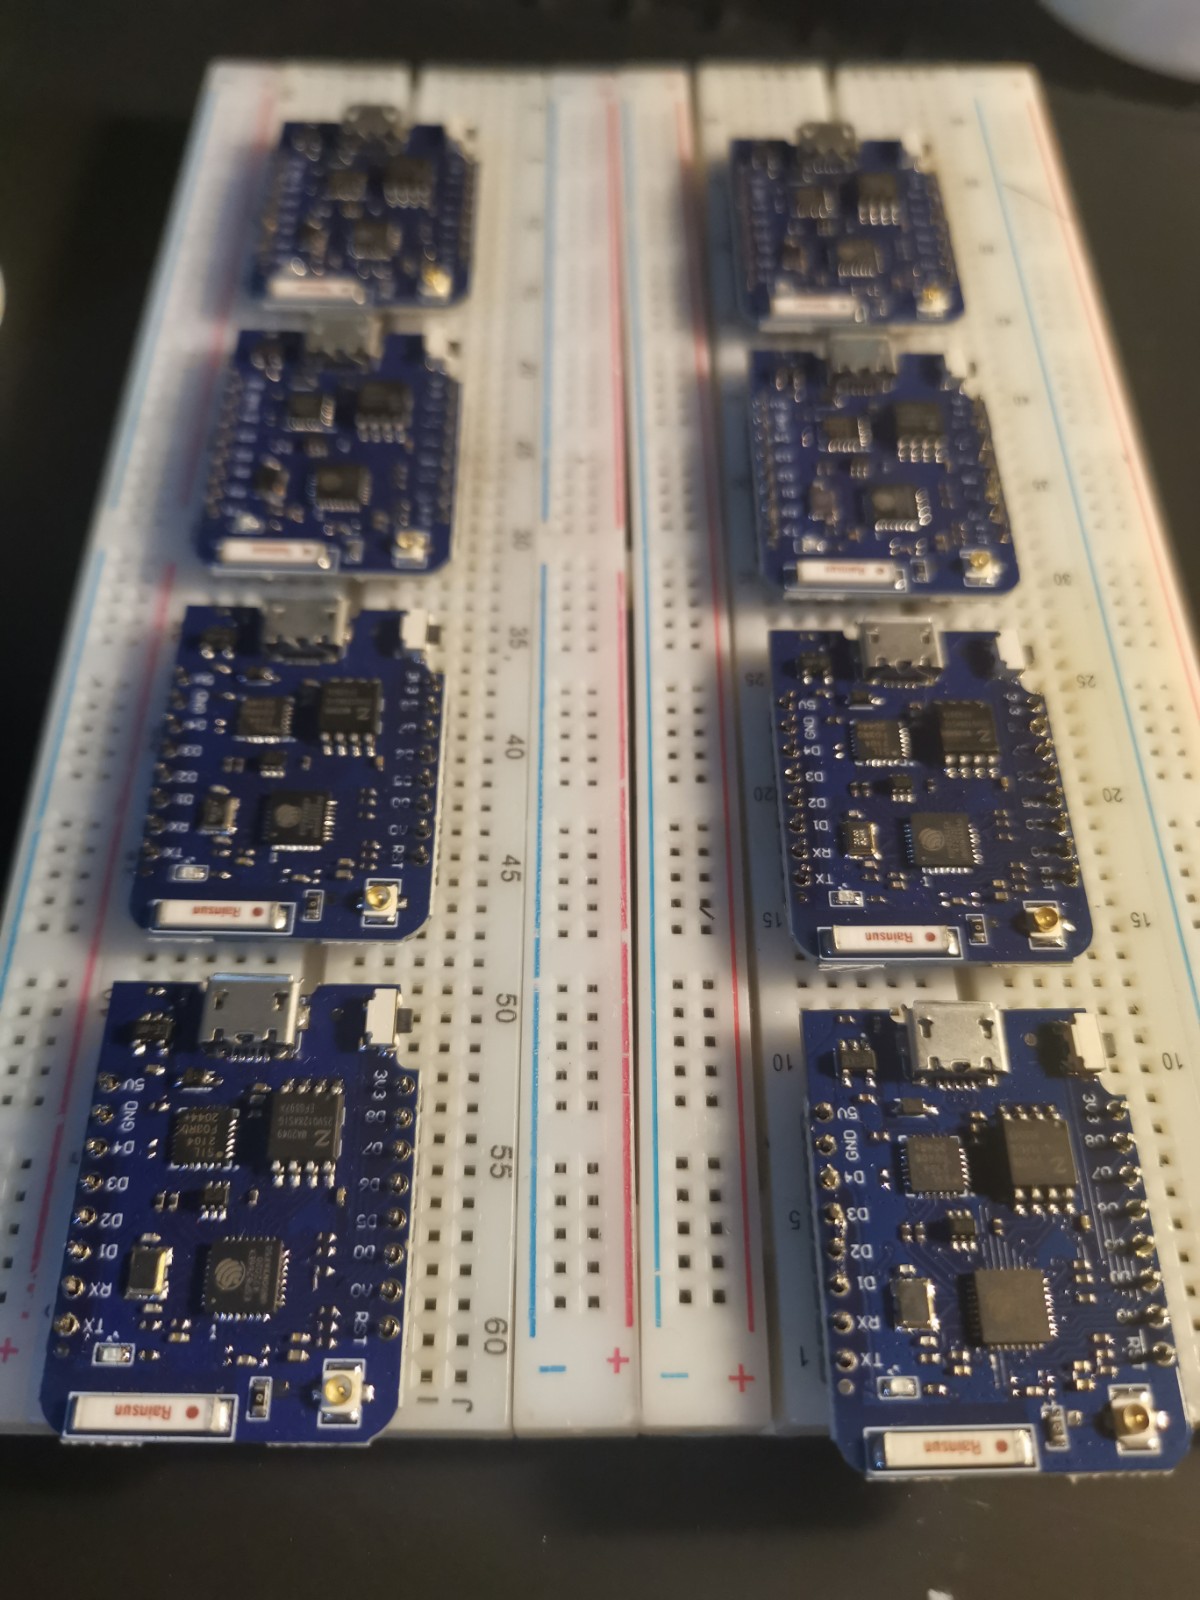
Soldering was not perfect but worked
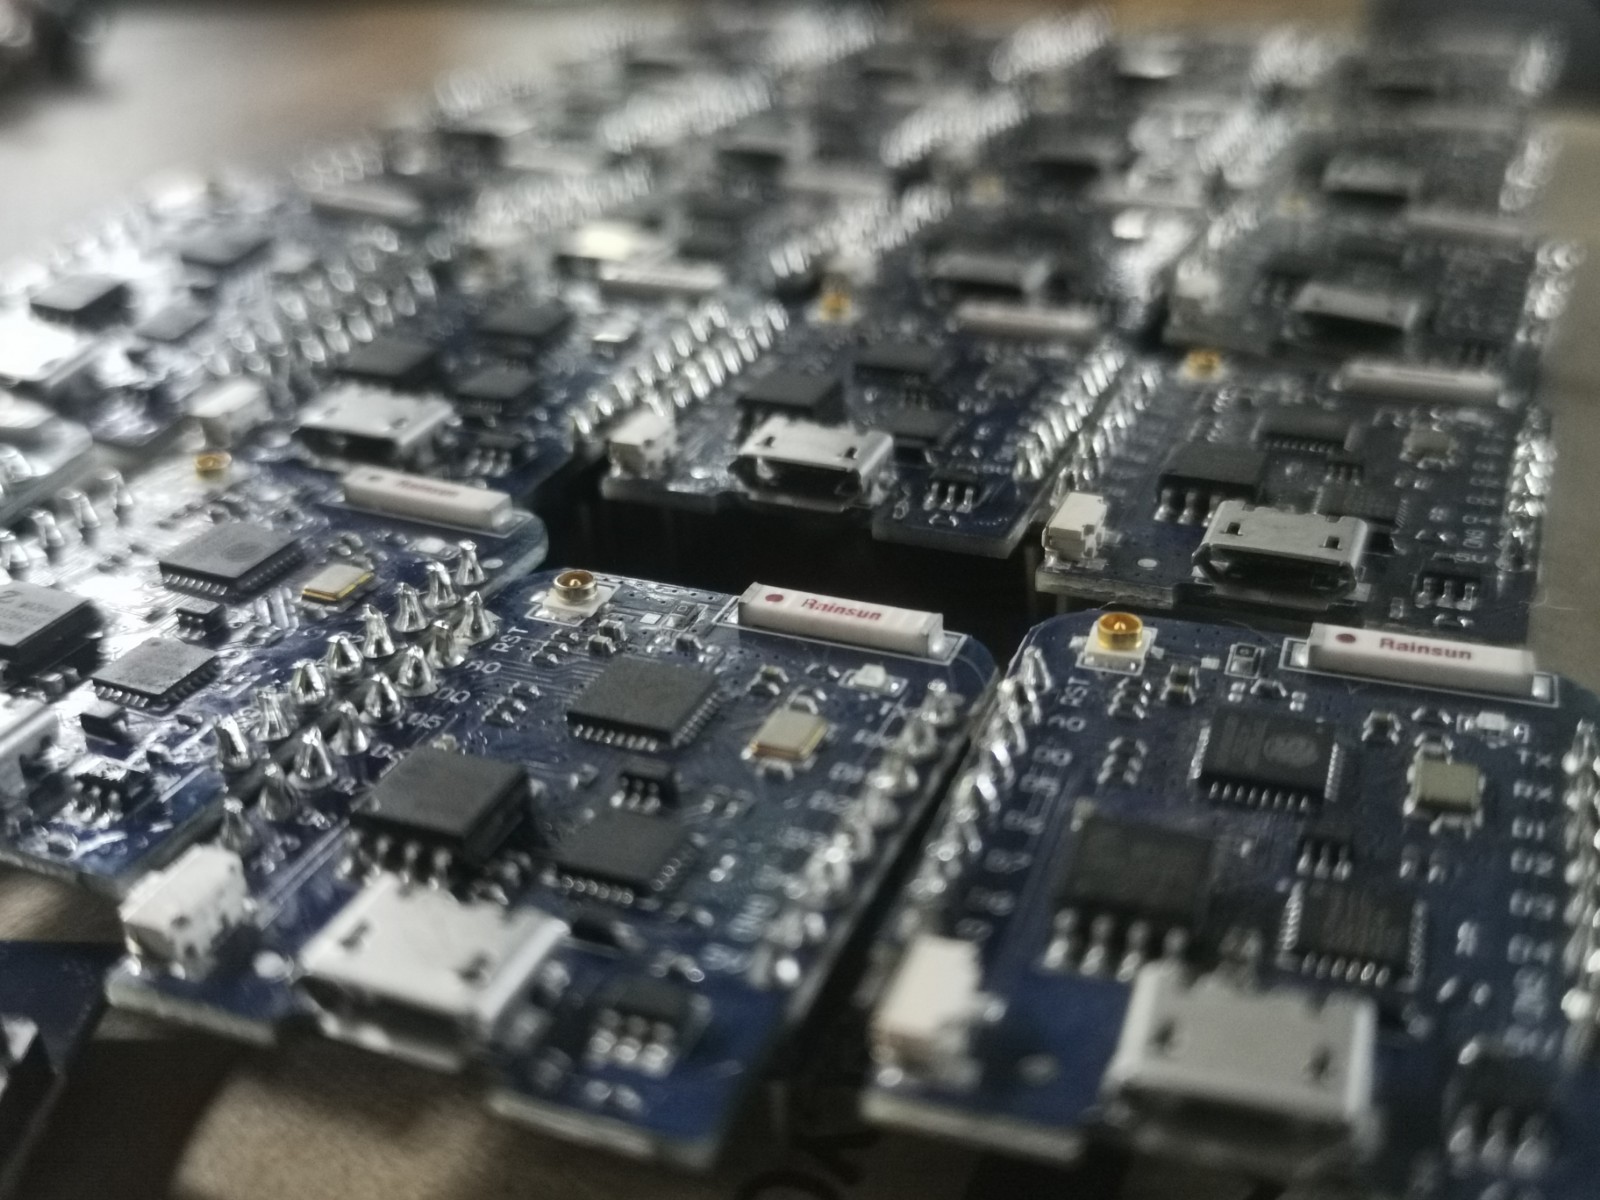
Soldering is not perfect but each joint was triple tested.
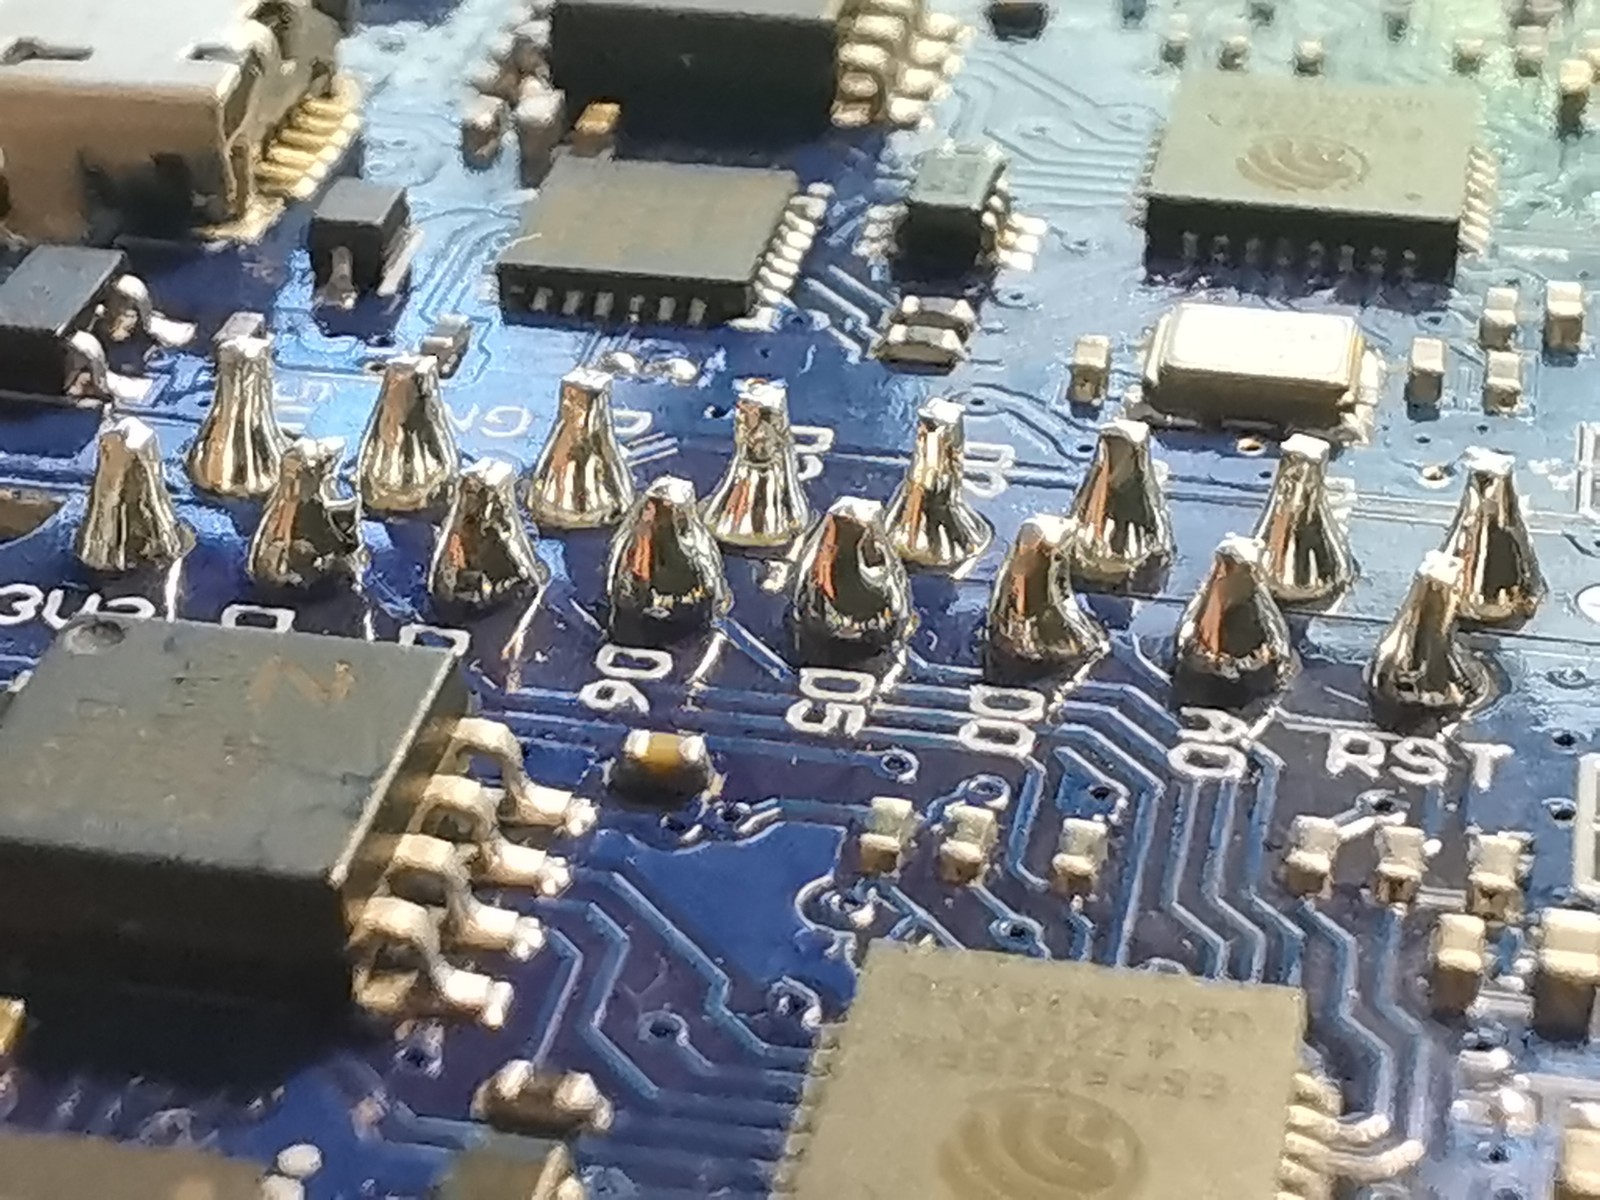
I only had one dead WeMos.
I will set up the final units on ProtoBoards.
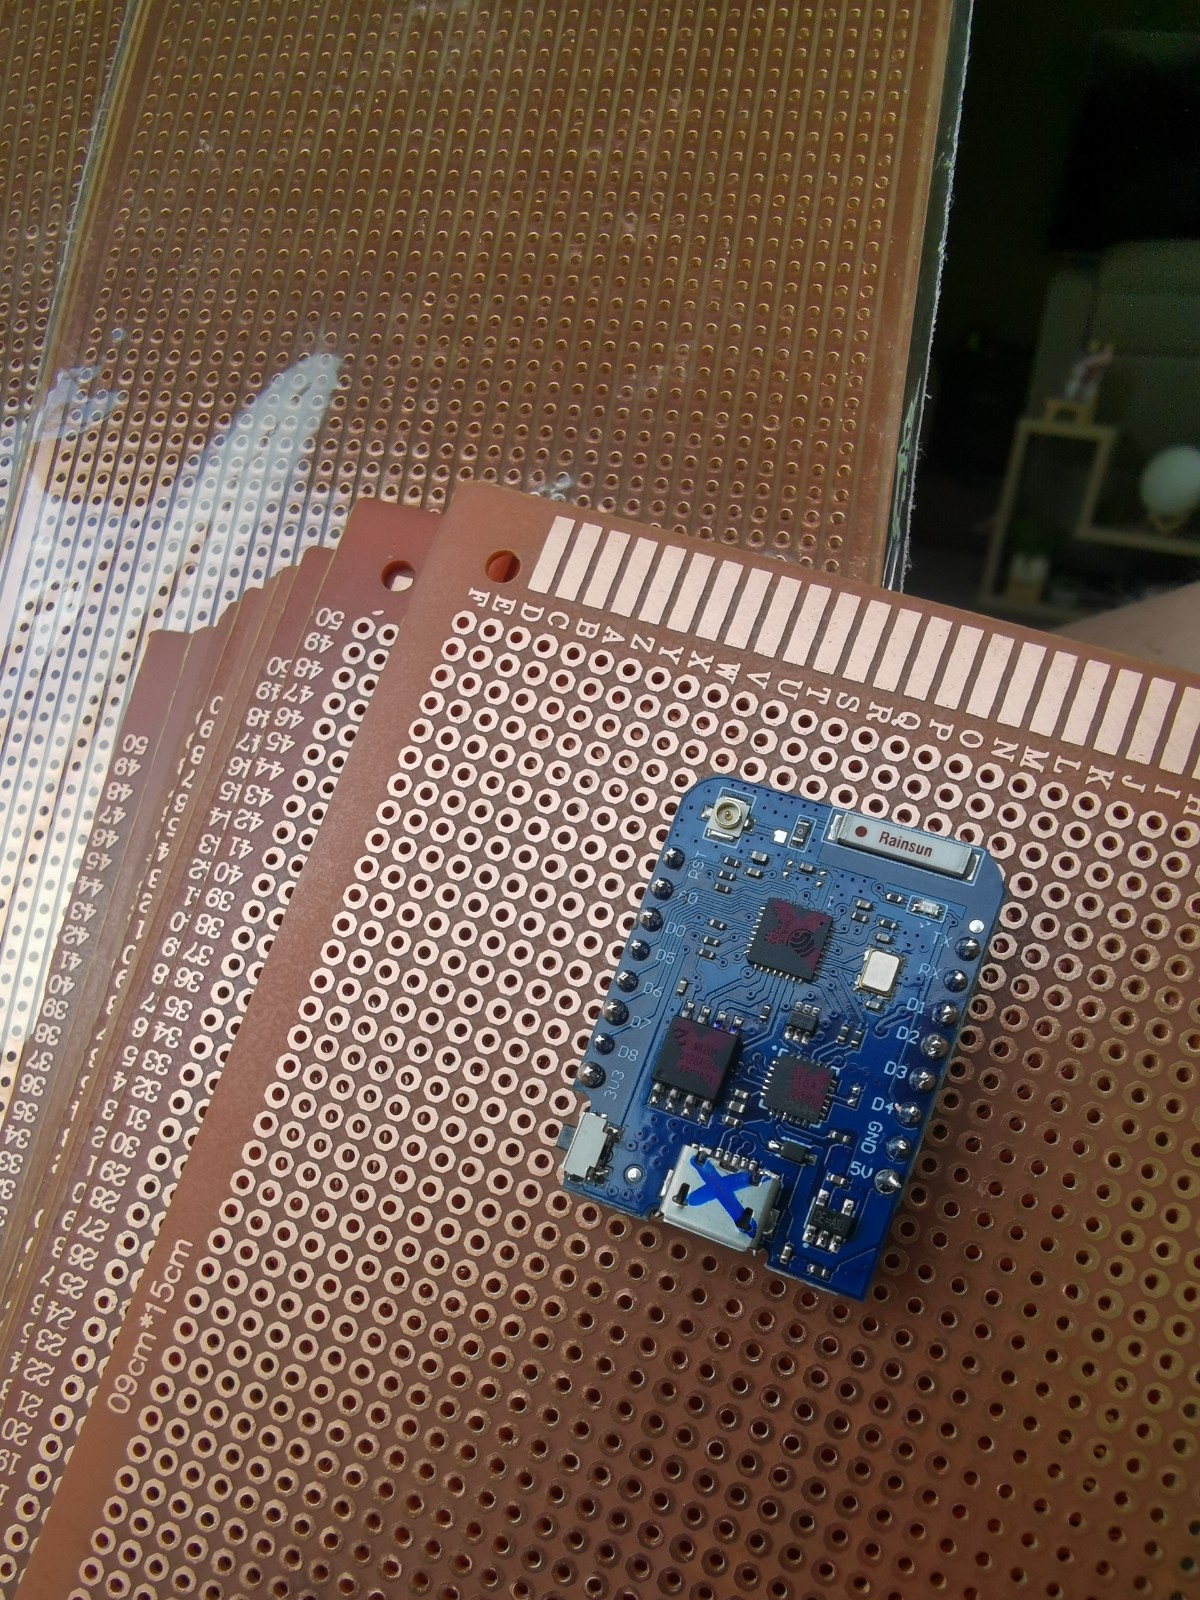
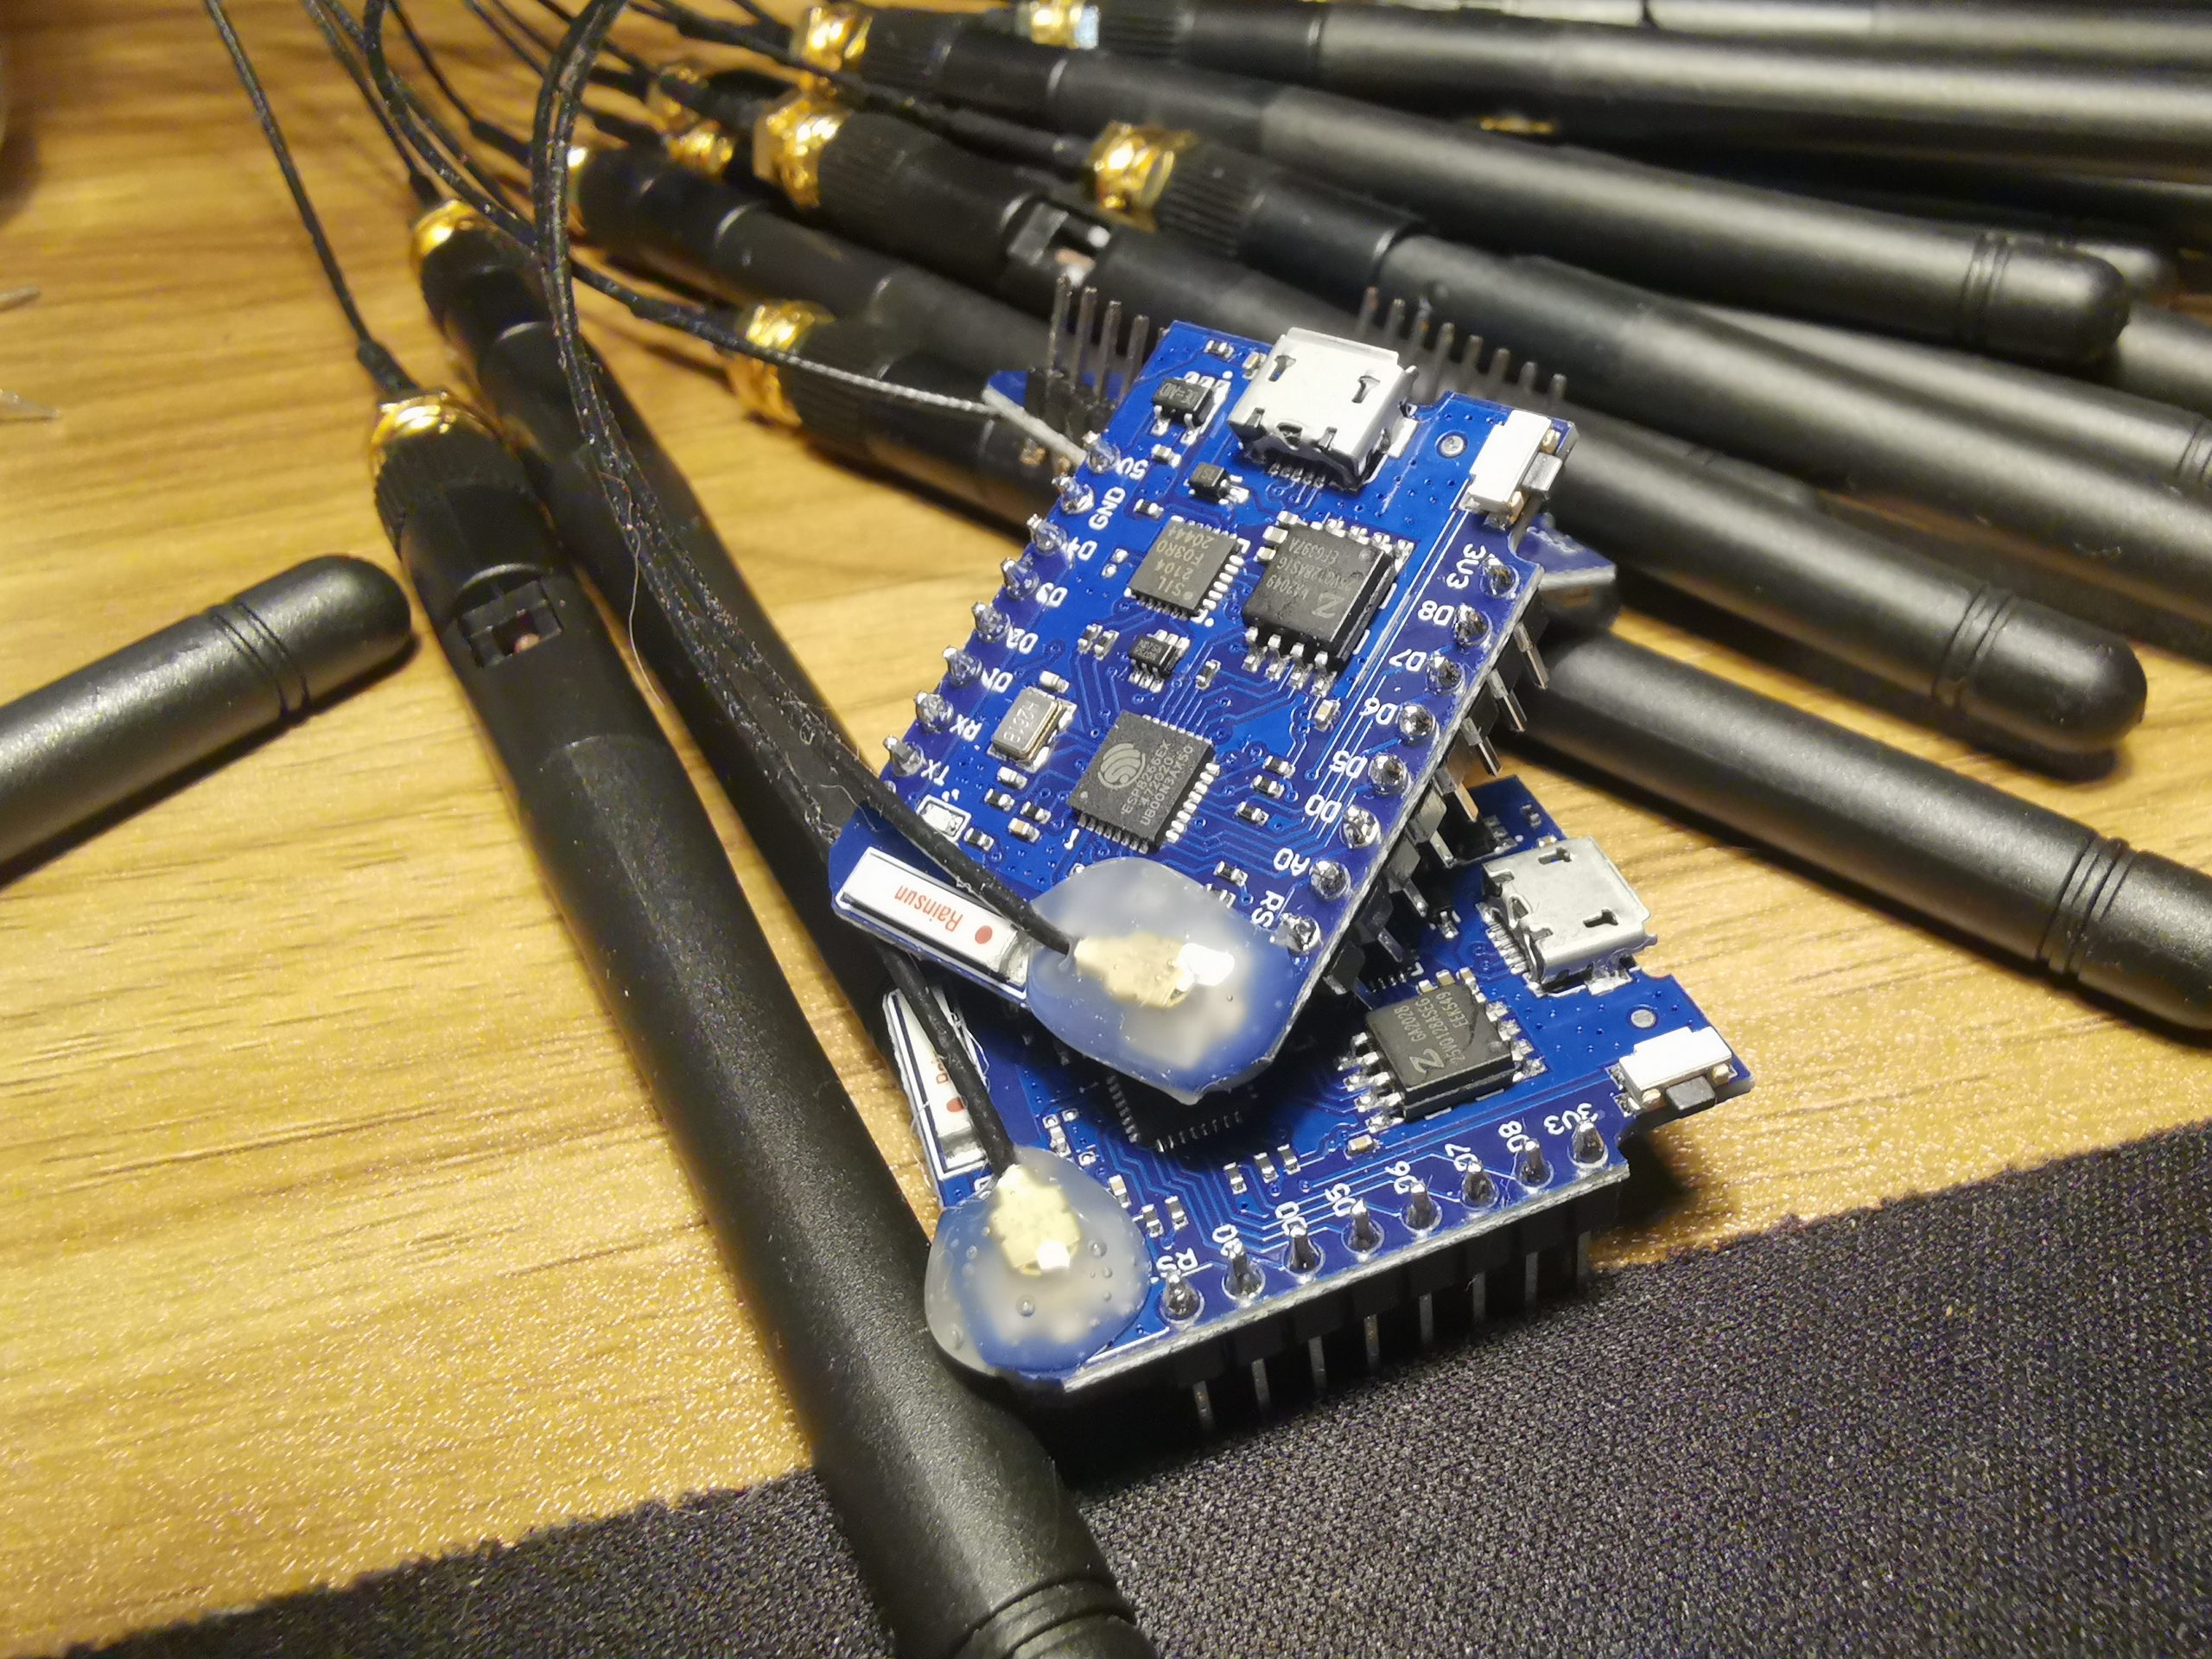
20x Wemos ready for service and the external aerial is glued down. The hot glue was a bad idea, I had to rotate a resistor under the hot glue.
Revision
I ended up reordering the WeMos Mini’s and soldering on Female headers so I can add OLED screens
I added female headers to allow an OLED screen

I purchased a microscope tpo be able to see better.
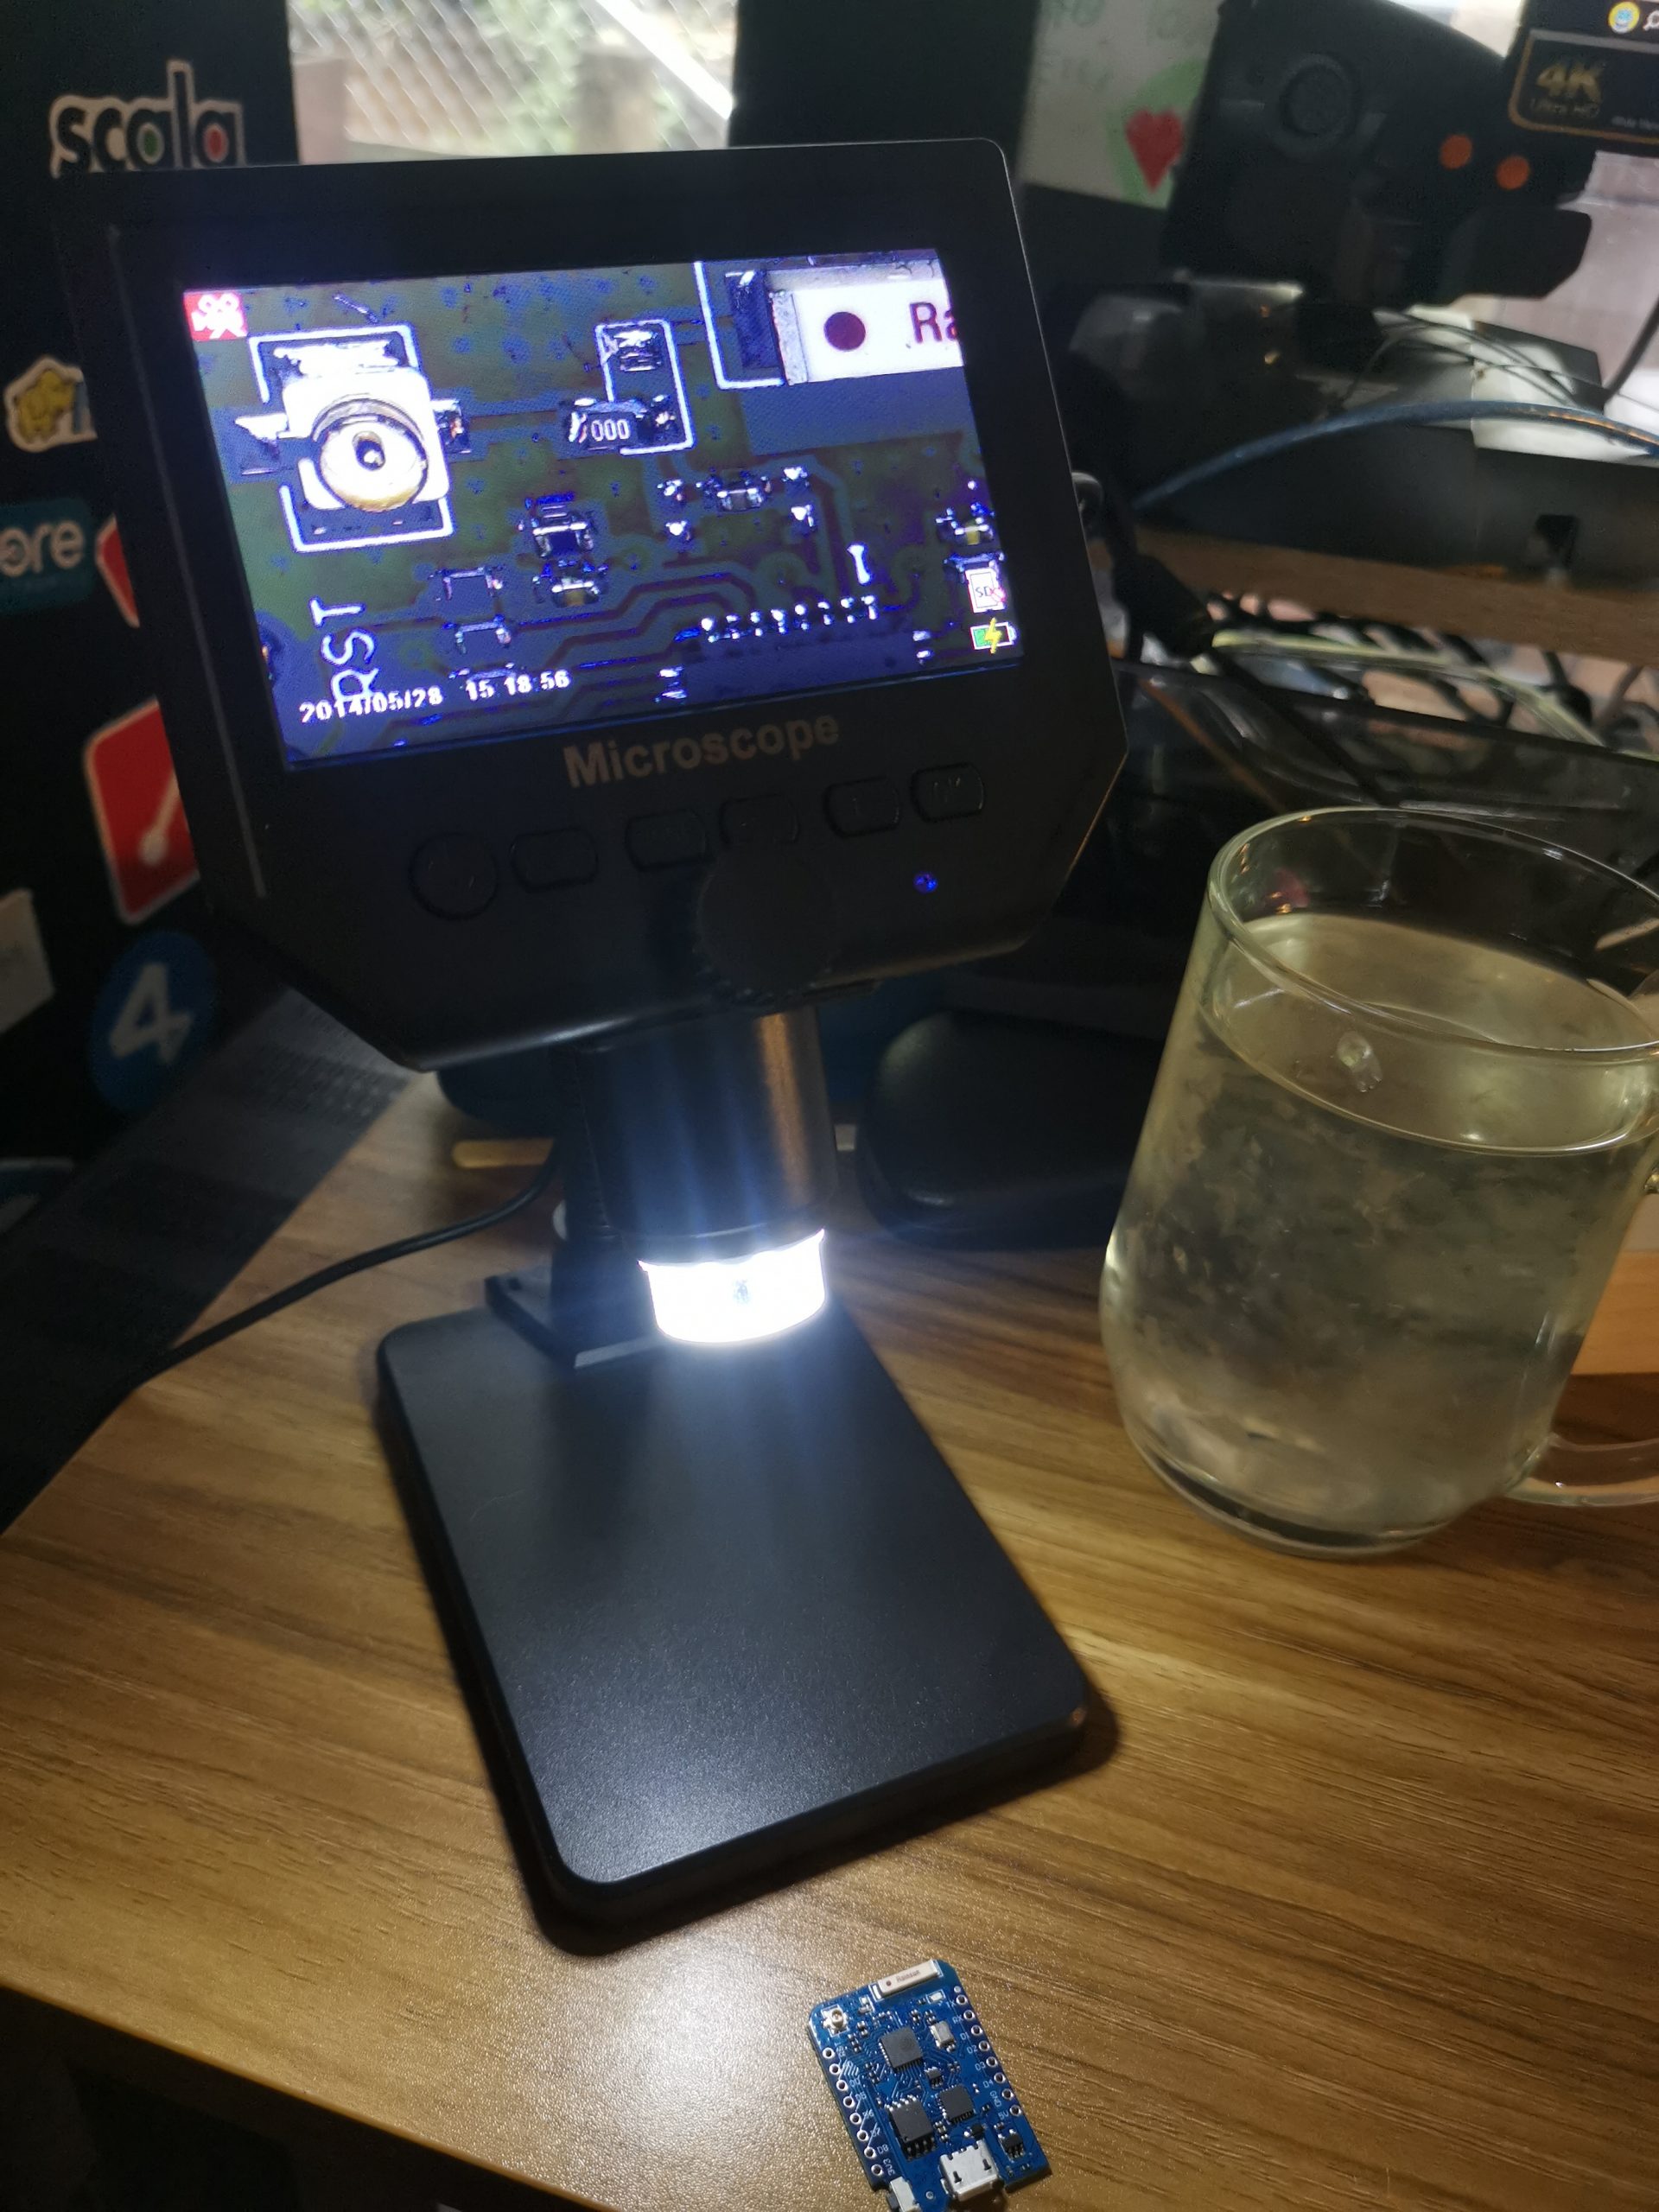
Each sensor will have a mini OLED screen.
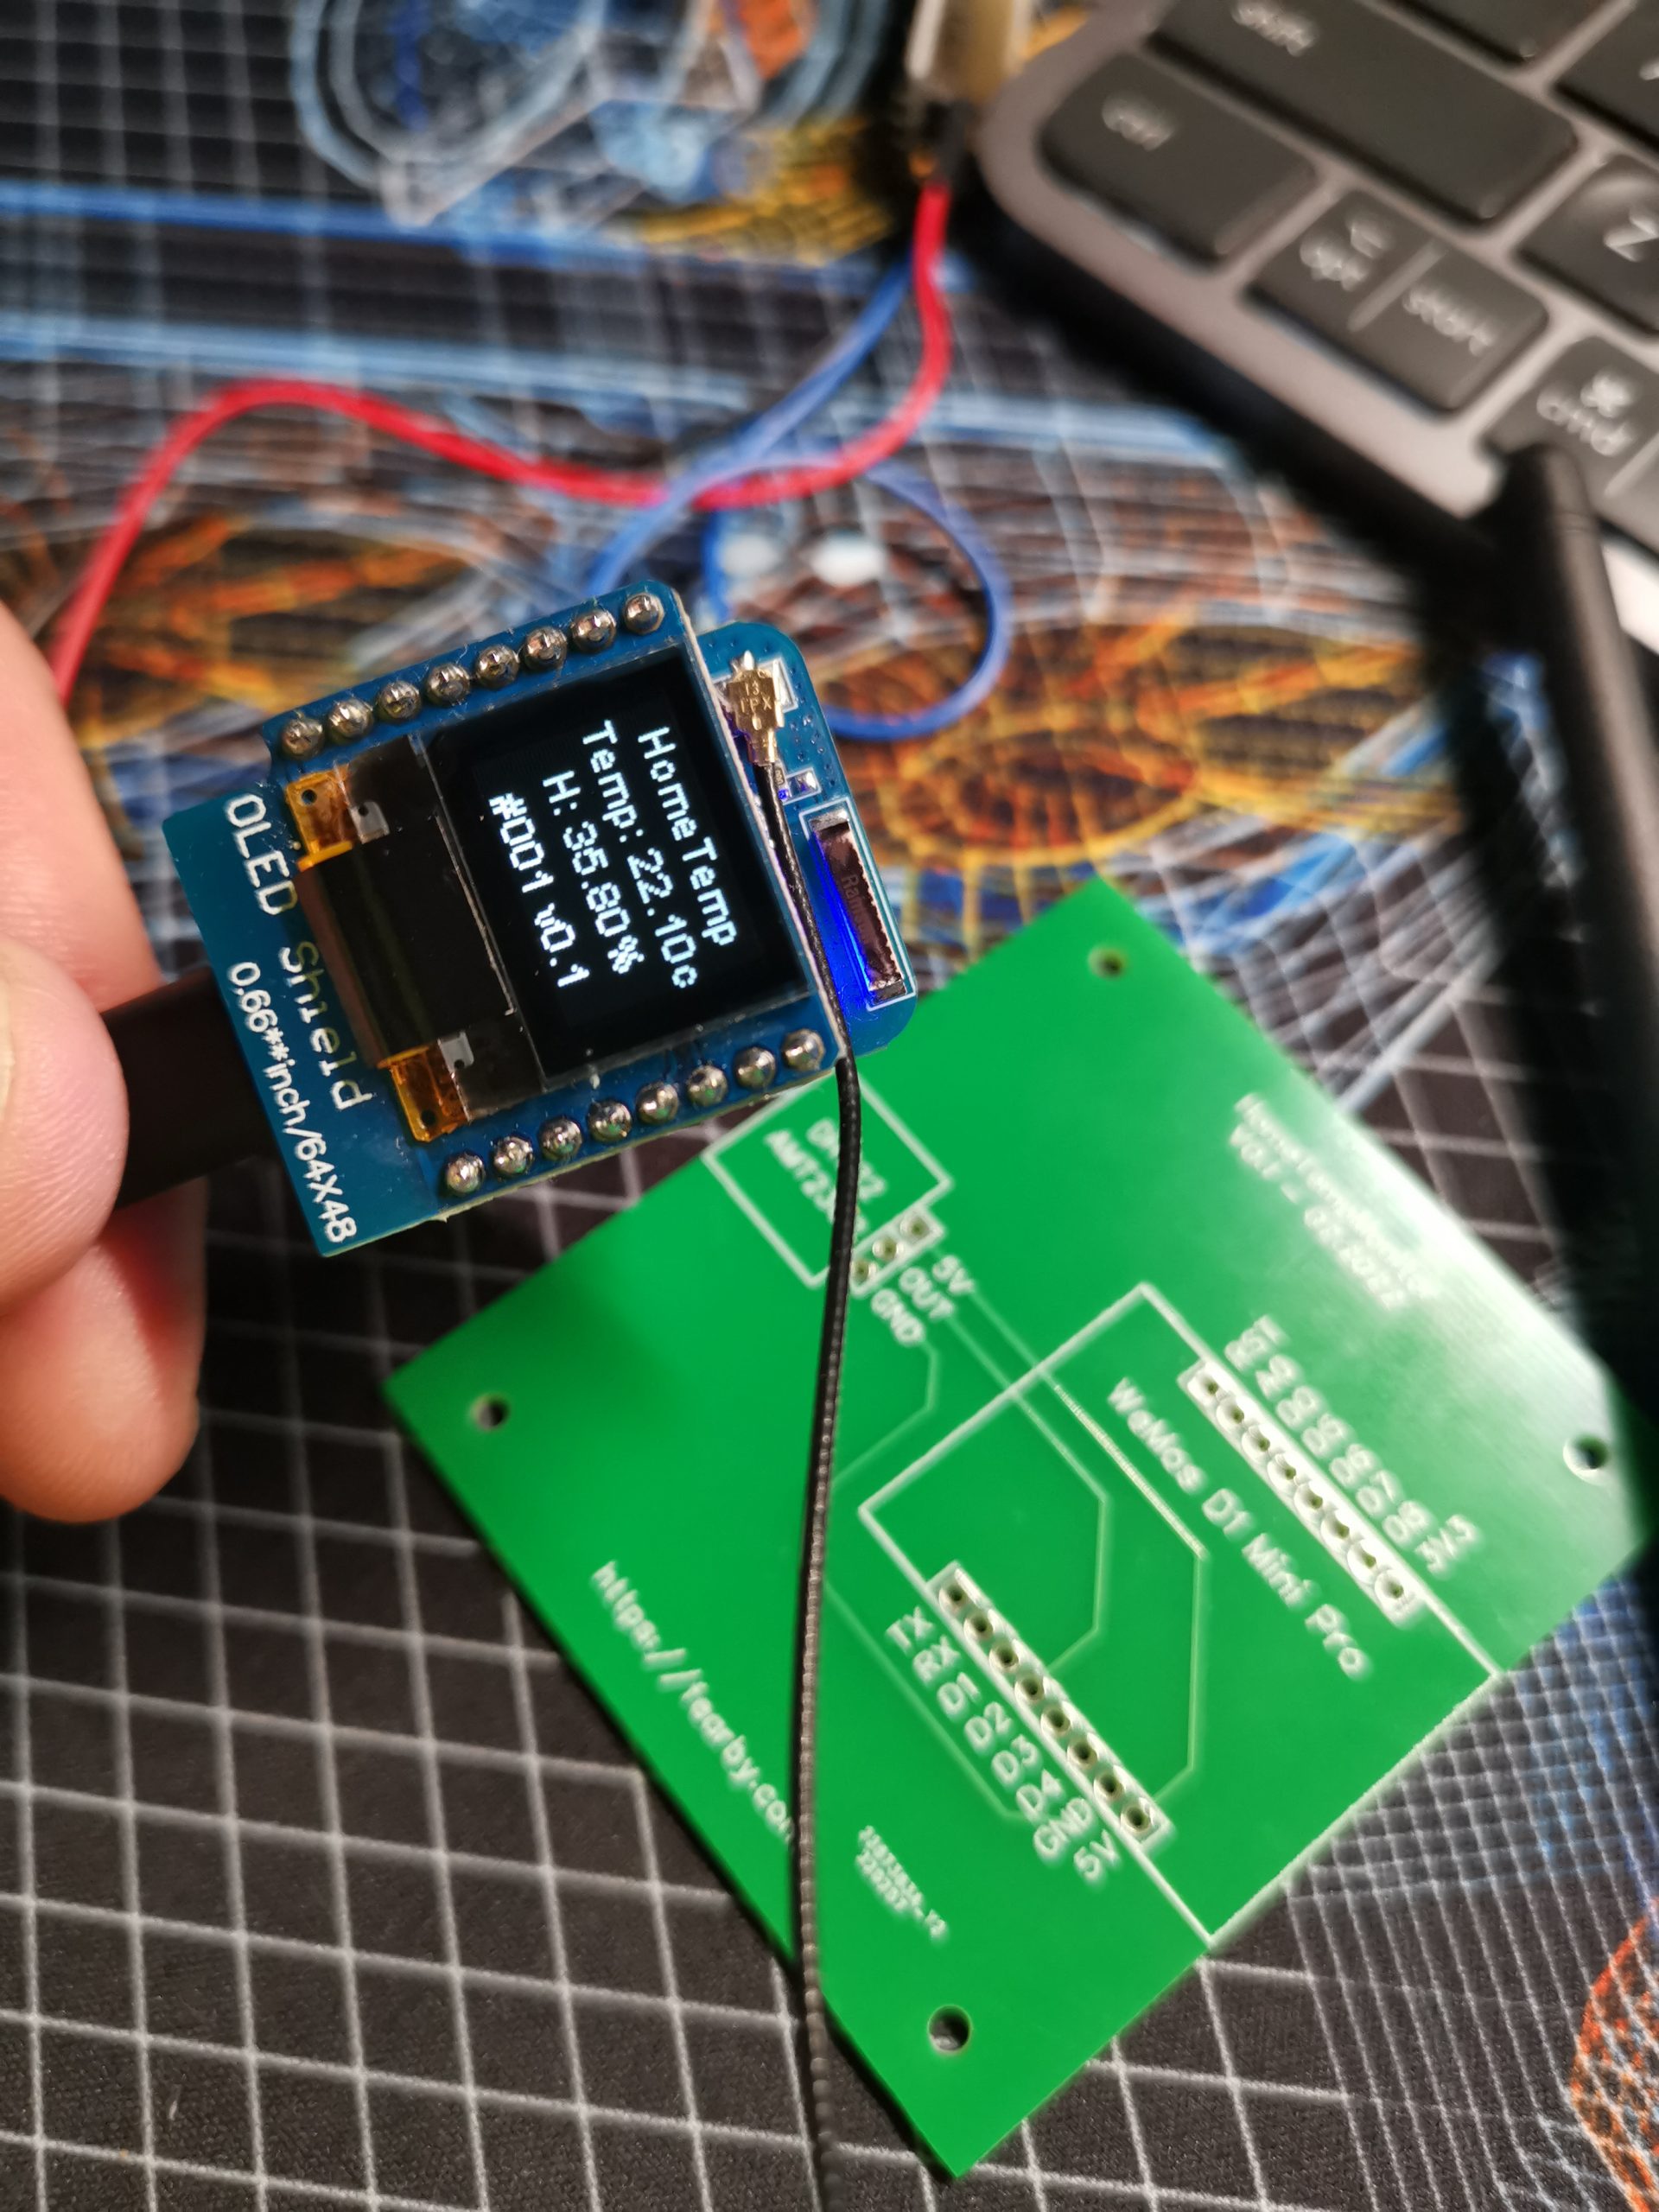
0.66″ OLED Screens
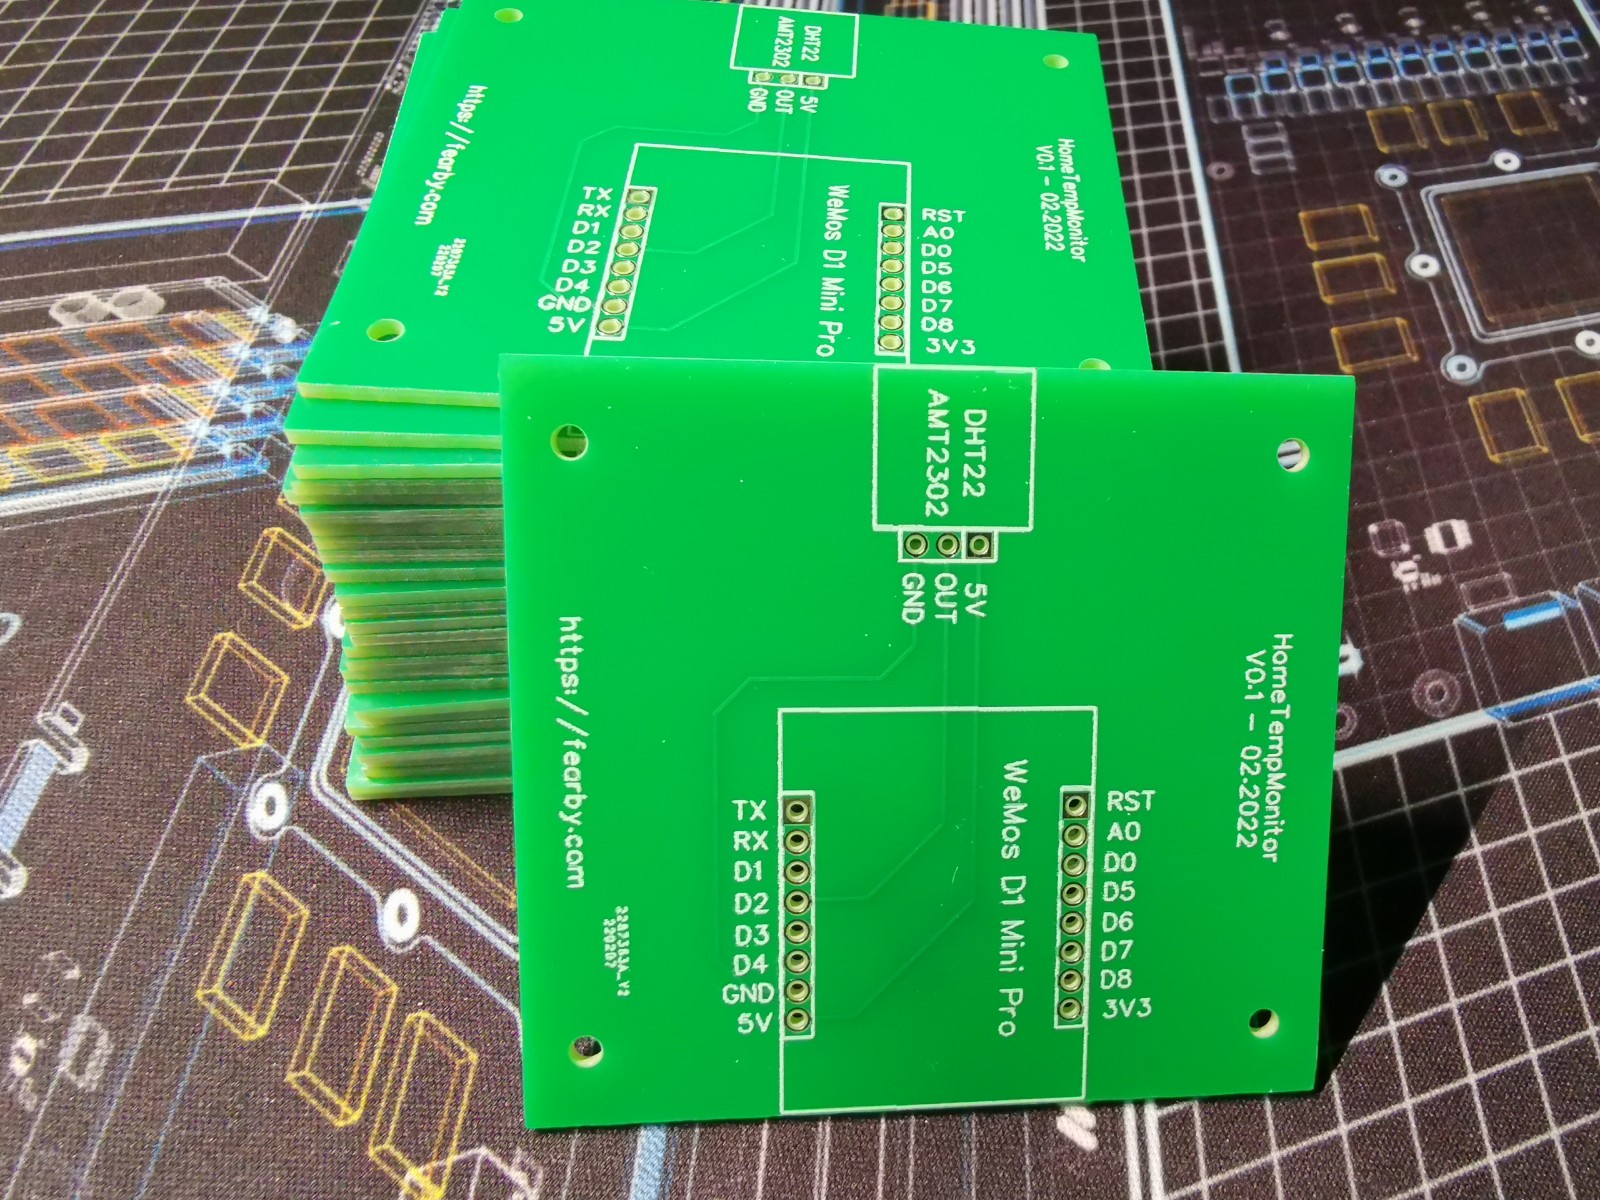
I designed a PCB in Photoshop and had it turned into a PCB via https://www.fiverr.com/syedzamin12. I ordered 30x bloards from https://jlcpcb.com/
The PCB’s fit inside the new enclosure perfectly
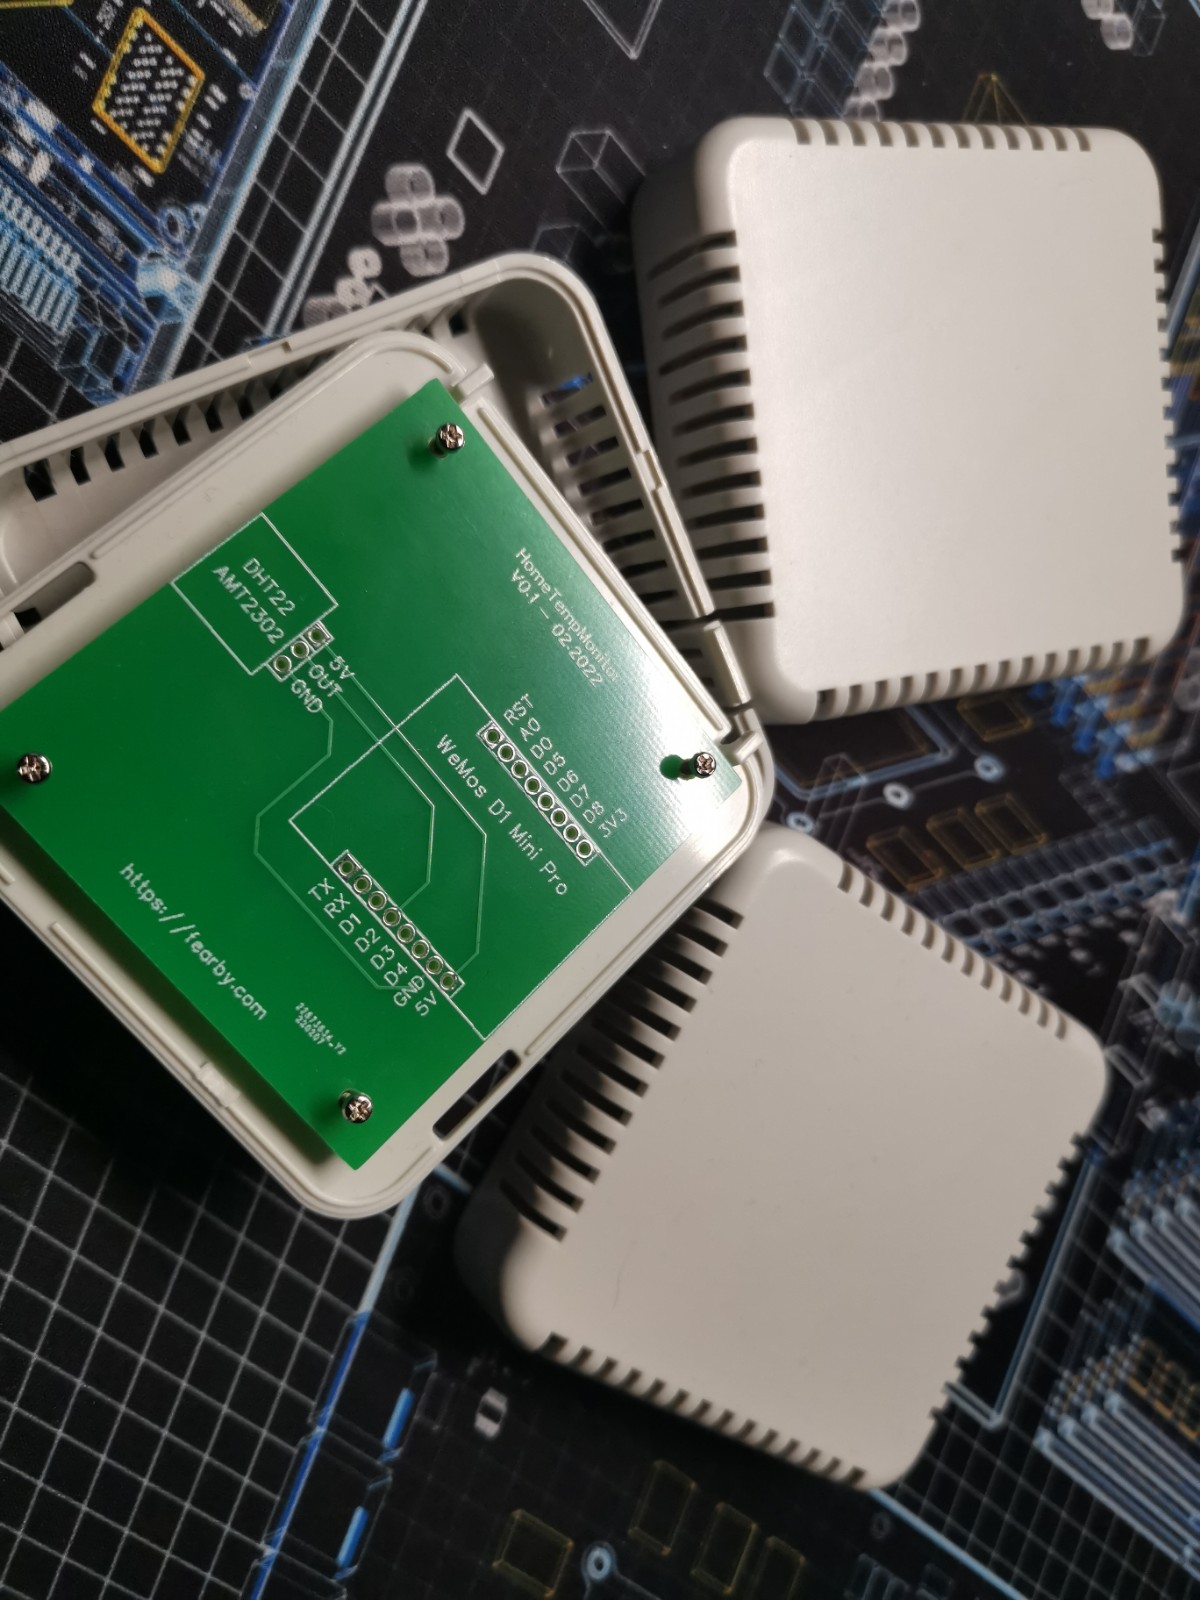
I am waiting for smaller screws to arrive.
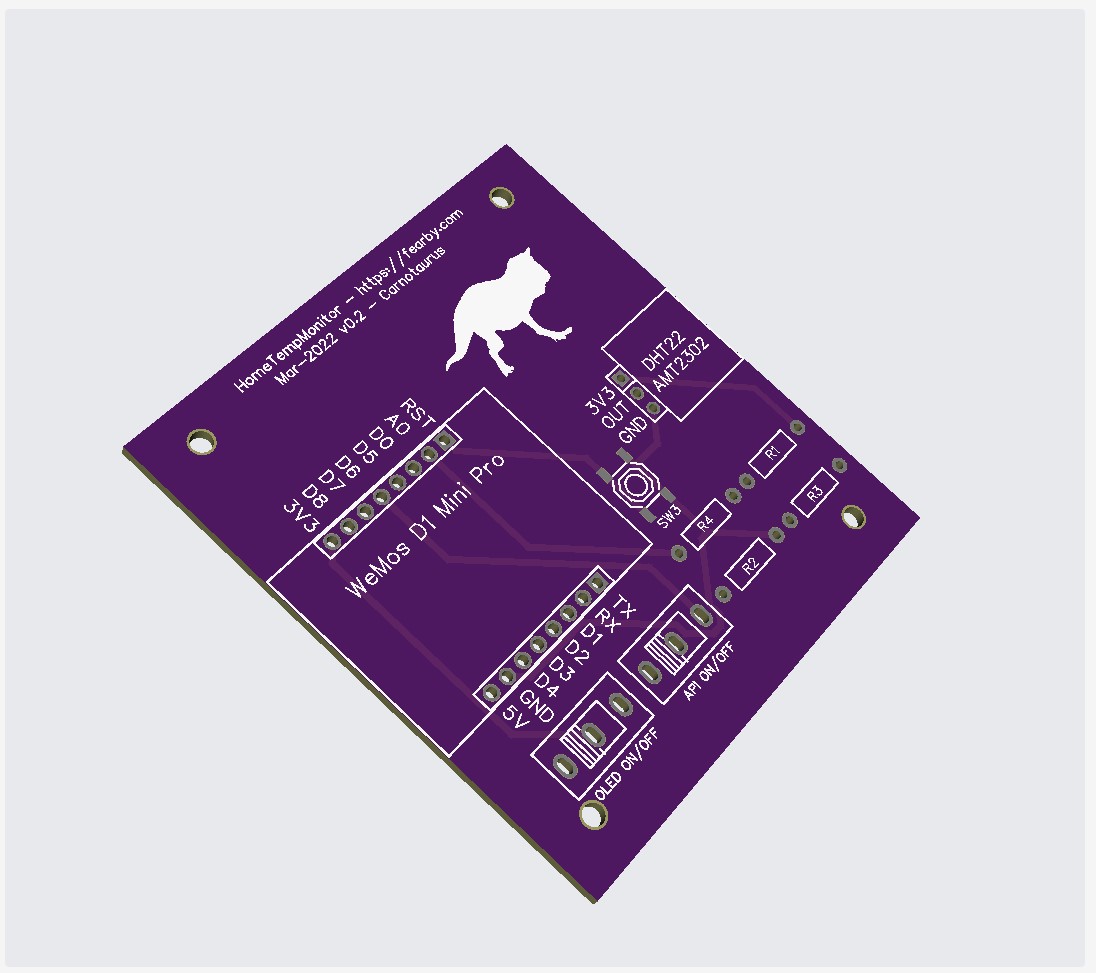
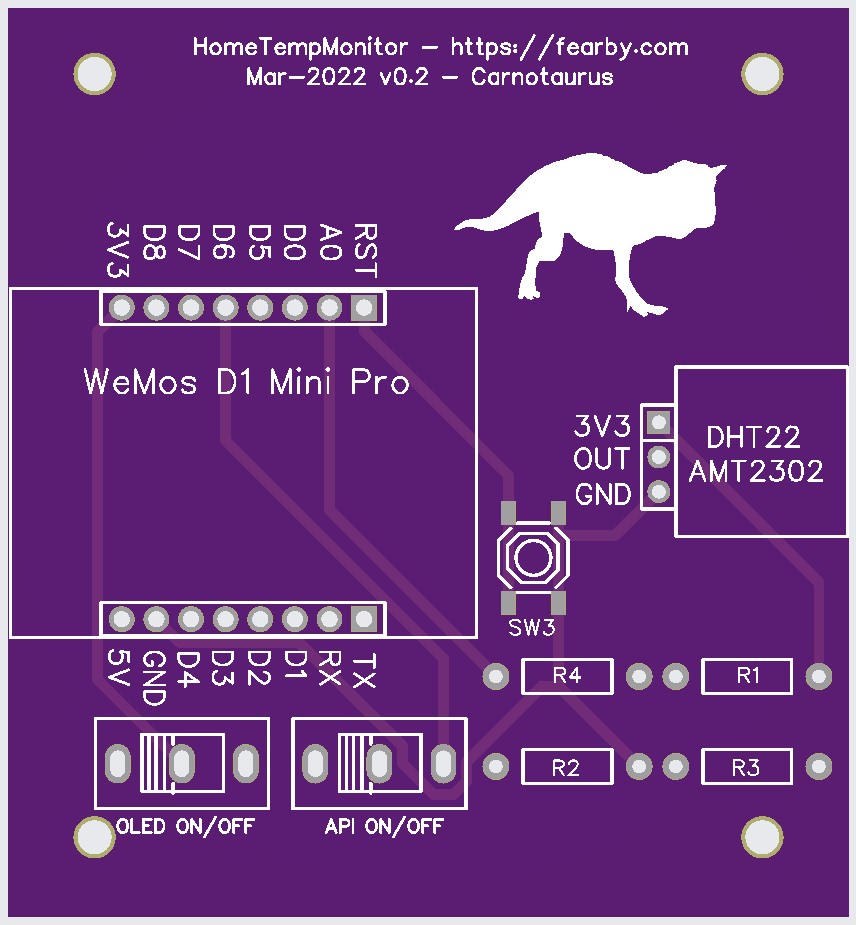
PCB v0.2
I decided to design a board with 2 switches (and a light sensor to turn the screen off at night)
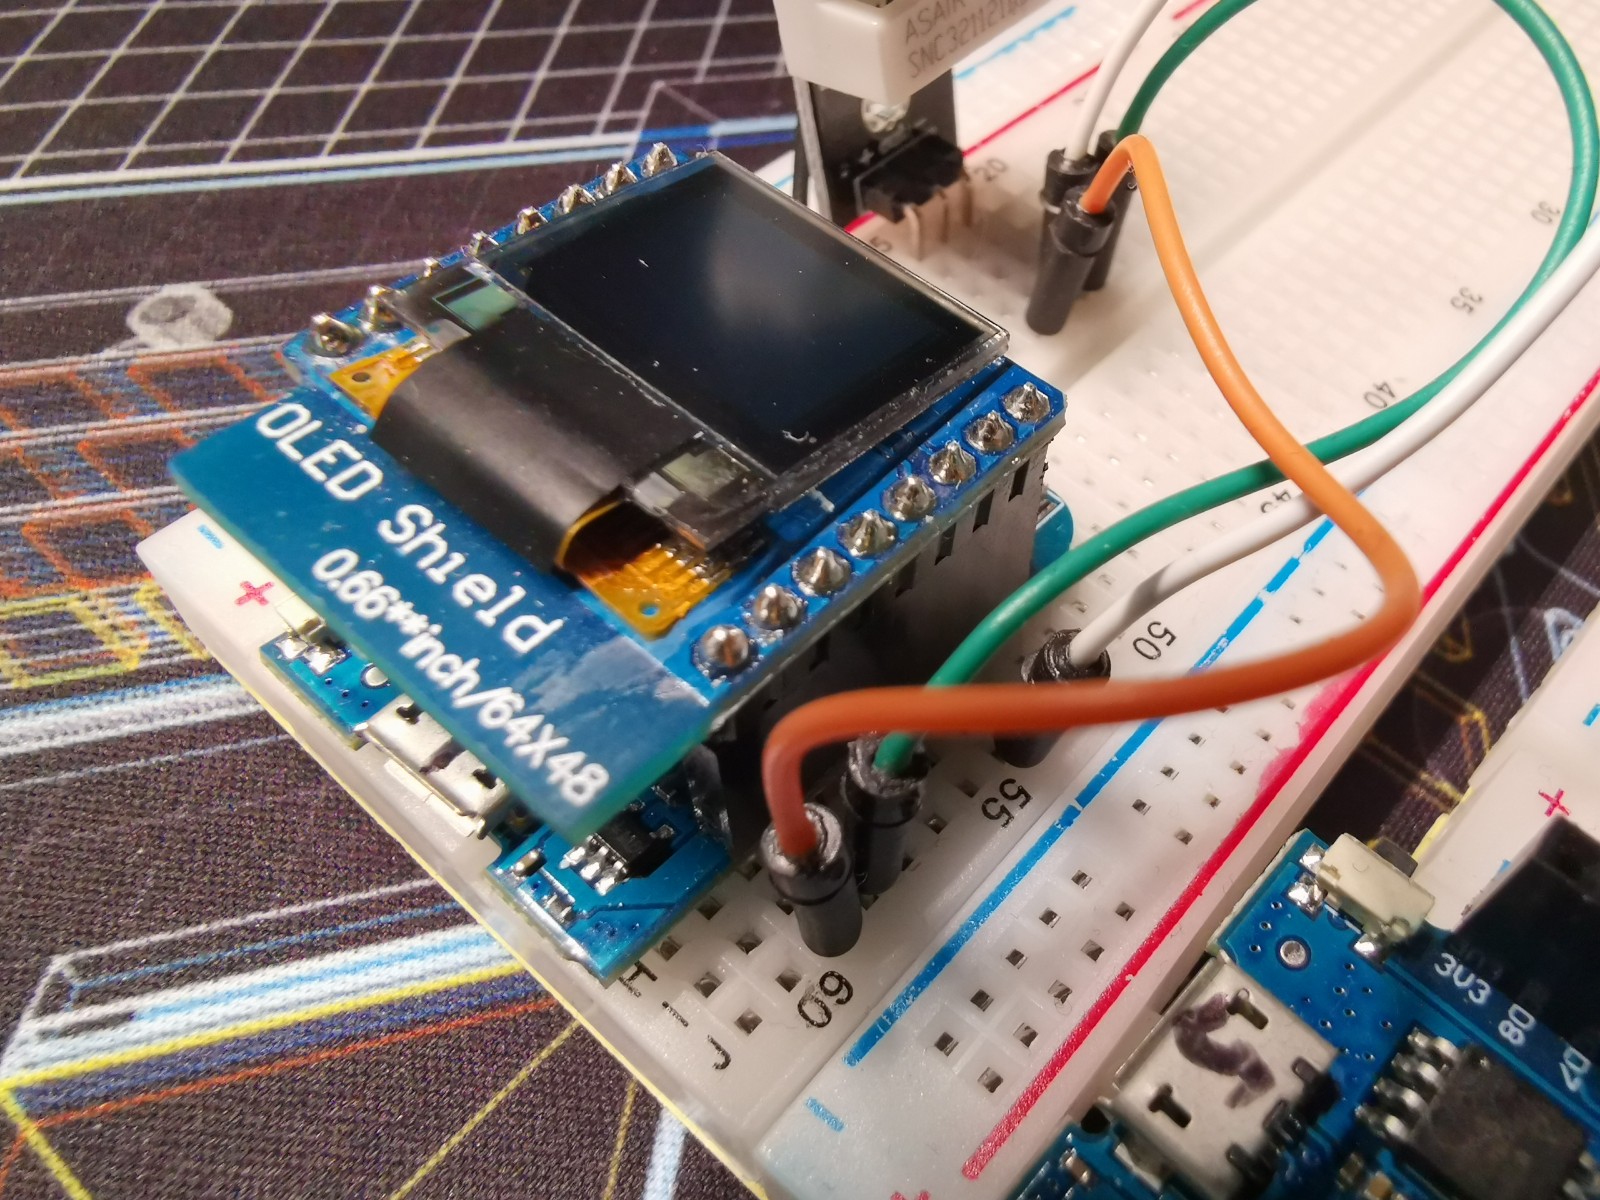
Breadboard Prototype
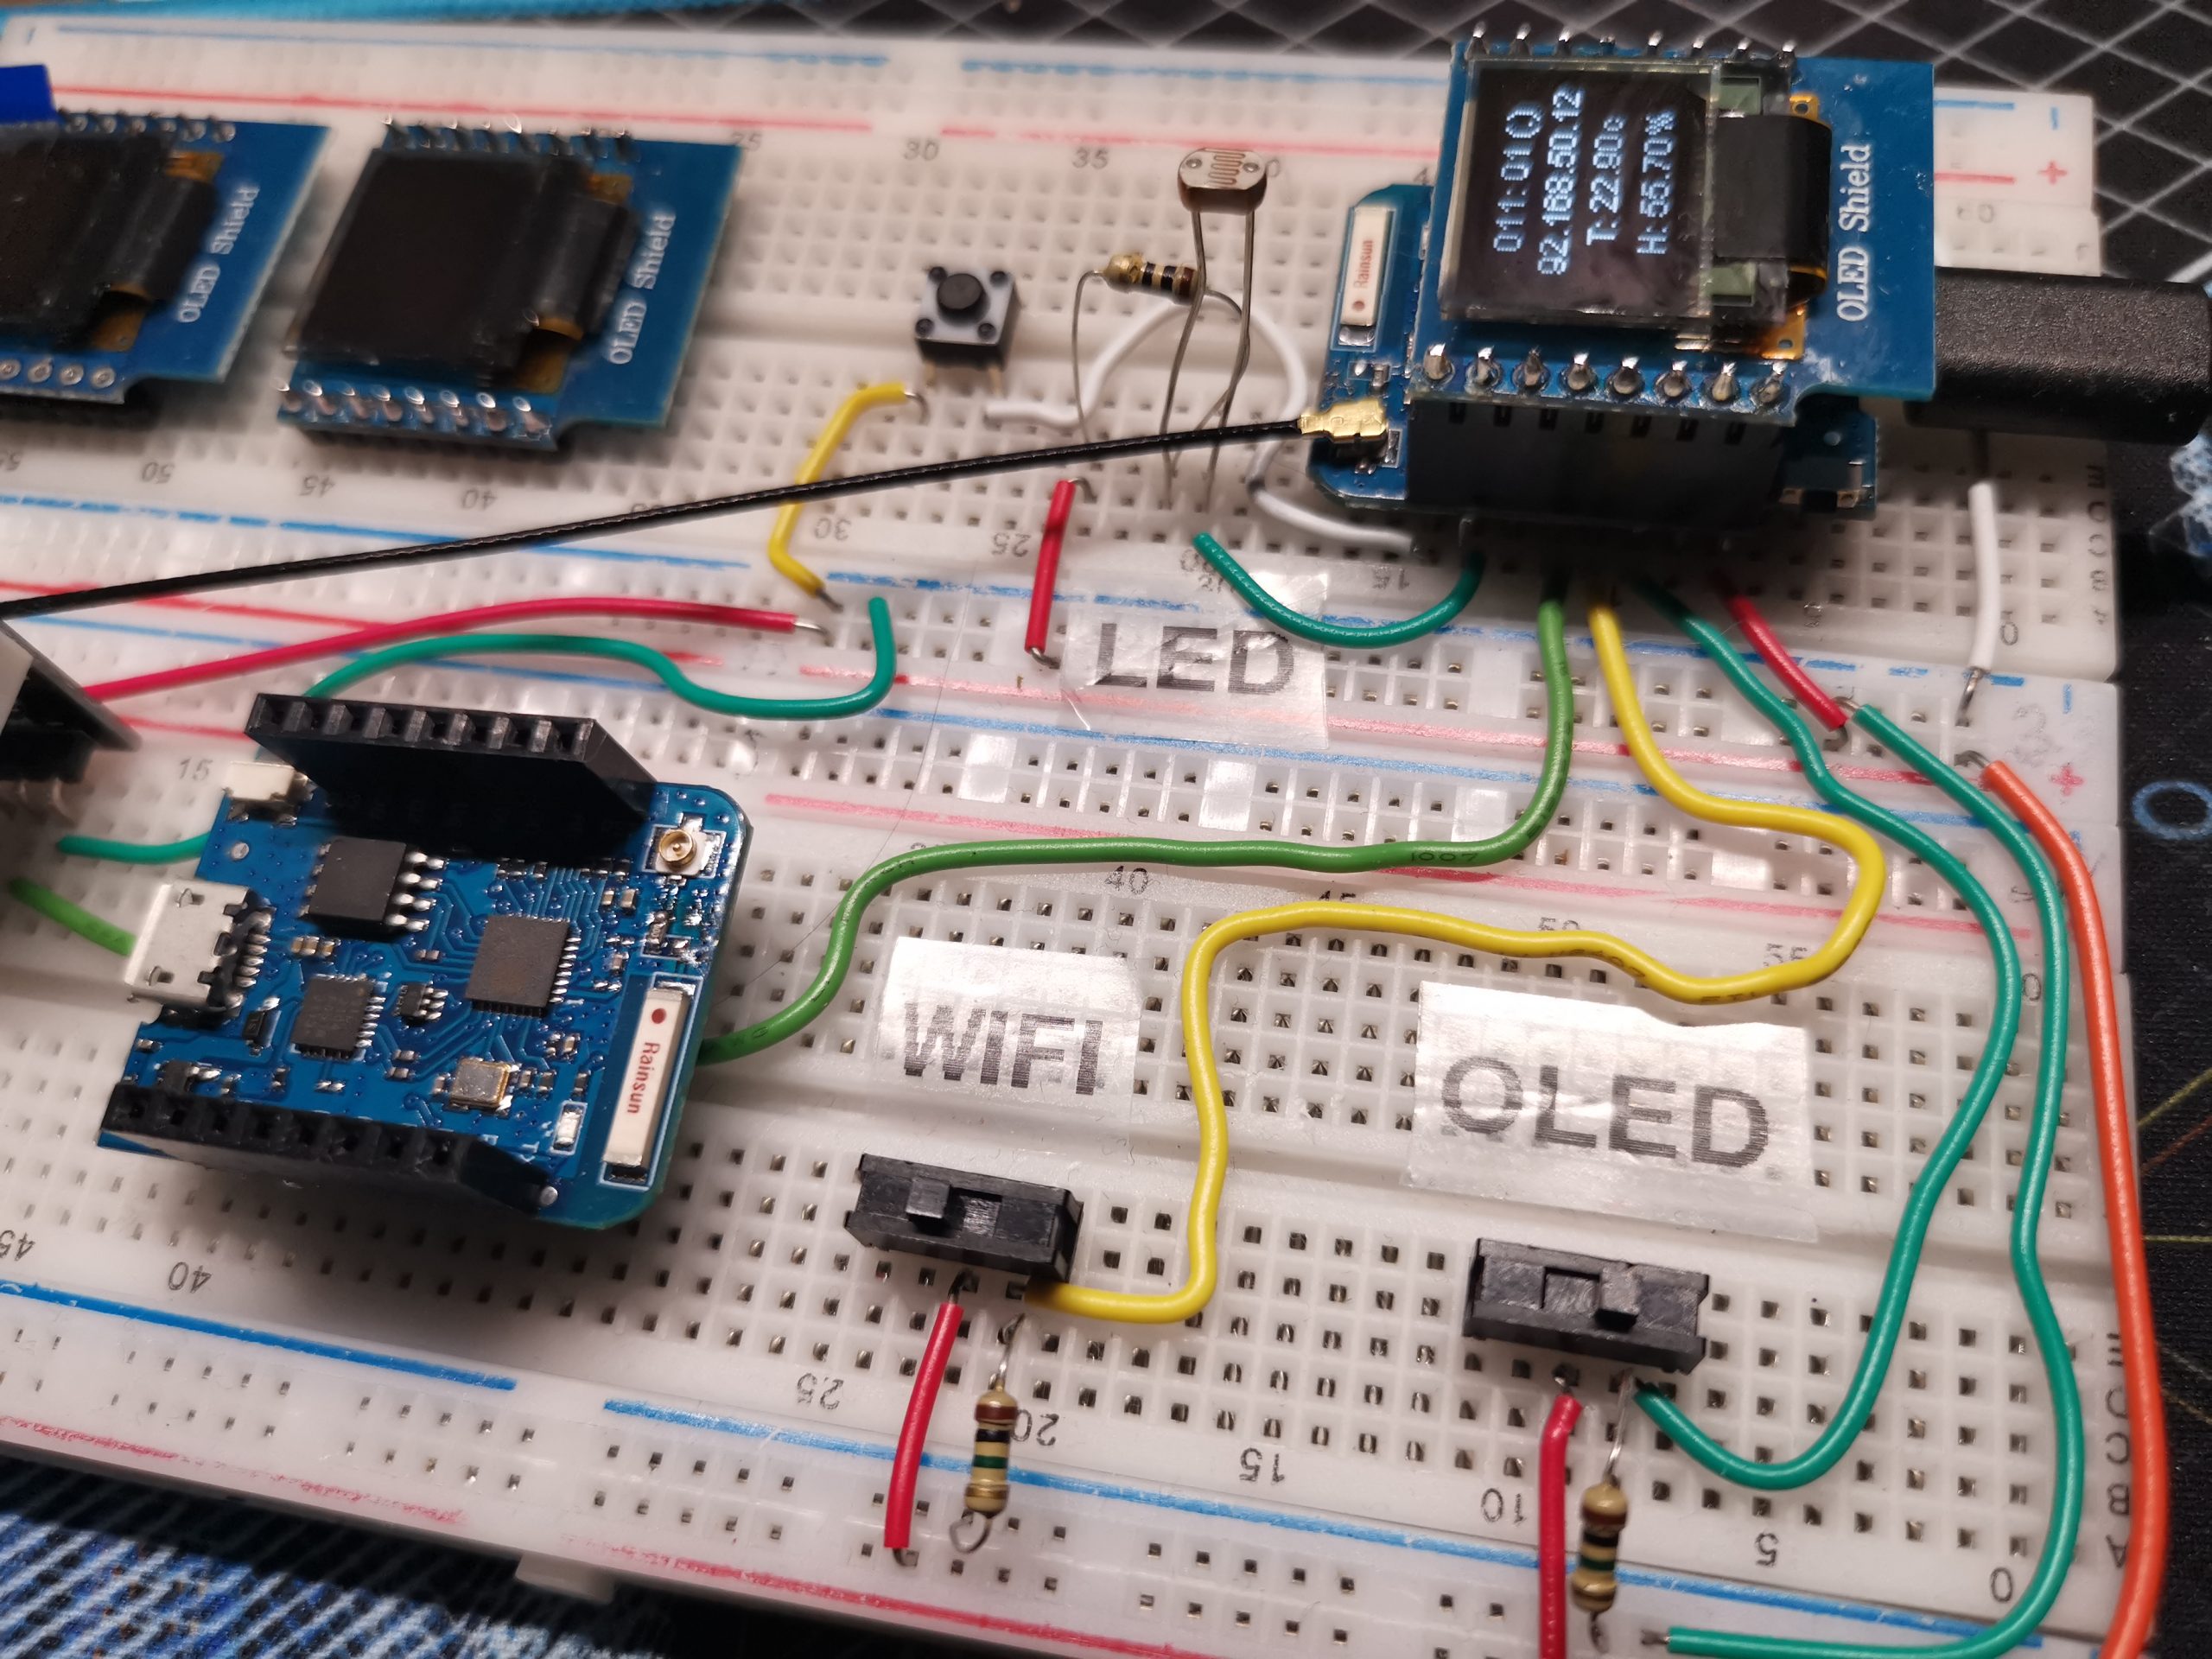
I spoke to https://www.fiverr.com/syedzamin12 and withing 24 hours a PCB was designed
I Layers

This time I will get a purple PCB from JLCPCB and add a dinosaur for my son
Top PCB View
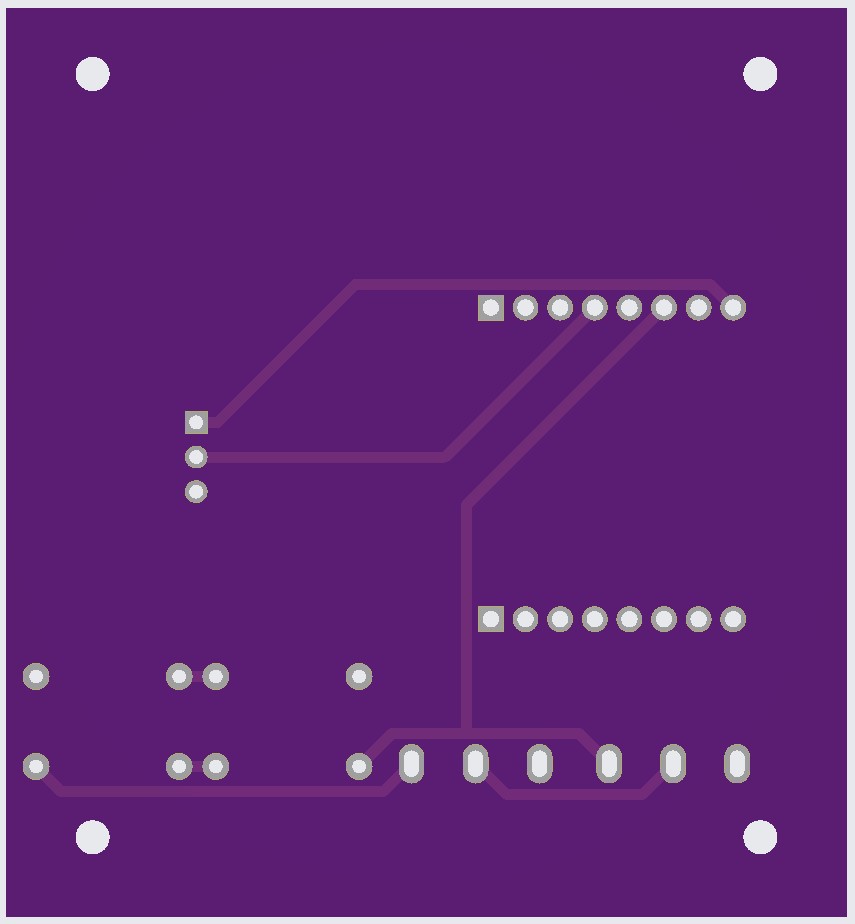
Back PCB View
3D PC View

JLCPCB made the board in 3 days
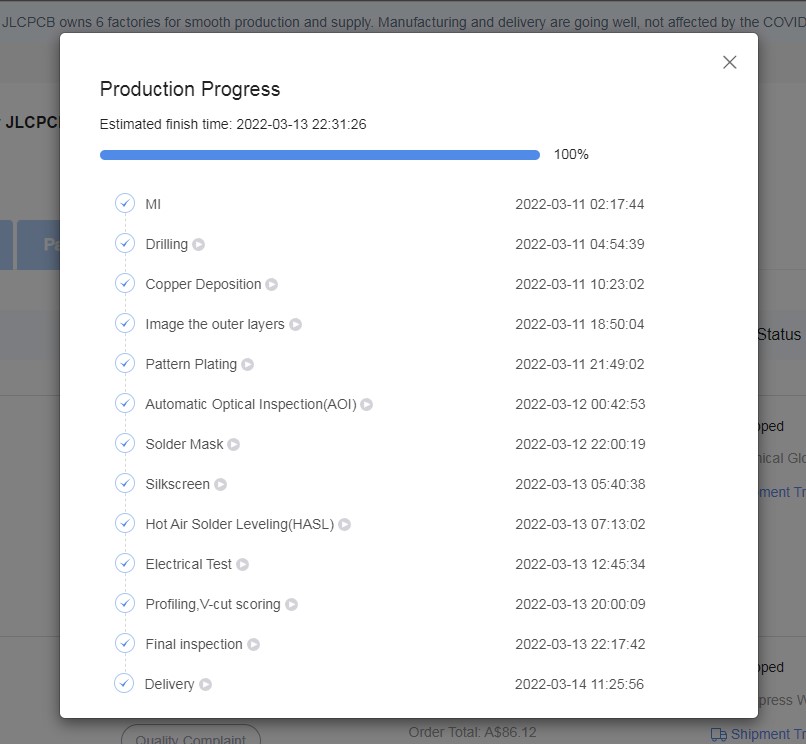
Now I need to wait a few weeks for the new PCB to arrive
Also, I finsihed the firmware for v0.2 PCB
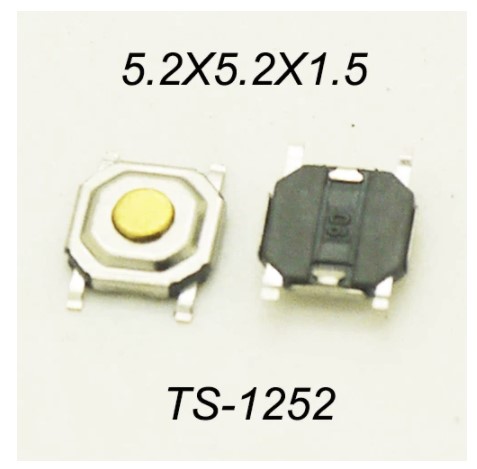
I ordered some switches

I also ordered some reset buttons
I might add a larger 0.96″ OLED screen
Wifi and Static IP Test
I uploaded a skepch to each WeMos and tested the Wifi and Static IP thta was given.
Sketch
#include <ESP8266WiFi.h>
#include <ESP8266HTTPClient.h>


#define SERVER_IP "192.168.0.50"

#ifndef STASSID
#define STASSID "wifi_ssid_name"
#define STAPSK  "************"
#endif

void setup() {

  Serial.begin(115200);

  Serial.println();
  Serial.println();
  Serial.println();

  WiFi.begin(STASSID, STAPSK);

  while (WiFi.status() != WL_CONNECTED) {
    delay(500);
    Serial.print(".");
  }
  Serial.println("");
  Serial.print("Connected! IP address: ");
  Serial.println(WiFi.localIP());

}

void loop() {
  // wait for WiFi connection
  if ((WiFi.status() == WL_CONNECTED)) {

    WiFiClient client;
    HTTPClient http;

    Serial.print("[HTTP] begin...\n");
    // configure traged server and url
    http.begin(client, "http://" SERVER_IP "/api/v1/test"); //HTTP
    http.addHeader("Content-Type", "application/json");

    Serial.print("[HTTP] POST...\n");
    // start connection and send HTTP header and body
    int httpCode = http.POST("{\"hello\":\"world\"}");

    // httpCode will be negative on error
    if (httpCode > 0) {
      // HTTP header has been send and Server response header has been handled
      Serial.printf("[HTTP] POST... code: %d\n", httpCode);

      // file found at server
      if (httpCode == HTTP_CODE_OK) {
        const String& payload = http.getString();
        Serial.println("received payload:\n<<");
        Serial.println(payload);
        Serial.println(">>");
      }
    } else {
      Serial.printf("[HTTP] POST... failed, error: %s\n", http.errorToString(httpCode).c_str());
    }

    http.end();
  }

  delay(1000);
}
The Wemos booted, connected to WiFi, set and IP, and tried to post a request to a URL.
........................................................
Connected! IP address: 192.168.0.51
[HTTP] begin...
[HTTP] POST...
[HTTP] POST... failed, error: connection failed
The POST failed because my PI API Server was off.
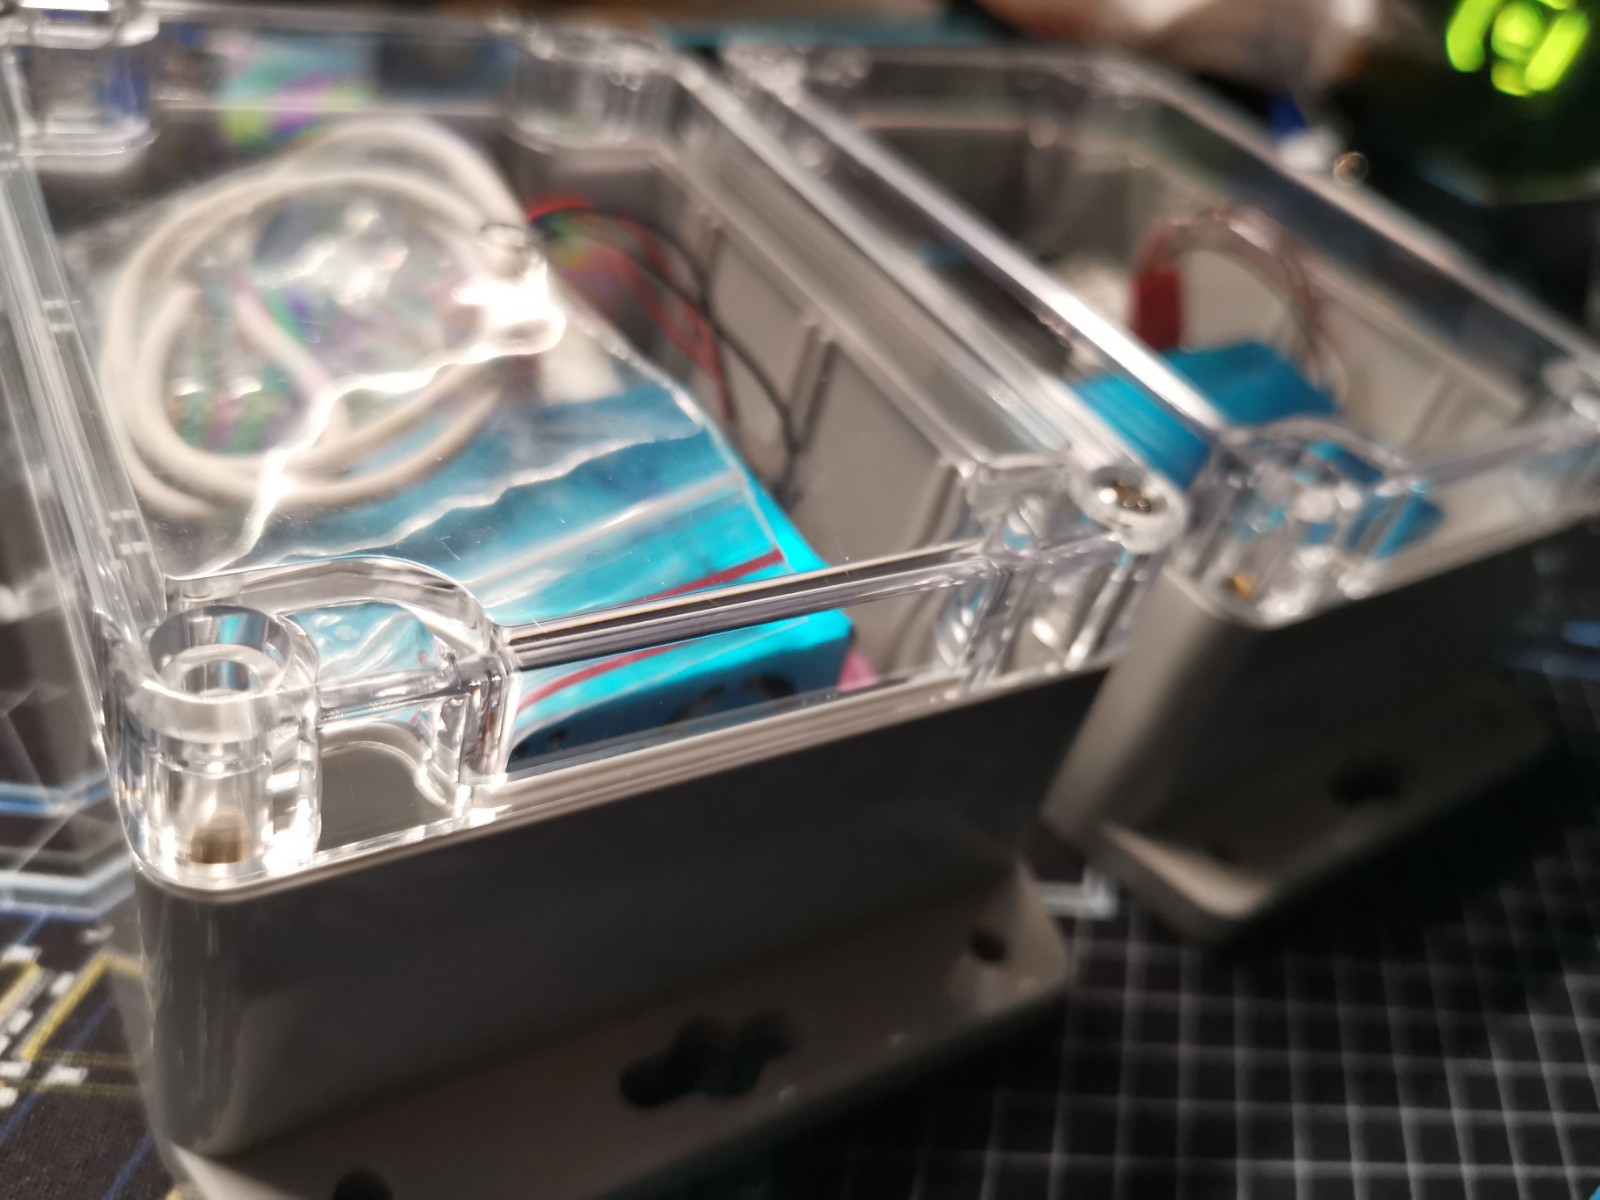
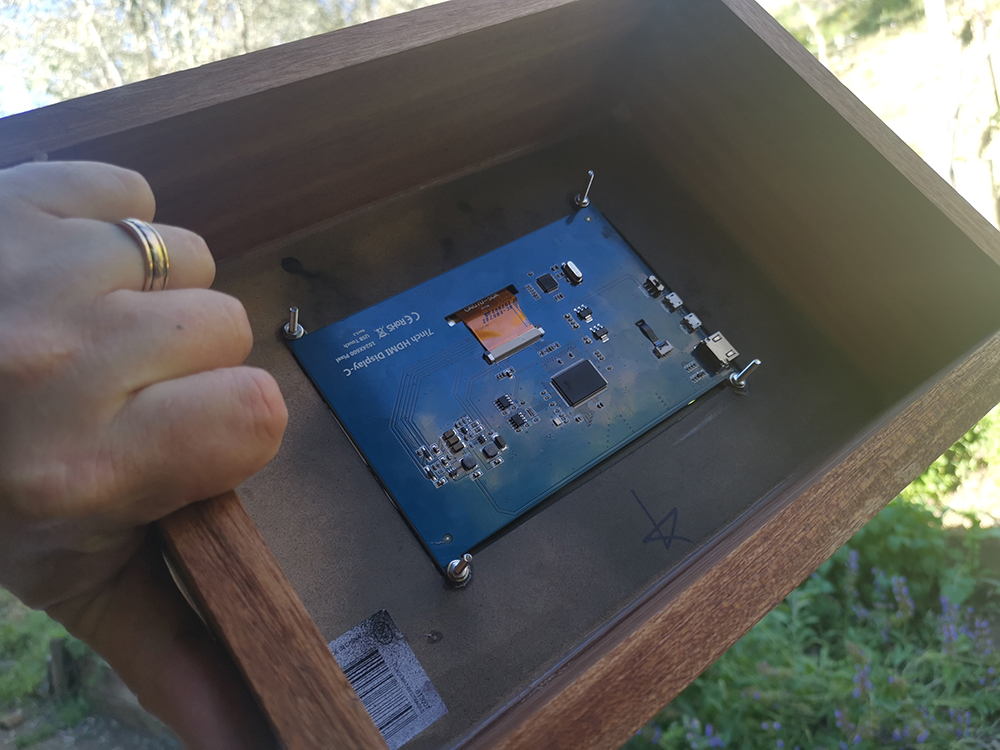
Touch Screen Enclosure
I constructed a basic enclosure and screwed the touch screen to it. I need to find aflexible black scrip to put around the screen and cover up the gaps.
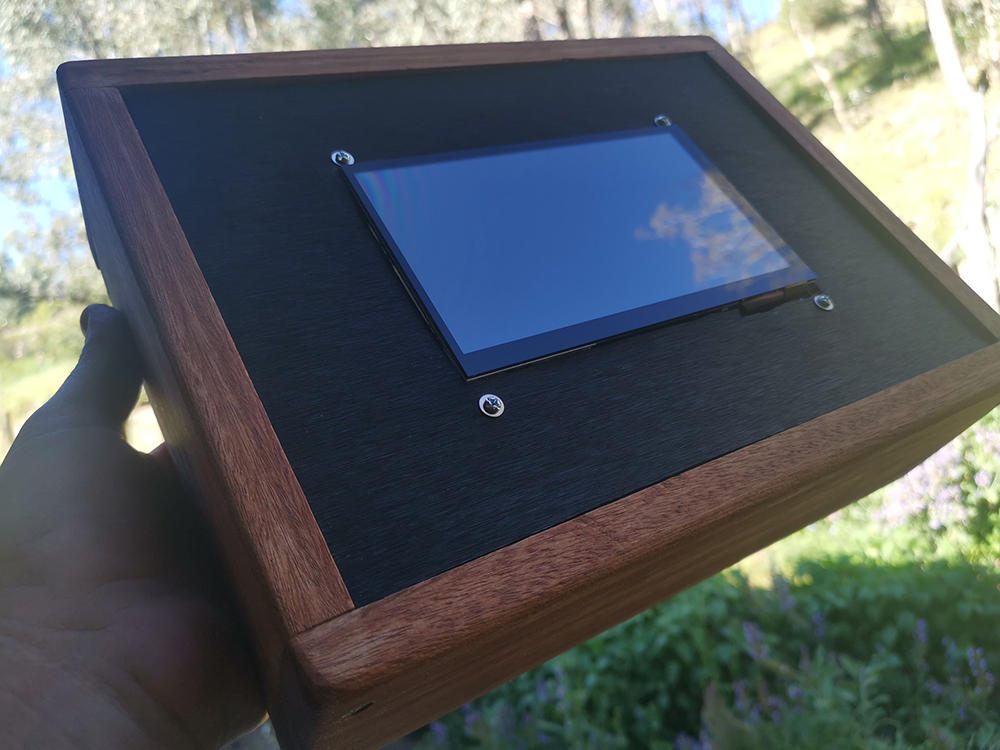
The touch screen has been screwed in.
Over the Air Updating
I followed this guide and having the WeMos updatable over WiFi.
Basically, I installed the libraries “AsyncHTTPSRequest_Generic”, “AsyncElegantOTA”, “AsyncHTTPRequest_Generic”, “ESPAsyncTCP” and “ESPAsyncWebServer”.
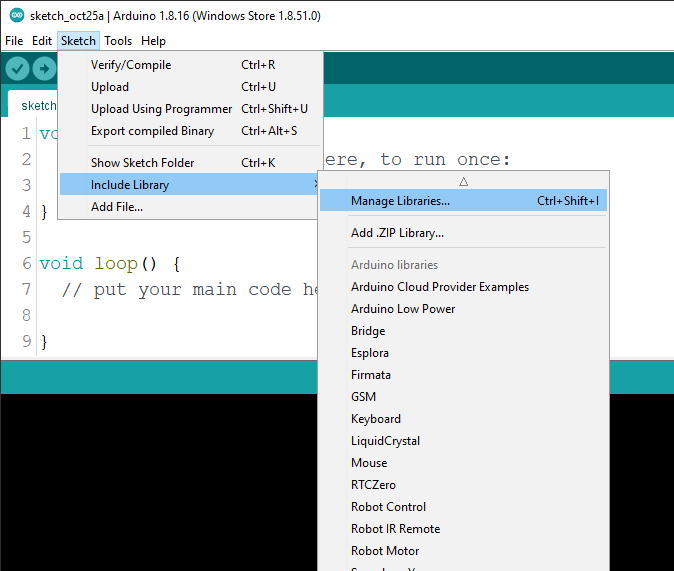
A few libraries would not download so I manually downloaded the code from the GitHub repository from Confirm your account recovery settings (github.com) and then extracted them to my Documents\Arduino\libraries folder.
I then opened the exampel project “AsyncElegantOTA\ESP8266_Async_Demo”
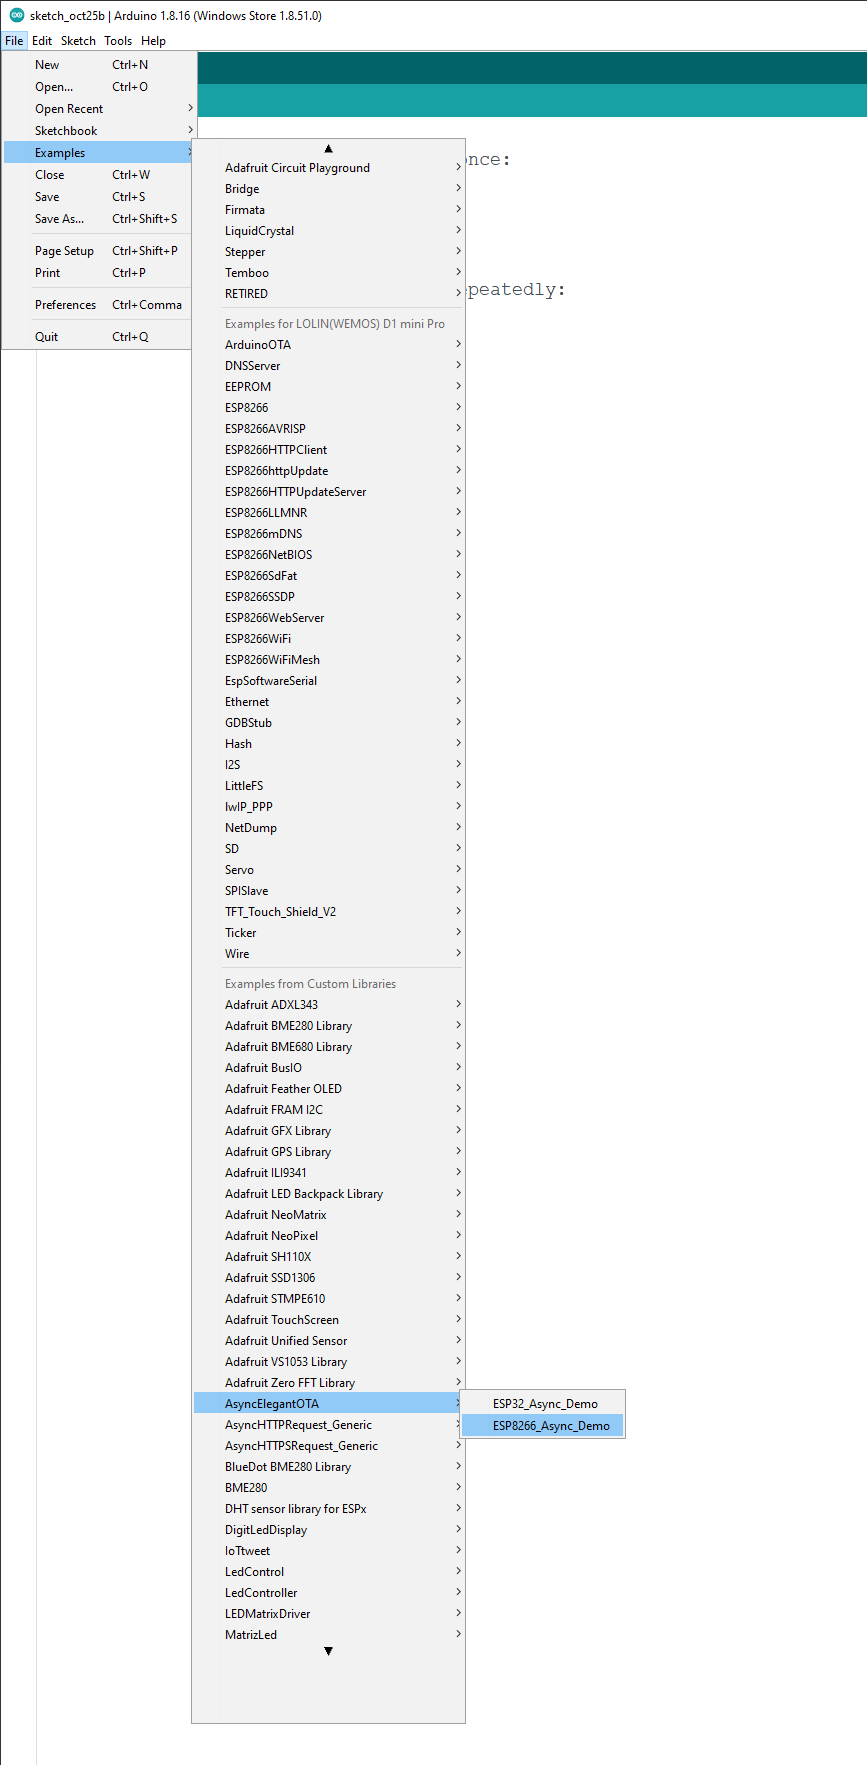
I reviewed the code
#include <ESP8266WiFi.h>
#include <ESPAsyncTCP.h>
#include <ESPAsyncWebServer.h>
#include <AsyncElegantOTA.h>
const char* ssid = "........";
const char* password = "........";
AsyncWebServer server(80);
void setup(void) {
Serial.begin(115200);
WiFi.mode(WIFI_STA);
WiFi.begin(ssid, password);
Serial.println("");
// Wait for connection
while (WiFi.status() != WL_CONNECTED) {
delay(500);
Serial.print(".");
}
Serial.println("");
Serial.print("Connected to ");
Serial.println(ssid);
Serial.print("IP address: ");
Serial.println(WiFi.localIP());
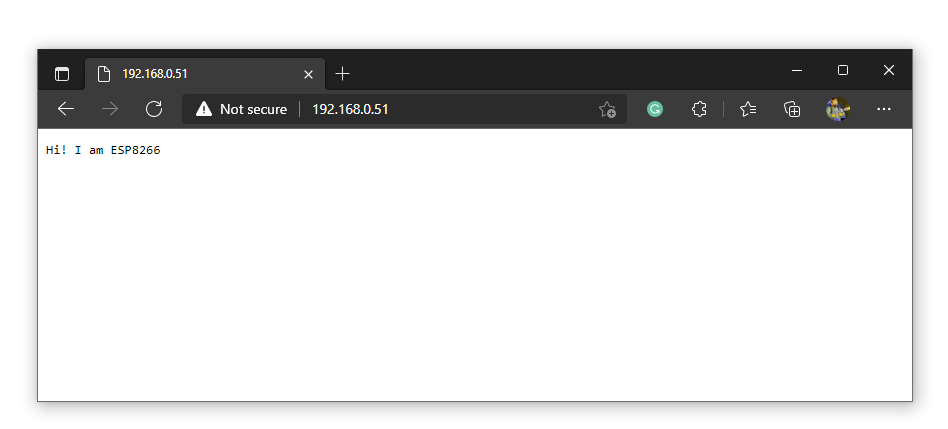
server.on("/", HTTP_GET, [](AsyncWebServerRequest *request) {
request->send(200, "text/plain", "Hi! I am ESP8266.");
});
AsyncElegantOTA.begin(&server); // Start ElegantOTA
server.begin();
Serial.println("HTTP server started");
}
void loop(void) {
AsyncElegantOTA.loop();
}I added my Wifi SSID and password, saved the project and compiled a the code and wrote it to my WeMos Mini D1
I added LED Blink Code
void setup(void) {
  ...
  pinMode(LED_BUILTIN, OUTPUT);     // Initialize the LED_BUILTIN pin as an output
  ...
}
void loop(void) {
 ...
  delay(1000);                      // Wait for a second
  digitalWrite(LED_BUILTIN, HIGH);  // Turn the LED off by making the voltage HIGH
  delay(1000);                      // Wait for two seconds (to demonstrate the active low LED)
 ...
}
I compiled and tested the code
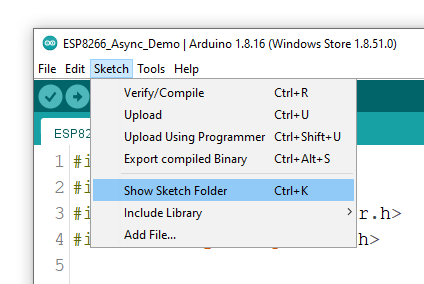
Now to get new code changes to the WeMos Mini via a binary, I edited the code (chnaged the LED blink speed) and clicked “Export Compiled Binary”
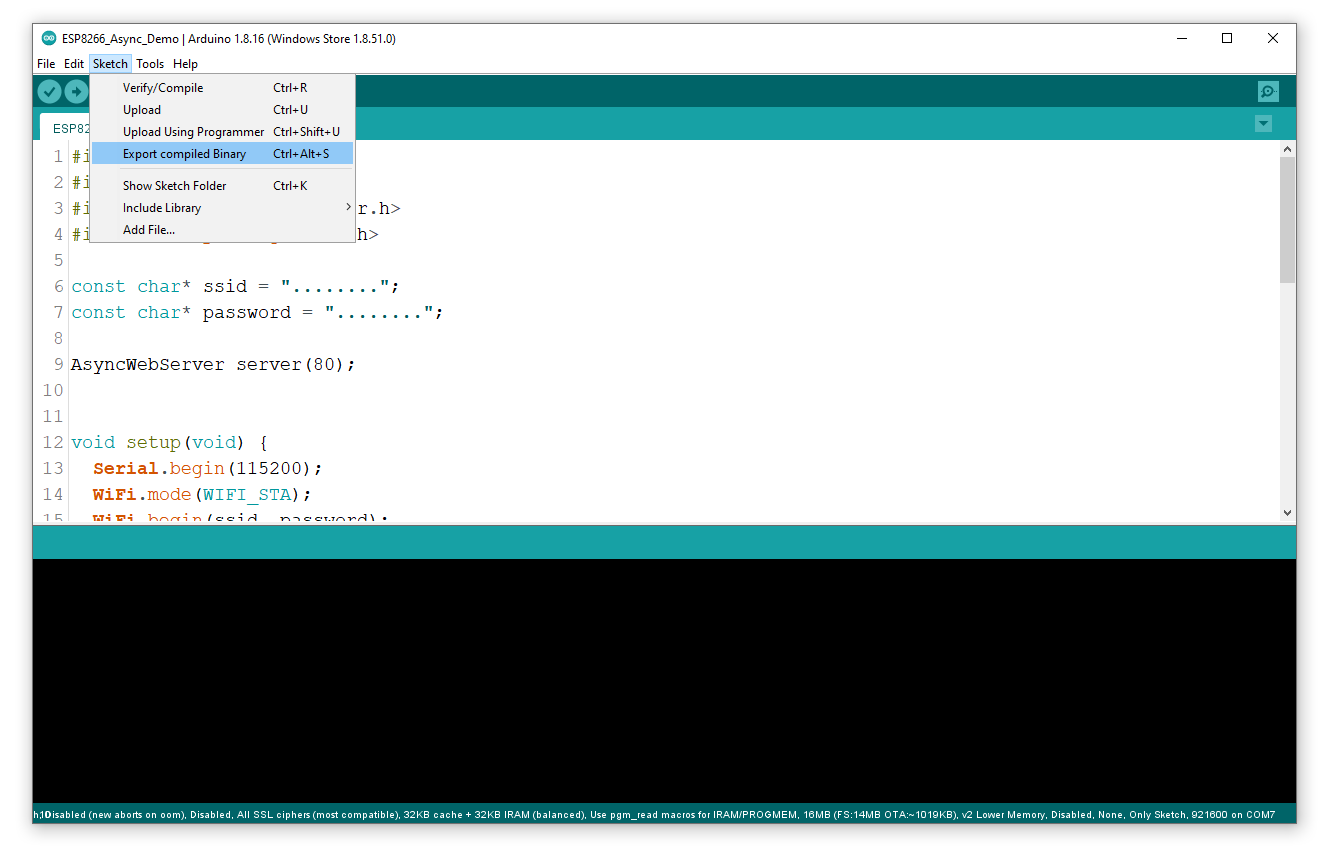
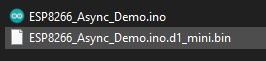
When the binary compiled I opened the Sketch Folder
I could see a bin file.
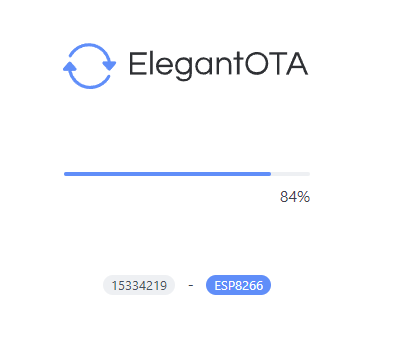
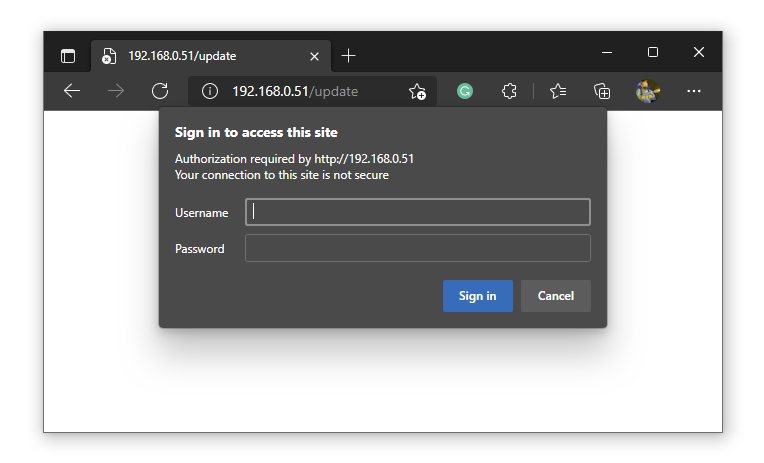
I loaded the http://192.168.0.51/update and selected the bin file.

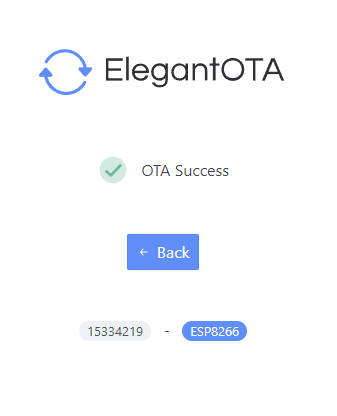
The new firmwaere applied.
I navighated back to http://192.168.0.51
TIP: Ensure you add the starter sketch that has your wifi details in there.
Password Protection
I changed the code to add a basic passeord on access ad on OTA update
#include <ESP8266WiFi.h>
#include <ESPAsyncTCP.h>
#include <ESPAsyncWebServer.h>
#include <AsyncElegantOTA.h>
//Saved Wifi Credentials (Research Encruption Later or store in FRAM Module?
const char* ssid = "your-wifi-ssid";
const char* password = "********";
//Credentials for the regular user to access "http://{ip}:{port}/"
const char* http_username = "user";
const char* http_password = "********";
//Credentials for the admin user to access "http://{ip}:{port}/update/"
const char* http_username_admin = "admin";
const char* http_password_admin = "********";
//Define the Web Server Object
AsyncWebServer server(80);
void setup(void) {
Serial.begin(115200); //Serial Mode (Debug)
WiFi.mode(WIFI_STA); //Client Mode
WiFi.begin(ssid, password); //Connect to Wifi
Serial.println("");
pinMode(LED_BUILTIN, OUTPUT); // Initialize the LED_BUILTIN pin as an output
// Wait for connection
while (WiFi.status() != WL_CONNECTED) {
delay(500);
Serial.print(".");
}
Serial.println("");
Serial.print("Connected to ");
Serial.println(ssid);
Serial.print("IP address: ");
Serial.println(WiFi.localIP());
// HTTP basic authentication on the root webpage
server.on("/", HTTP_GET, [](AsyncWebServerRequest *request){
if(!request->authenticate(http_username, http_password))
return request->requestAuthentication();
request->send(200, "text/plain", "Login Success! ESP8266 #001.");
});
//This is the OTA Login
AsyncElegantOTA.begin(&server, http_username_admin, http_password_admin);
server.begin();
Serial.println("HTTP server started");
}
void loop(void) {
AsyncElegantOTA.loop();
digitalWrite(LED_BUILTIN, LOW);
delay(8000); // Wait for a second
digitalWrite(LED_BUILTIN, HIGH); // Turn the LED off by making the voltage HIGH
delay(8000); // Wait for two seconds (to demonstrate the active low LED)
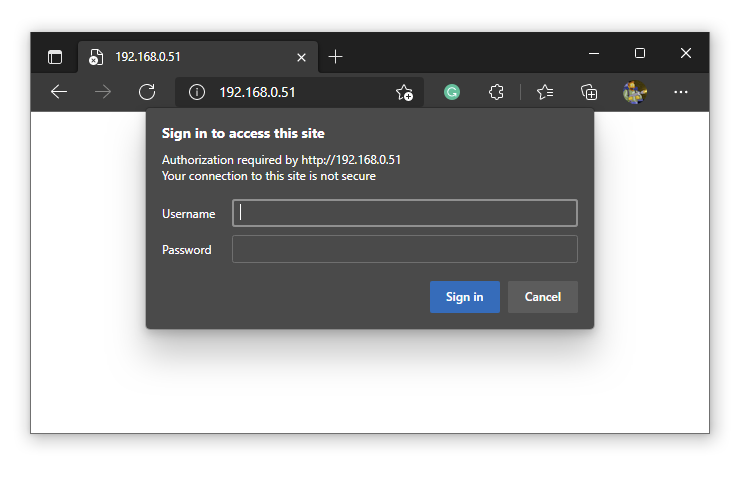
}Password prompt for users accessing the device.
Password prompt for admin users accessing the device.
Later I will research encrypting the password and storing it on SPIFFS partition or a FRAM memory module.
Adding the DHT22 Sensors
I received my paxckl of DHT22 Sensors (AM
Specifications
- Operating Voltage: 3.5V to 5.5V
- Operating current: 0.3mA (measuring) 60uA (standby)
- Output: Serial data
- Temperature Range: 0°C to 50°C
- Humidity Range: 20% to 90%
- Resolution: Temperature and Humidity both are 16-bit
- Accuracy: ±1°C and ±1%
I wired it up based on this Adafruit post.
DHT22 and Basic API Working
I will not bore you with hours or coding and debugging so here is my code thta
- Allows the WeMos D1 Mini Prpo (ESP8266) to connect to WiFi
- Web Server (with stats)
- Admin page for OTA updates
- Password Prpotects the main web folder and OTA admin page
- Reading DHT Sensor values
- Debug to serial Toggle
- LED activity Toggle
- Json Serialization
- POST DHT22 data to an API on the Raspberry PI
- Placeholder for API return values
- Automatically posts data to the API ever 10 seconds
- etc
Here is the work in progress ESP8288 Code
#include <ESP8266WiFi.h> // https://github.com/esp8266/Arduino/blob/master/libraries/ESP8266WiFi/src/ESP8266WiFi.h
#include <ESPAsyncTCP.h> // https://github.com/me-no-dev/ESPAsyncTCP
#include <ESPAsyncWebServer.h> // https://github.com/me-no-dev/ESPAsyncWebServer
#include <AsyncElegantOTA.h> // https://github.com/ayushsharma82/AsyncElegantOTA
#include <ArduinoJson.h> // https://github.com/bblanchon/ArduinoJson
#include "DHT.h" // https://github.com/adafruit/DHT-sensor-library
// Written by ladyada, public domain
//Todo: Add Authentication
//Fyi: https://api.gov.au/standards/national_api_standards/index.html
#include <ESP8266HTTPClient.h> //POST Client
//Firmware Stats
bool bDEBUG = true; //true = debug to Serial output
//false = no serial output
//Port Number for the Web Server
int WEB_PORT_NUMBER = 1337;
//Post Sensor Data Delay
int POST_DATA_DELAY = 10000;
bool bLEDS = true; //true = Flash LED
//false = NO LED's
//Device Variables
String sDeviceName = "ESP-002";
String sFirmwareVersion = "v0.1.0";
String sFirmwareDate = "27/10/2021 23:00";
String POST_SERVER_IP = "192.168.0.50";
String POST_SERVER_PORT = "";
String POST_ENDPOINT = "/api/v1/test";
//Saved Wifi Credentials (Research Encryption later and store in FRAM Module?
const char* ssid = "your_wifi_ssid";
const char* password = "***************";
//Credentials for the regular user to access "http://{ip}:{port}/"
const char* http_username = "user";
const char* http_password = "********";
//Credentials for the admin user to access "http://{ip}:{port}/update/"
const char* http_username_admin = "admin";
const char* http_password_admin = "********";
//Define the Web Server Object
AsyncWebServer server(WEB_PORT_NUMBER); //Feel free to chnage the port number
//DHT22 Temp Sensor
#define DHTTYPE DHT22 // DHT 22 (AM2302), AM2321
#define DHTPIN 5
DHT dht(DHTPIN, DHTTYPE);
//Common Variables
String thisBoard = ARDUINO_BOARD;
String sHumidity = "";
String sTempC = "";
String sTempF = "";
String sJSON = "{ }";
//DHT Variables
float h;
float t;
float f;
float hif;
float hic;
void setup(void) {
//Turn On PIN
pinMode(LED_BUILTIN, OUTPUT); // Initialize the LED_BUILTIN pin as an output
//Serial Mode (Debug)
//Debug LED Flash
if (bLEDS) {
digitalWrite(LED_BUILTIN, LOW);
delay(100); // Wait for a second
digitalWrite(LED_BUILTIN, HIGH); // Turn the LED off by making the voltage HIGH
delay(100); // Wait for two seconds (to demonstrate the active low LED)
}
if (bDEBUG) Serial.begin(115200);
if (bDEBUG) Serial.println("Serial Begin");
//Debug LED Flash
if (bLEDS) {
digitalWrite(LED_BUILTIN, LOW);
delay(100); // Wait for a second
digitalWrite(LED_BUILTIN, HIGH); // Turn the LED off by making the voltage HIGH
delay(100); // Wait for two seconds (to demonstrate the active low LED)
}
if (bDEBUG) Serial.println("Wifi Setup");
if (bDEBUG) Serial.println(" - Client Mode");
WiFi.mode(WIFI_STA); //Client Mode
if (bDEBUG) Serial.print(" - Connecting to Wifi: " + String(ssid));
WiFi.begin(ssid, password); //Connect to Wifi
if (bDEBUG) Serial.println("");
// Wait for connection
while (WiFi.status() != WL_CONNECTED) {
delay(500);
if (bDEBUG) Serial.print(".");
}
if (bDEBUG) Serial.println("");
if (bDEBUG) Serial.print("- Connected to ");
if (bDEBUG) Serial.println(ssid);
if (bDEBUG) Serial.print("IP address: ");
if (bDEBUG) Serial.println(WiFi.localIP());
//Debug LED Flash
if (bLEDS) {
digitalWrite(LED_BUILTIN, LOW);
delay(100); // Wait for a second
digitalWrite(LED_BUILTIN, HIGH); // Turn the LED off by making the voltage HIGH
delay(100); // Wait for two seconds (to demonstrate the active low LED)
}
// HTTP basic authentication on the root webpage
server.on("/", HTTP_GET, [](AsyncWebServerRequest *request){
if(!request->authenticate(http_username, http_password))
return request->requestAuthentication();
String sendHtml = "";
sendHtml = sendHtml + "<html>\n";
sendHtml = sendHtml + " <head>\n";
sendHtml = sendHtml + " <title>ESP# 002</title>\n";
sendHtml = sendHtml + " <meta http-equiv=\"refresh\" content=\"5\";>\n";
sendHtml = sendHtml + " </head>\n";
sendHtml = sendHtml + " <body>\n";
sendHtml = sendHtml + " <h1>ESP# 002</h1>\n";
sendHtml = sendHtml + " <u2>Debug</h2>";
sendHtml = sendHtml + " <ul>\n";
sendHtml = sendHtml + " <li>Device Name: " + sDeviceName + " </li>\n";
sendHtml = sendHtml + " <li>Firmware Version: " + sFirmwareVersion + " </li>\n";
sendHtml = sendHtml + " <li>Firmware Date: " + sFirmwareDate + " </li>\n";
sendHtml = sendHtml + " <li>Board: " + thisBoard + " </li>\n";
sendHtml = sendHtml + " <li>Auto Refresh Root: On </li>\n";
sendHtml = sendHtml + " <li>Web Port Number: " + String(WEB_PORT_NUMBER) +" </li>\n";
sendHtml = sendHtml + " <li>Serial Debug: " + String(bDEBUG) +" </li>\n";
sendHtml = sendHtml + " <li>Flash LED's Debug: " + String(bLEDS) +" </li>\n";
sendHtml = sendHtml + " <li>SSID: " + String(ssid) +" </li>\n";
sendHtml = sendHtml + " <li>DHT TYPE: " + String(DHTTYPE) +" </li>\n";
sendHtml = sendHtml + " <li>DHT PIN: " + String(DHTPIN) +" </li>\n";
sendHtml = sendHtml + " <li>POST_DATA_DELAY: " + String(POST_DATA_DELAY) +" </li>\n";
sendHtml = sendHtml + " <li>POST_SERVER_IP: " + String(POST_SERVER_IP) +" </li>\n";
sendHtml = sendHtml + " <li>POST_ENDPOINT: " + String(POST_ENDPOINT) +" </li>\n";
sendHtml = sendHtml + " </ul>\n";
sendHtml = sendHtml + " <u2>Sensor</h2>";
sendHtml = sendHtml + " <ul>\n";
sendHtml = sendHtml + " <li>Humidity: " + sHumidity + "% </li>\n";
sendHtml = sendHtml + " <li>Temp: " + sTempC + "c, " + sTempF + "f. </li>\n";
sendHtml = sendHtml + " <li>Heat Index: " + String(hic) + "c, " + String(hif) + "f.</li>\n";
sendHtml = sendHtml + " </ul>\n";
sendHtml = sendHtml + " <u2>JSON</h2>";
// Allocate the JSON document Object/Memory
// Use https://arduinojson.org/v6/assistant to compute the capacity.
StaticJsonDocument<250> doc;
//JSON Values
doc["Name"] = sDeviceName;
doc["humidity"] = sHumidity;
doc["tempc"] = sTempC;
doc["tempf"] = sTempF;
doc["heatc"] = String(hic);
doc["heatf"] = String(hif);
sJSON = "";
serializeJson(doc, sJSON);
sendHtml = sendHtml + " <ul>" + sJSON + "</ul>\n";
sendHtml = sendHtml + " <u2>Seed</h2>";
long randNumber = random(100000, 1000000);
sendHtml = sendHtml + " <ul>\n";
sendHtml = sendHtml + " <p>" + String(randNumber) + "</p>\n";
sendHtml = sendHtml + " </ul>\n";
sendHtml = sendHtml + " </body>\n";
sendHtml = sendHtml + "</html>\n";
//Send the HTML
request->send(200, "text/html", sendHtml);
});
//This is the OTA Login
AsyncElegantOTA.begin(&server, http_username_admin, http_password_admin);
server.begin();
if (bDEBUG) Serial.println("HTTP server started");
if (bDEBUG) Serial.println("Board: " + thisBoard);
//Setup the DHT22 Object
dht.begin();
}
void loop(void) {
AsyncElegantOTA.loop();
//Debug LED Flash
if (bLEDS) {
digitalWrite(LED_BUILTIN, LOW);
delay(100); // Wait for a second
digitalWrite(LED_BUILTIN, HIGH); // Turn the LED off by making the voltage HIGH
delay(100); // Wait for two seconds (to demonstrate the active low LED)
}
//Display Temp and Humidity Data
h = dht.readHumidity();
t = dht.readTemperature();
f = dht.readTemperature(true);
// Check if any reads failed and exit early (to try again).
if (isnan(h) || isnan(t) || isnan(f)) {
if (bDEBUG) Serial.println(F("Failed to read from DHT sensor!"));
return;
}
hif = dht.computeHeatIndex(f, h); // Compute heat index in Fahrenheit (the default)
hic = dht.computeHeatIndex(t, h, false); // Compute heat index in Celsius (isFahreheit = false)
if (bDEBUG) Serial.print(F("Humidity: "));
if (bDEBUG) Serial.print(h);
if (bDEBUG) Serial.print(F("% Temperature: "));
if (bDEBUG) Serial.print(t);
if (bDEBUG) Serial.print(F("°C "));
if (bDEBUG) Serial.print(f);
if (bDEBUG) Serial.print(F("°F Heat index: "));
if (bDEBUG) Serial.print(hic);
if (bDEBUG) Serial.print(F("°C "));
if (bDEBUG) Serial.print(hif);
if (bDEBUG) Serial.println(F("°F"));
//Save for Page Load
sHumidity = String(h,2);
sTempC = String(t,2);
sTempF = String(f,2);
//Post to Pi API
// Allocate the JSON document Object/Memory
// Use https://arduinojson.org/v6/assistant to compute the capacity.
StaticJsonDocument<250> doc;
//JSON Values
doc["Name"] = sDeviceName;
doc["humidity"] = sHumidity;
doc["tempc"] = sTempC;
doc["tempf"] = sTempF;
doc["heatc"] = String(hic);
doc["heatf"] = String(hif);
sJSON = "";
serializeJson(doc, sJSON);
//Post to API
if (bDEBUG) Serial.println(" -> POST TO API: " + sJSON);
//Test POST
if ((WiFi.status() == WL_CONNECTED)) {
WiFiClient client;
HTTPClient http;
if (bDEBUG) Serial.println(" -> API Endpoint: http://" + POST_SERVER_IP + POST_SERVER_PORT + POST_ENDPOINT);
http.begin(client, "http://" + POST_SERVER_IP + POST_SERVER_PORT + POST_ENDPOINT); //HTTP
if (bDEBUG) Serial.println(" -> addHeader: \"Content-Type\", \"application/json\"");
http.addHeader("Content-Type", "application/json");
// start connection and send HTTP header and body
int httpCode = http.POST(sJSON);
if (bDEBUG) Serial.print(" -> Posted JSON: " + sJSON);
// httpCode will be negative on error
if (httpCode > 0) {
// HTTP header has been send and Server response header has been handled
//See https://api.gov.au/standards/national_api_standards/api-response.html
// Response from Server
if (bDEBUG) Serial.println(" <- Return Code: " + httpCode);
//Get the Payload
const String& payload = http.getString();
if (bDEBUG) Serial.println(" <- Received Payload:");
if (bDEBUG) Serial.println(payload);
if (bDEBUG) Serial.println(" <- Payload (httpcode: 201):");
//Hnadle the HTTP Code
if (httpCode == 200) {
if (bDEBUG) Serial.println(" <- 200: Invalid API Call/Response Code");
if (bDEBUG) Serial.println(" <- " + payload);
}
if (httpCode == 201) {
if (bDEBUG) Serial.println(" <- 201: The resource was created. The Response Location HTTP header SHOULD be returned to indicate where the newly created resource is accessible.");
if (bDEBUG) Serial.println(" <- " + payload);
}
if (httpCode == 202) {
if (bDEBUG) Serial.println(" <- 202: Is used for asynchronous processing to indicate that the server has accepted the request but the result is not available yet. The Response Location HTTP header may be returned to indicate where the created resource will be accessible.");
if (bDEBUG) Serial.println(" <- " + payload);
}
if (httpCode == 400) {
if (bDEBUG) Serial.println(" <- 400: The server cannot process the request (such as malformed request syntax, size too large, invalid request message framing, or deceptive request routing, invalid values in the request) For example, the API requires a numerical identifier and the client sent a text value instead, the server will return this status code.");
if (bDEBUG) Serial.println(" <- " + payload);
}
if (httpCode == 401) {
if (bDEBUG) Serial.println(" <- 401: The request could not be authenticated.");
if (bDEBUG) Serial.println(" <- " + payload);
}
if (httpCode == 403) {
if (bDEBUG) Serial.println(" <- 403: The request was authenticated but is not authorised to access the resource.");
if (bDEBUG) Serial.println(" <- " + payload);
}
if (httpCode == 404) {
if (bDEBUG) Serial.println(" <- 404: The resource was not found.");
if (bDEBUG) Serial.println(" <- " + payload);
}
if (httpCode == 415) {
if (bDEBUG) Serial.println(" <- 415: This status code indicates that the server refuses to accept the request because the content type specified in the request is not supported by the server");
if (bDEBUG) Serial.println(" <- " + payload);
}
if (httpCode == 422) {
if (bDEBUG) Serial.println(" <- 422: This status code indicates that the server received the request but it did not fulfil the requirements of the back end. An example is a mandatory field was not provided in the payload.");
if (bDEBUG) Serial.println(" <- " + payload);
}
if (httpCode == 500) {
if (bDEBUG) Serial.println(" <- 500: An internal server error. The response body may contain error messages.");
if (bDEBUG) Serial.println(" <- " + payload);
}
} else {
if (bDEBUG) Serial.println(" <- Unknown Return Code (ERROR): " + httpCode);
//if (bDEBUG) Serial.printf(" " + http.errorToString(httpCode).c_str());
}
}
if (bDEBUG) Serial.print("\n\n");
delay(POST_DATA_DELAY);
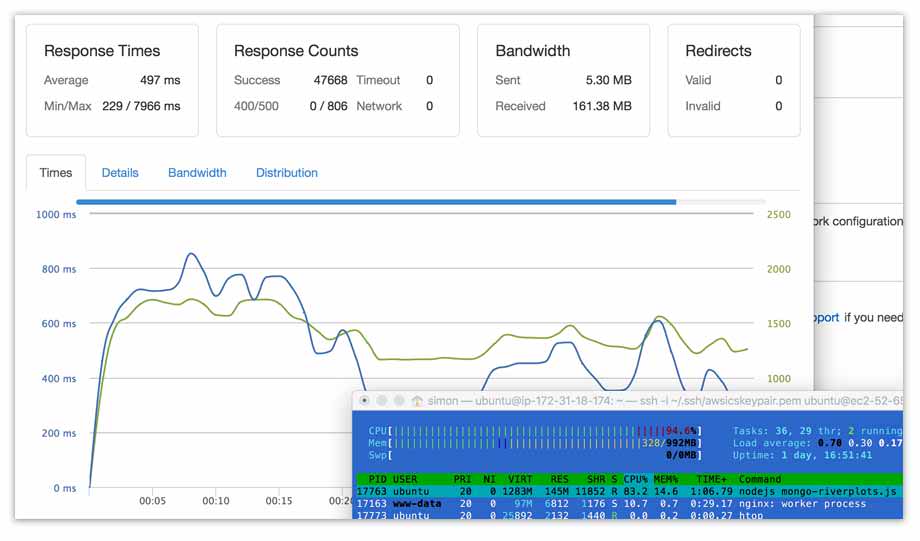
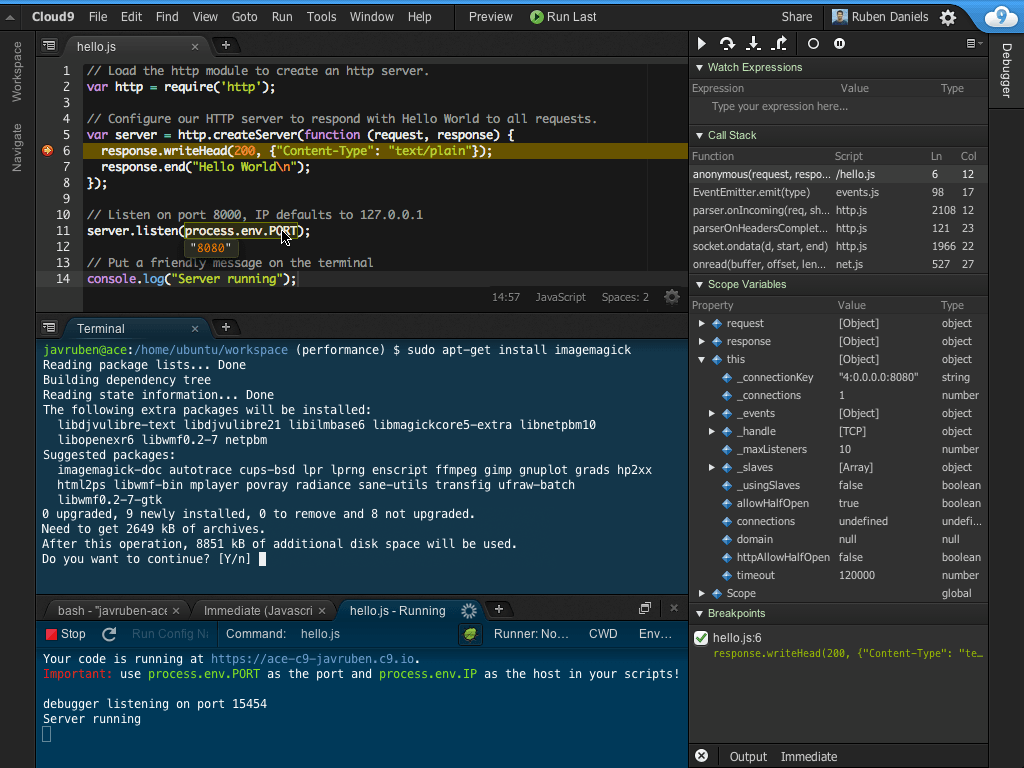
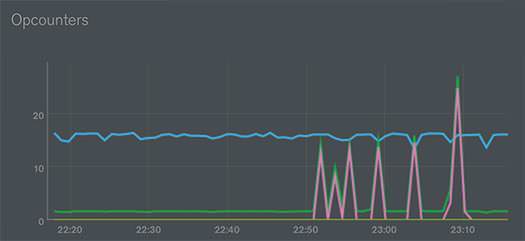
}Here is a screenshot of the Arduino IDE Serial Monitor debugging the code

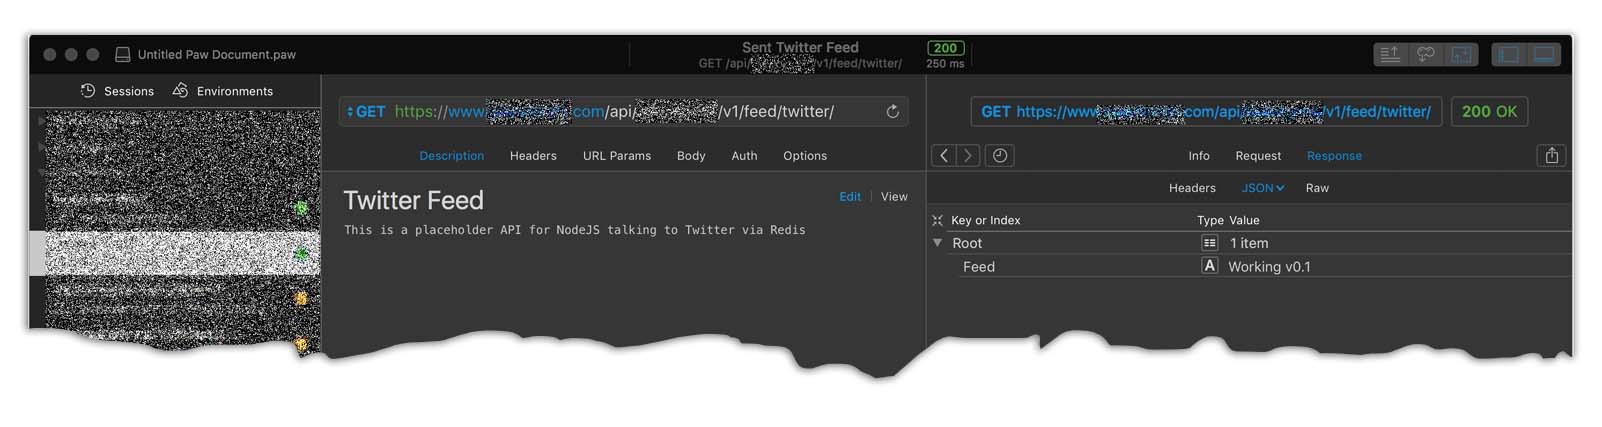
Here is a screenshot of the NodeJS API on the raspberry Pi accepting the POSTed data from the ESP8266
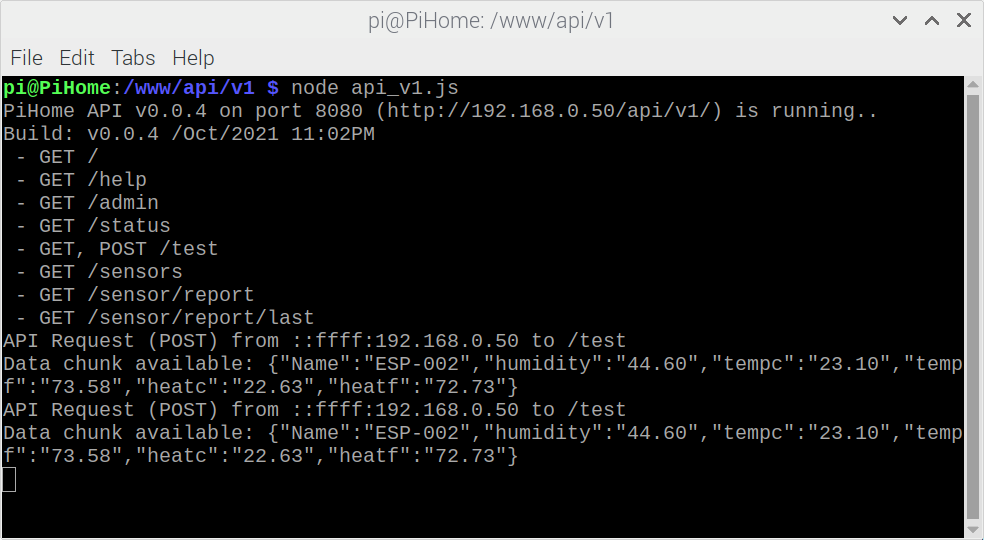
Here is a sneak peek of the code accpeing the Posted Data
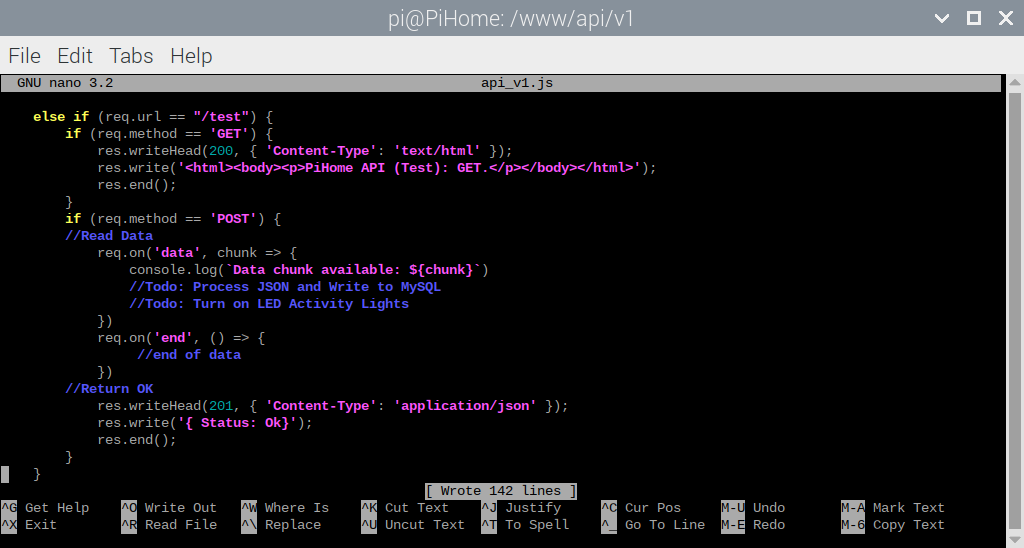
The final code will be open sourced.
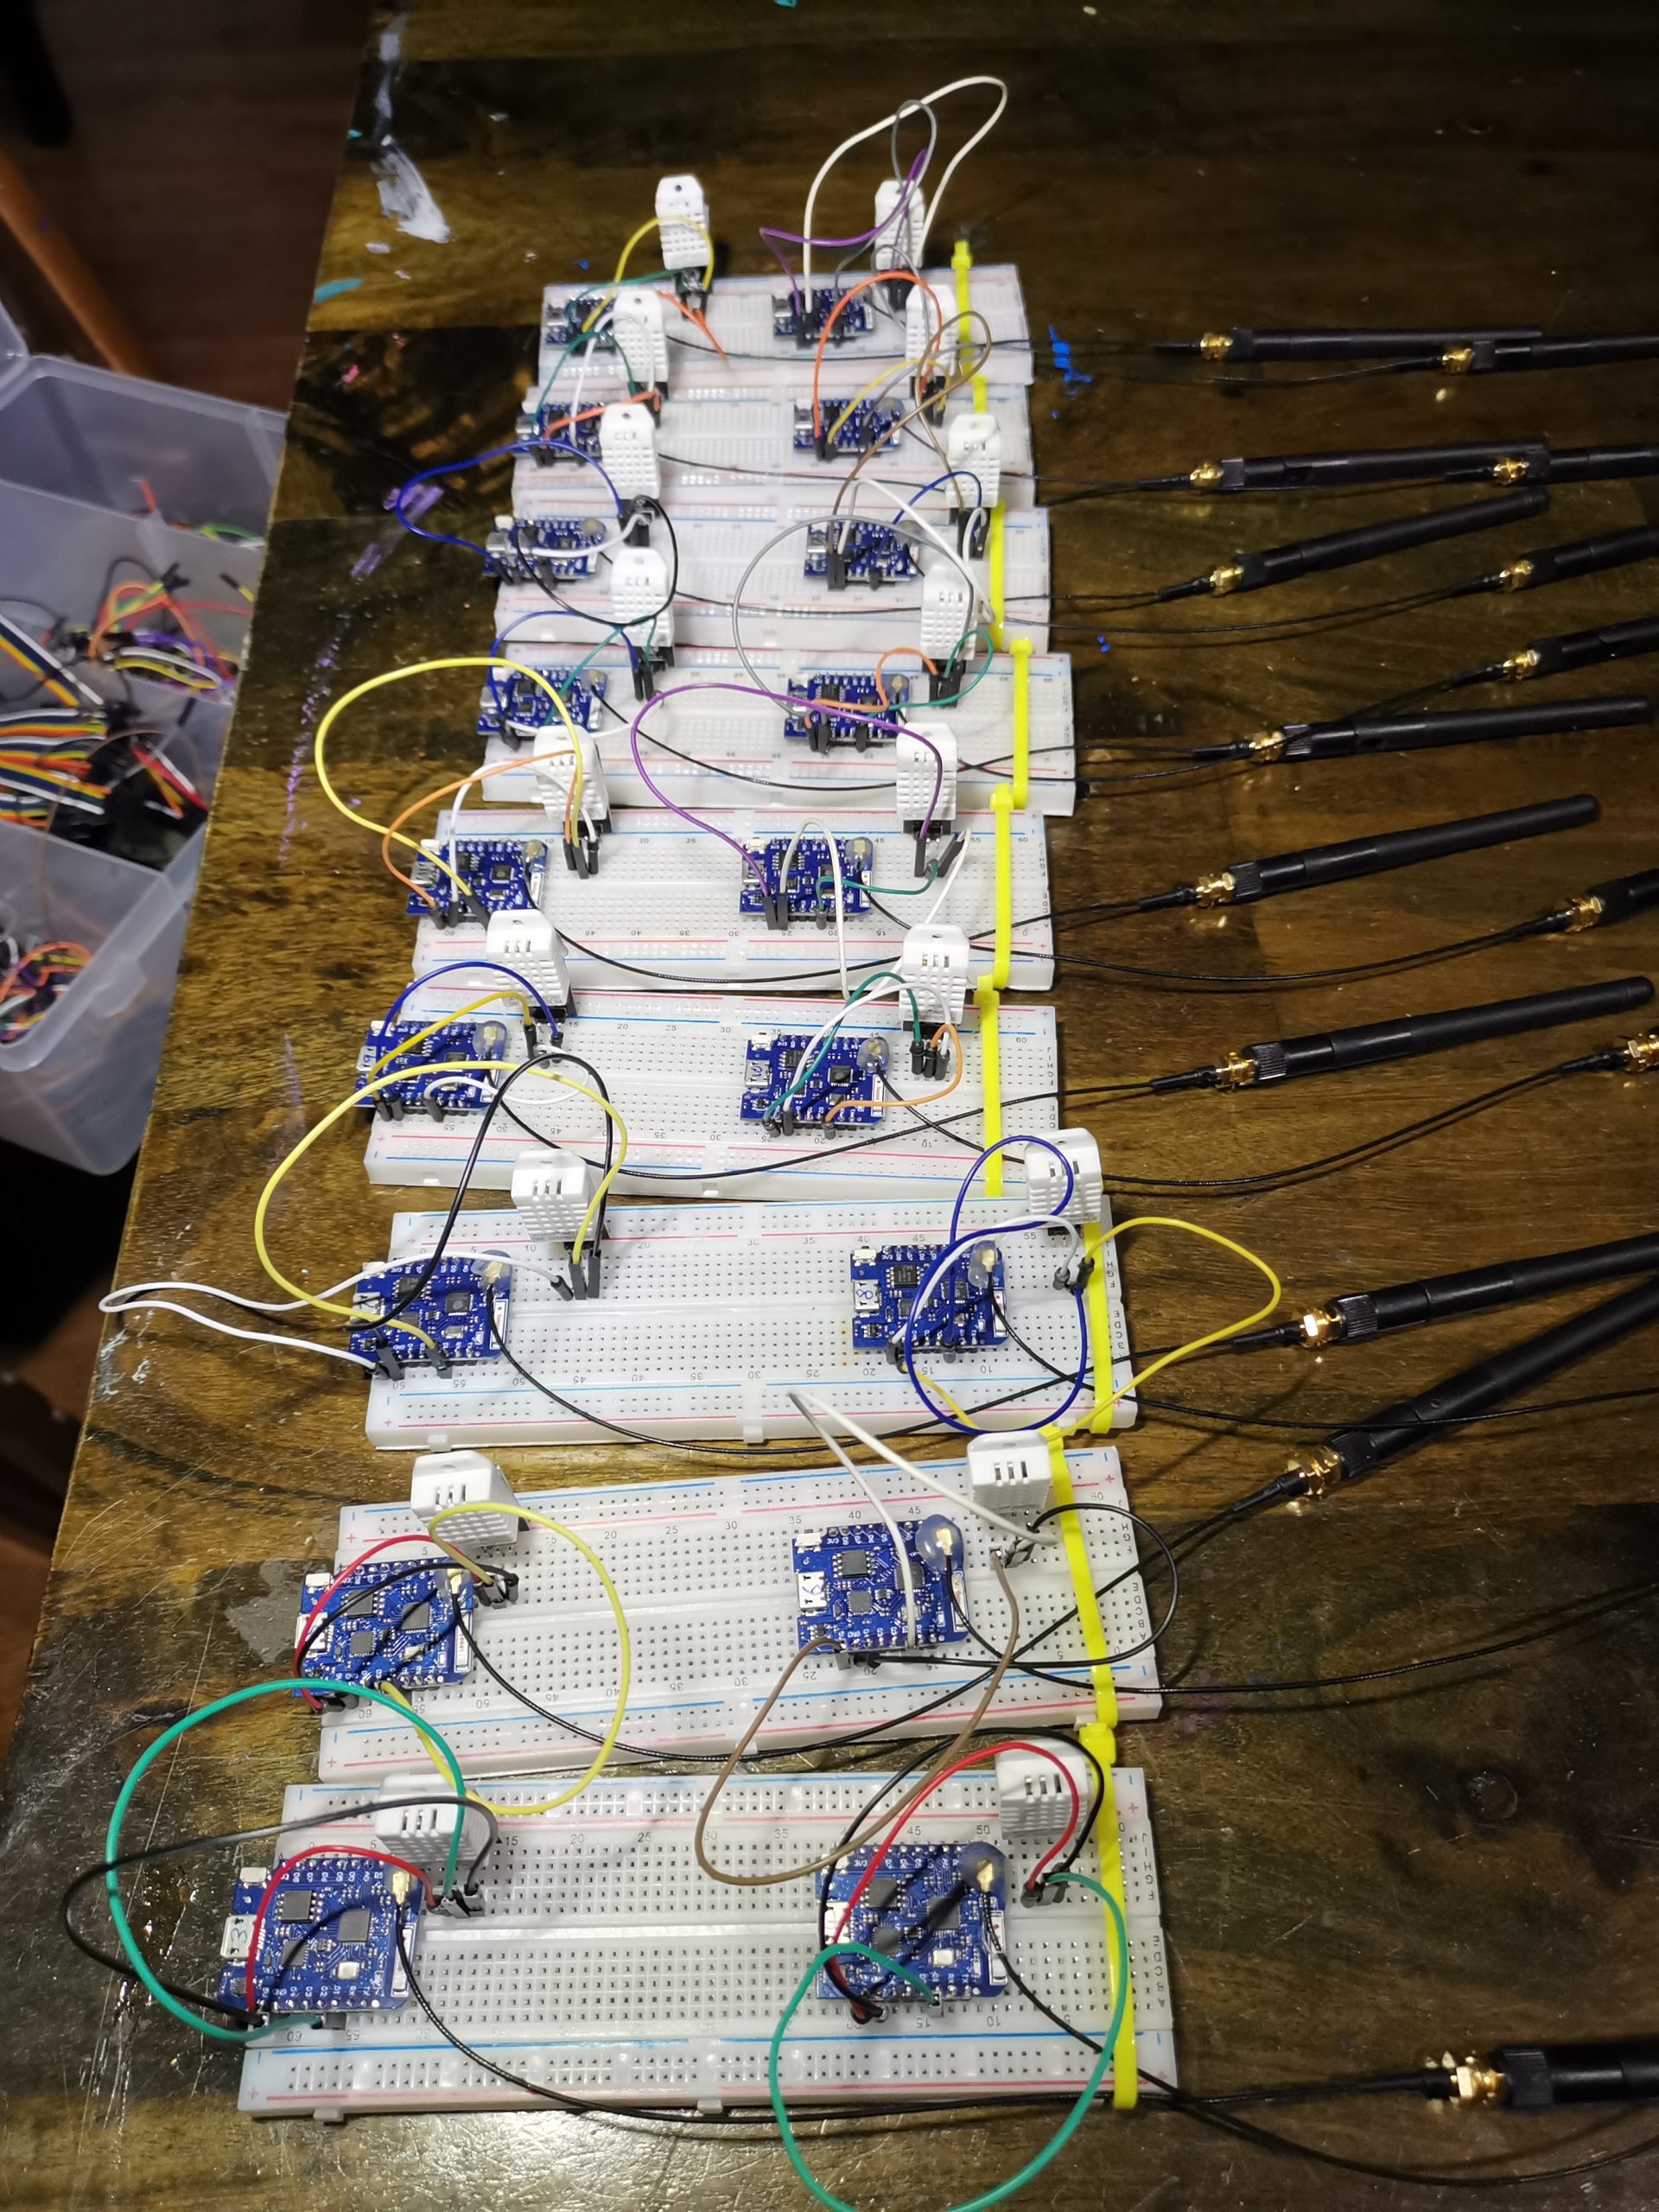
API with 2x sensors (18x more soon)
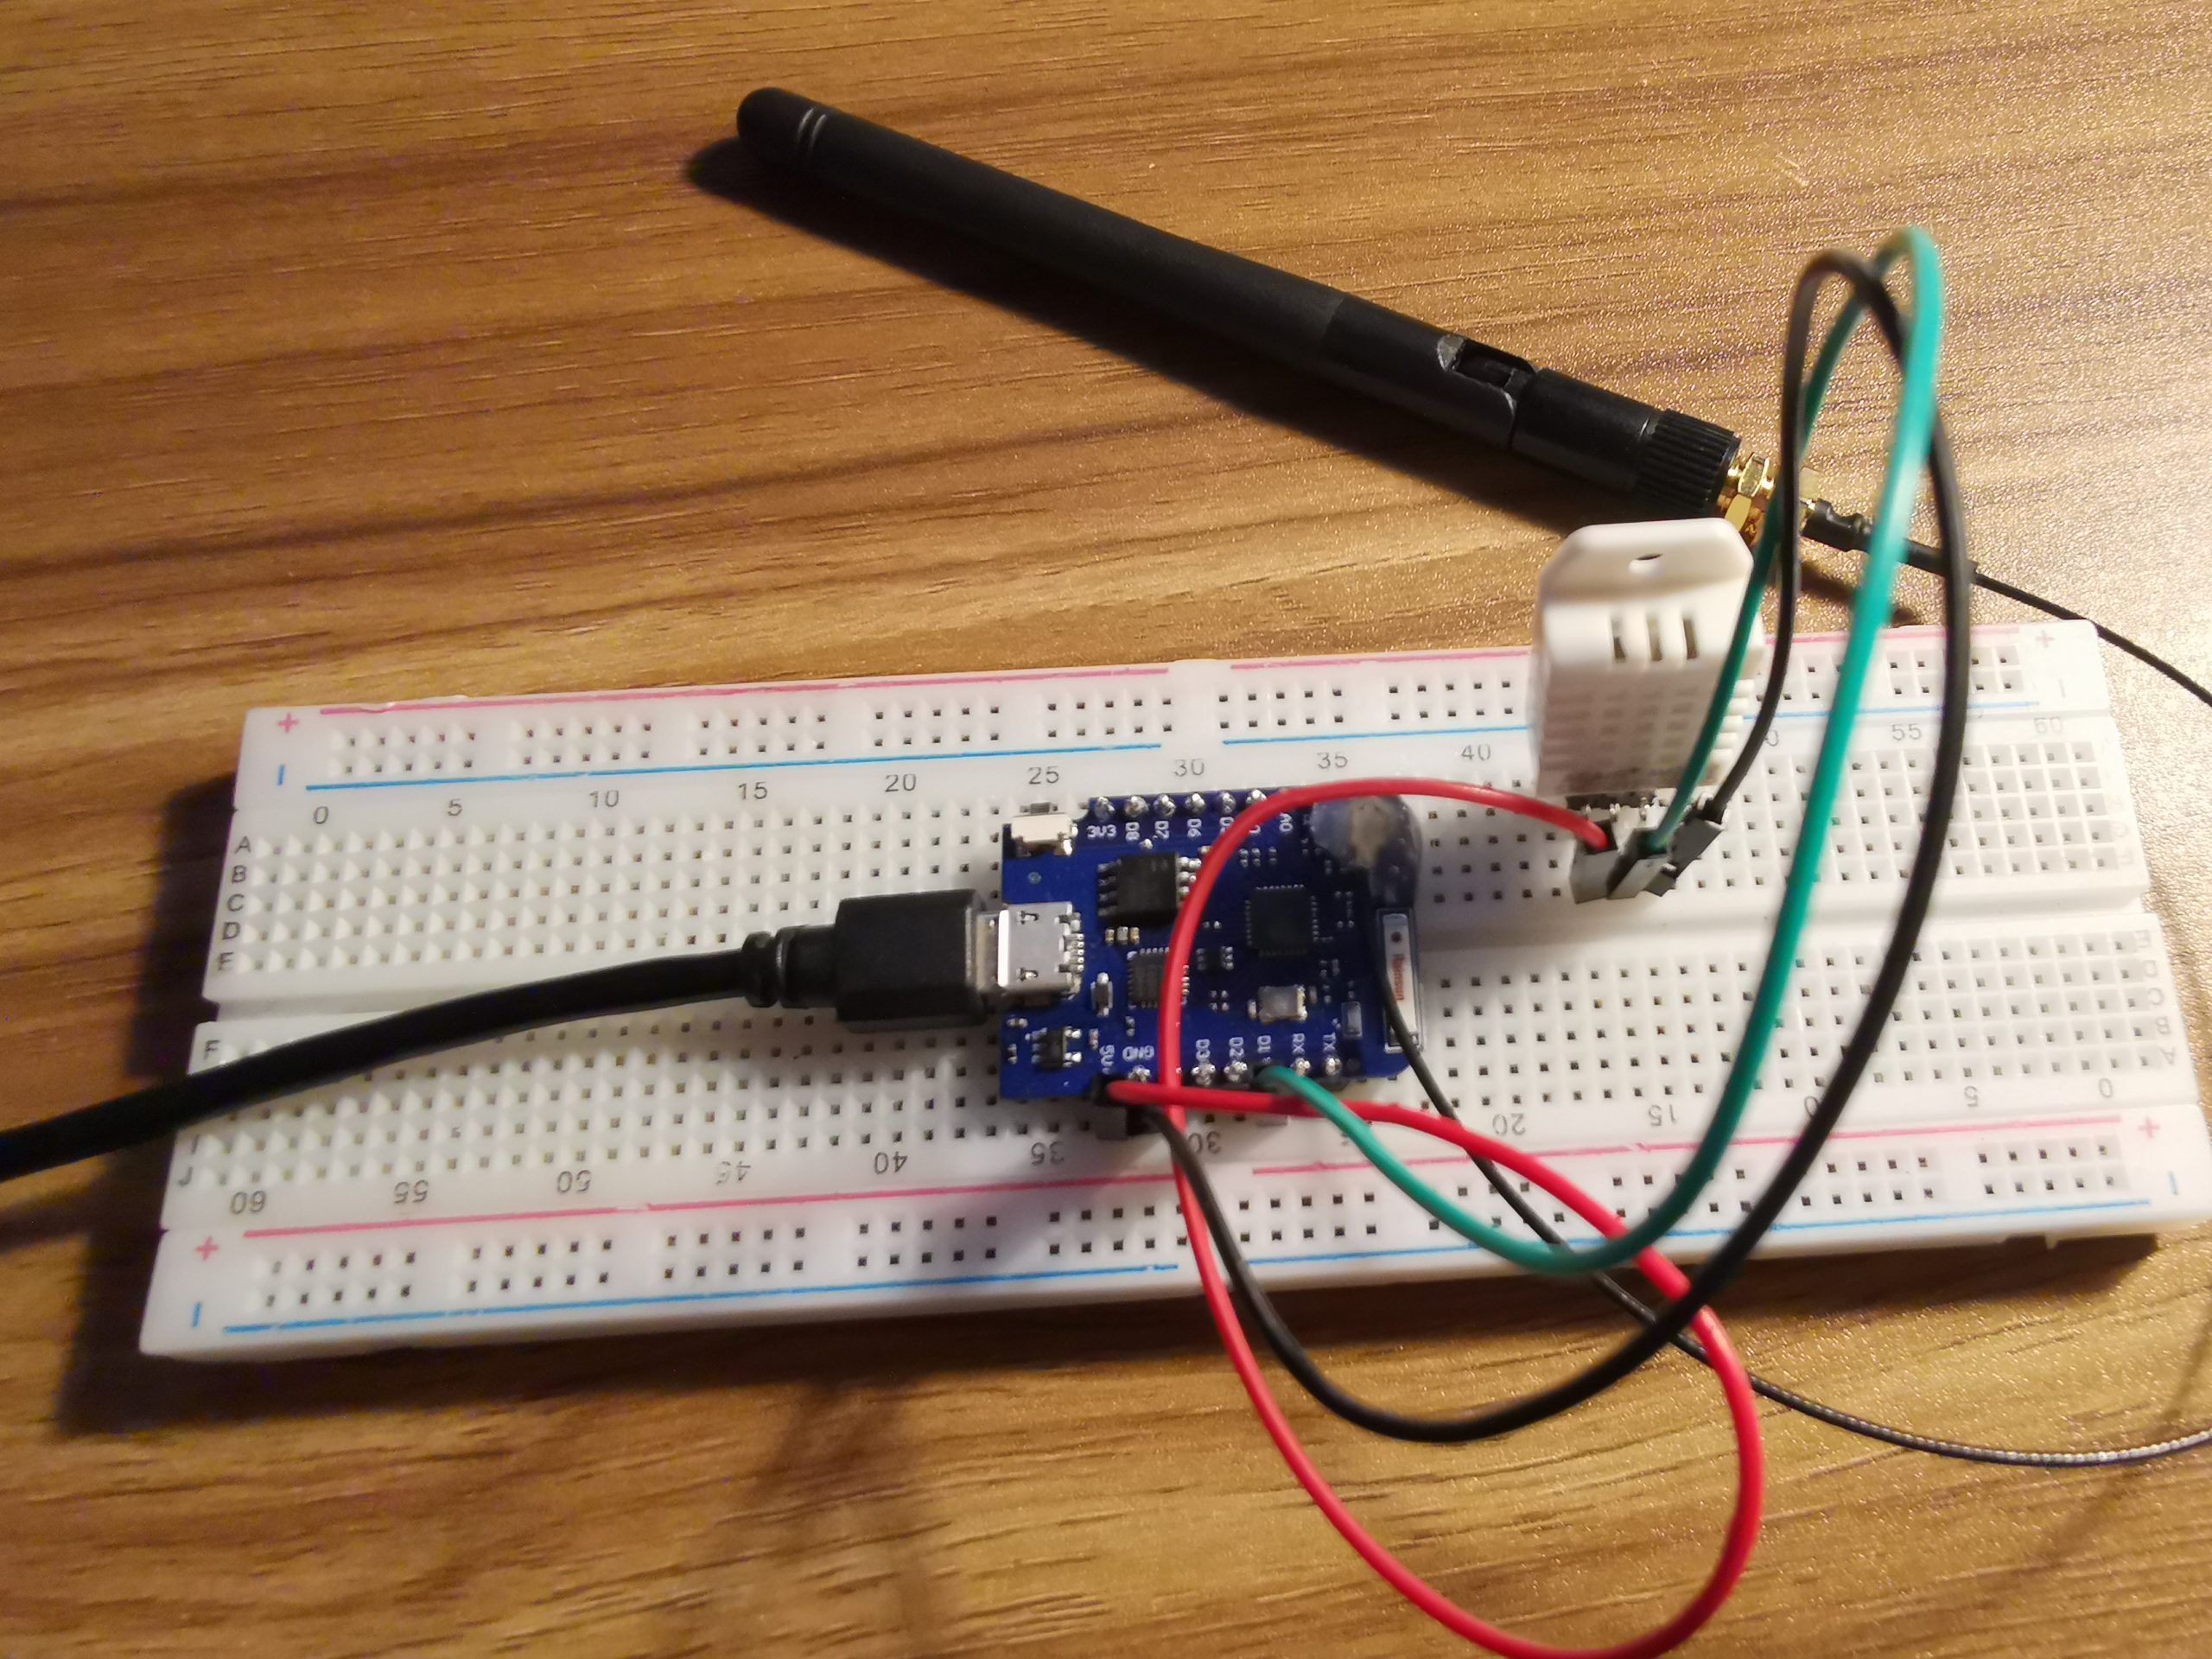
I built 2 sensors (on Breadboards) to start hitting the API
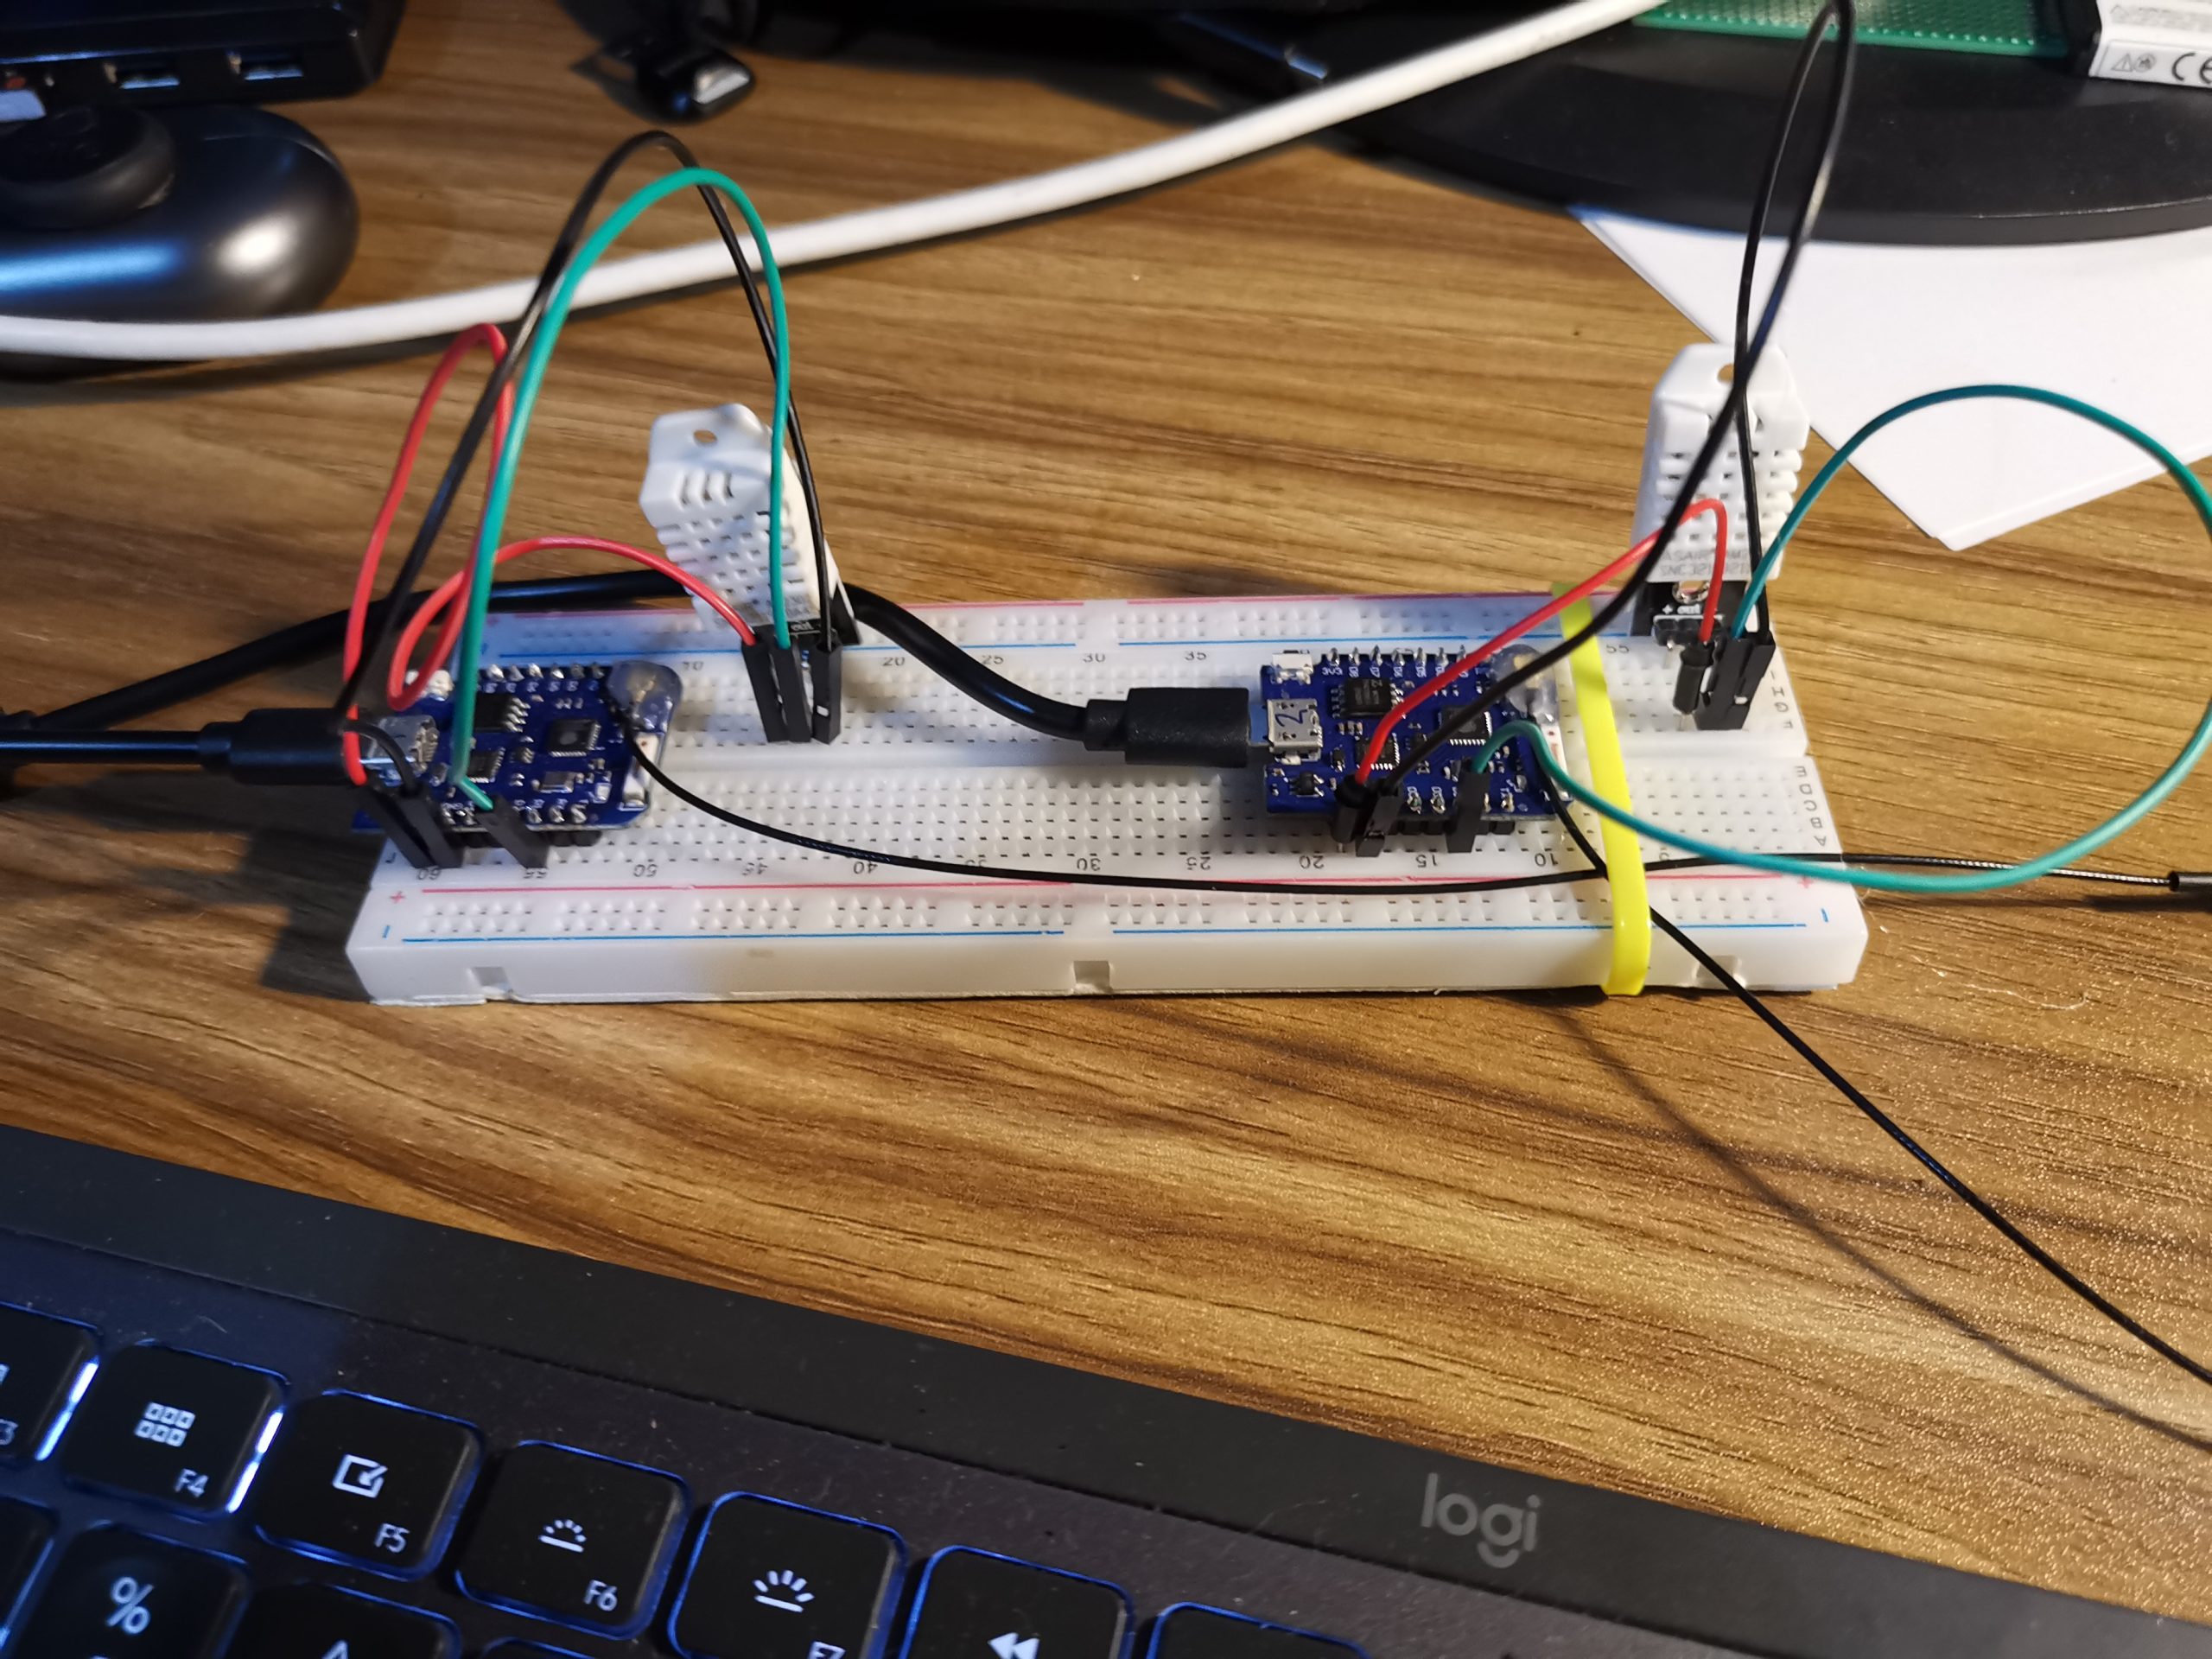
18 more sensors are ready for action (after I get tempporary USB power sorted)
PiJuice and Battery save the Day
I accidentally used my Pi for a few hours (to develop the API) and I realised the power to the PiJuice was not connected.
The PiJuice worked a treat and supplied the Pi from battery
I plugged in the battery after 25% was drained.
Research and Setup TRIM/Defrag on the M.2 SSD
Todo: Research
Add a Buzzer to the RaspBerry Pi and Connect to Pi Juice No Power Event
Todo
Wire Up a Speaker to the PiJuice
Todo: Figure out cusrom scripts and add a Piezo Speaker to the PiJuice to alert me of issues in future.
Add buttons to the enclosure
Todo
Add email alerts from the system
I logged into Google G-Suite (my domain’s email provider) and set up an email alias for my domain “[email protected]”, I added this alias to GMail (logged in with my GSuite account.
I created an app-specific password at G-Suite to allow my poi to use a dedicated password to access my email.
I installed these packages on the Raspberry Pi
sudo apt-get install libio-socket-ssl-perl libnet-ssleay-perl sendemail I can run this command to send an email to my primary email
sudo sendemail -f [email protected] -t my_primary_gsuite_email@your_domain.com -u "Test Email From PiHome" -m "Test Email From PiHome" -s smtp.gmail.com:587 -o tls=yes -xu my_primary_gsuite_email@your_domain.com -xp ********************The email arrives from the Raspberry Pi
PiJuice Alerts (email)
In created some python scripts and configured PiJuice to Email Me

I assigned the scripts to Events

Python Script (CronJob) to email the batteruy level every 6 hours
Todo
Building the Co2/PM2.5 Sensors
Todo: (Waiting for parts)
The AirGradient PCB’s have arrived

NodeJS API writing to MySQL/Influx etc
Todo: Save Data to a Database
Setup 20x WeMos External Antennae’s (DONE, I ordered new factory rotated resistors)
I assumed the external antennae’s on the WeMos D1 Mini Pro’s were using the external antennae. Wrong.
I have to move 20x resistors (1 per WeMos) to switch over the the external antennae.
This will be fun as I added hot glue over the area where the resistior is to hold down the antennae.
Reading configuration files via SPIFFS
Todo
Power over Ethernet (PoE) (SKIP, WIll use plain old USB wall plugs)
Todo: Passive por PoE
Building a C# GUI for the Touch Panel
Todo (Started coding this)
Todo (Passive POE, 5v, 3.3v)?
Building the enclosures for the sensorsDesigned and ordered the PCB, FIrmware next.
Custom PCB?
Yes, See above
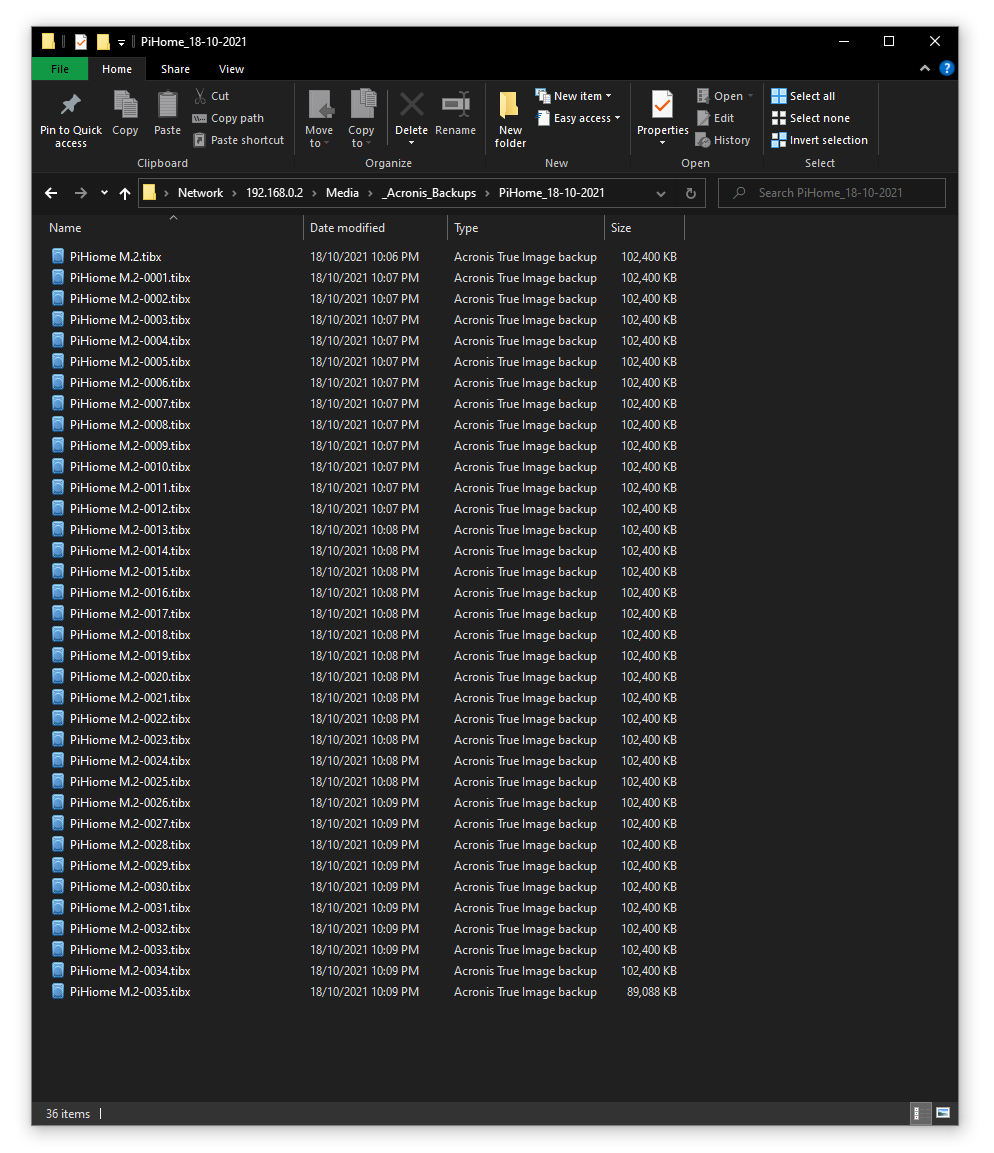
Backing up the Raspberry Pi M.2 Drive
This is quite easy as the M.2 Drive is connected to a USB Pliug. I shutdown the Pi and pugged int he M.2 board to my PC

I then Backed up the entire disk to my PC with Acronis Software (review here)

I now have a complete backup of my Pi on a remote network share (and my primary pc).
Version History
v0.9.63 – PCB v0.2 Designed and orderd.
v0.9.62 – 3/2/2022 Update
v0.9.61 – New Nginx, PHP, MySQL etc
v0.9.60 – Fresh Bullseye install (Buster upgrade failed)
v0.951 Email Code in PiJUice
v0.95 Added Email Code
v0.94 Added Todo Areas.
v0.93 2x Sensors hitting the API, 18x sensors ready, Air Gradient
v0.92 DHT22 and Basic API
v0.91 Password Protection
v0.9 Final Battery Setup
v0.8 OTA Updates
v0.7 Screen Enclosure
v0.6 Added Wifi Test Info
v0.5 Initial Post