• Skip to primary navigation
  • Skip to main content
  • Skip to primary sidebar
  • Skip to footer
  • Home
  • Create a VM ($25 Credit)
  • Buy a Domain
  • 1 Month free Back Blaze Backup
  • Other Deals
    • Domain Email
    • Nixstats Server Monitoring
    • ewww.io Auto WordPress Image Resizing and Acceleration
  • About
  • Links

IoT, Code, Security, Server Stuff etc

Views are my own and not my employer's.

Personal Development Blog...

Coding for fun since 1996, Learn by doing and sharing.

Buy a domain name, then create your own server (get $25 free credit)

View all of my posts.

  • Cloud
    • I moved my domain to UpCloud (on the other side of the world) from Vultr (Sydney) and could not be happier with the performance.
    • How to buy a new domain and SSL cert from NameCheap, a Server from Digital Ocean and configure it.
    • Setting up a Vultr VM and configuring it
    • All Cloud Articles
  • Dev
    • I moved my domain to UpCloud (on the other side of the world) from Vultr (Sydney) and could not be happier with the performance.
    • How to setup pooled MySQL connections in Node JS that don’t disconnect
    • NodeJS code to handle App logins via API (using MySQL connection pools (1000 connections) and query parameters)
    • Infographic: So you have an idea for an app
    • All Development Articles
  • MySQL
    • Using the free Adminer GUI for MySQL on your website
    • All MySQL Articles
  • Perf
    • PHP 7 code to send object oriented sanitised input data via bound parameters to a MYSQL database
    • I moved my domain to UpCloud (on the other side of the world) from Vultr (Sydney) and could not be happier with the performance.
    • Measuring VM performance (CPU, Disk, Latency, Concurrent Users etc) on Ubuntu and comparing Vultr, Digital Ocean and UpCloud – Part 1 of 4
    • Speeding up WordPress with the ewww.io ExactDN CDN and Image Compression Plugin
    • Setting up a website to use Cloudflare on a VM hosted on Vultr and Namecheap
    • All Performance Articles
  • Sec
    • Using the Qualys FreeScan Scanner to test your website for online vulnerabilities
    • Using OWASP ZAP GUI to scan your Applications for security issues
    • Setting up the Debian Kali Linux distro to perform penetration testing of your systems
    • Enabling TLS 1.3 SSL on a NGINX Website (Ubuntu 16.04 server) that is using Cloudflare
    • PHP implementation to check a password exposure level with Troy Hunt’s pwnedpasswords API
    • Setting strong SSL cryptographic protocols and ciphers on Ubuntu and NGINX
    • Securing Google G Suite email by setting up SPF, DKIM and DMARC with Cloudflare
    • All Security Articles
  • Server
    • I moved my domain to UpCloud (on the other side of the world) from Vultr (Sydney) and could not be happier with the performance.
    • All Server Articles
  • Ubuntu
    • I moved my domain to UpCloud (on the other side of the world) from Vultr (Sydney) and could not be happier with the performance.
    • Useful Linux Terminal Commands
    • All Ubuntu Articles
  • VM
    • I moved my domain to UpCloud (on the other side of the world) from Vultr (Sydney) and could not be happier with the performance.
    • All VM Articles
  • WordPress
    • Speeding up WordPress with the ewww.io ExactDN CDN and Image Compression Plugin
    • Installing and managing WordPress with WP-CLI from the command line on Ubuntu
    • How to backup WordPress on a host that has CPanel
    • Moving WordPress to a new self managed server away from CPanel
    • Moving a CPanel domain with email to a self managed VPS and Gmail
    • All WordPress Articles
  • All

Website

I thought my website was hacked. Here is how I hardened my Linux servers security with Lynis Enterprise

October 24, 2020 by Simon

Disclaimer

I have waited a year before posting this, and I have tried my best to hide the bank’s identity as I never got a good explanation back from them about they the were whitelisting my website.

Background

I was casually reading Twitter one evening and found references to an awesome service (https://publicwww.com/) that allows you to find string references in CSS, JS, CSP etc files on websites.

Search engine that searches the web for the source code of the sites, not the content of them: https://t.co/G7oYQZ4Cbp

— @mikko (@mikko) March 8, 2018

https://t.co/DUyxFD4QbV is one of my new favorite search tools. Finally I can search for html/css/js and see which websites are using it. Really powerful when you think of the right searches…

— Allan Thraen (@athraen) April 26, 2019

See how people are using the publicwww service on Twitter.

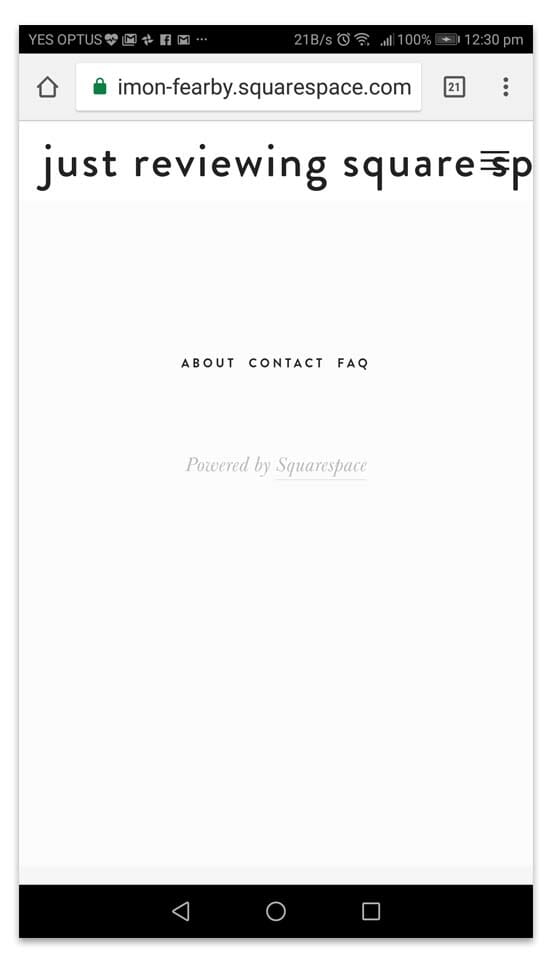
I searched https://publicwww.com/ for “https://fearby.com“. I was expecting to only see only resources that were loading from my site.

I was shocked to see a bank in Asia was whistling my website and my websites CDN (hosted via ewww.io) in it’s Content Security Policy.

Screenshot of publicwww.com scan of "fearby.com

I was not hosting content for a bank and they should not be whitelisting my site?

Were they hacked? Was I hacked and delivering malware to their customers? Setting up a Content Security Policy (CSP) is not a trivial thing to do and I would suggest you check out https://report-uri.com/products/content_security_policy (by Scott Helme) for more information on setting up a good Content Security Policy (CSP).

Were we both hacked or was I serving malicious content?

Hacked Koala meme

I have written a few blog posts on creating Content Security Policies, and maybe they did copy my starter Content Security Policy and added it to their site?

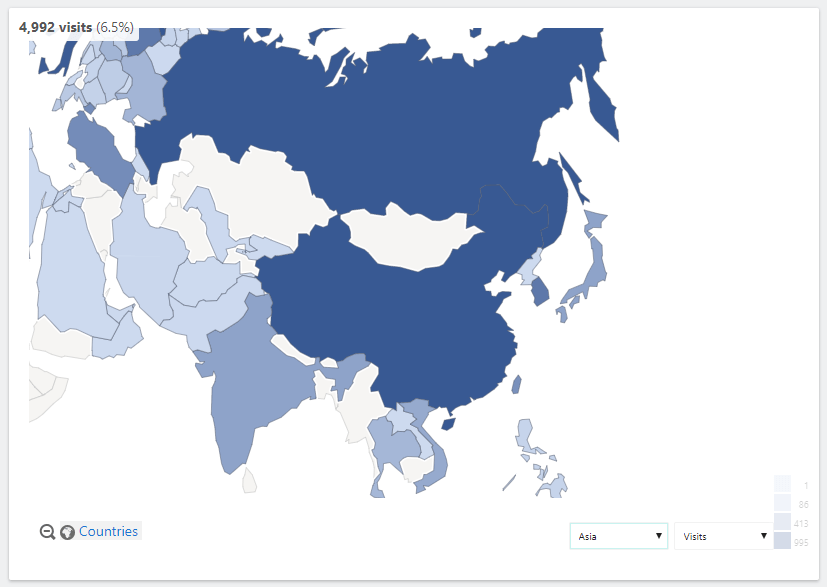
I do have a lot of blog readers from their country.

Analytics map of Asia

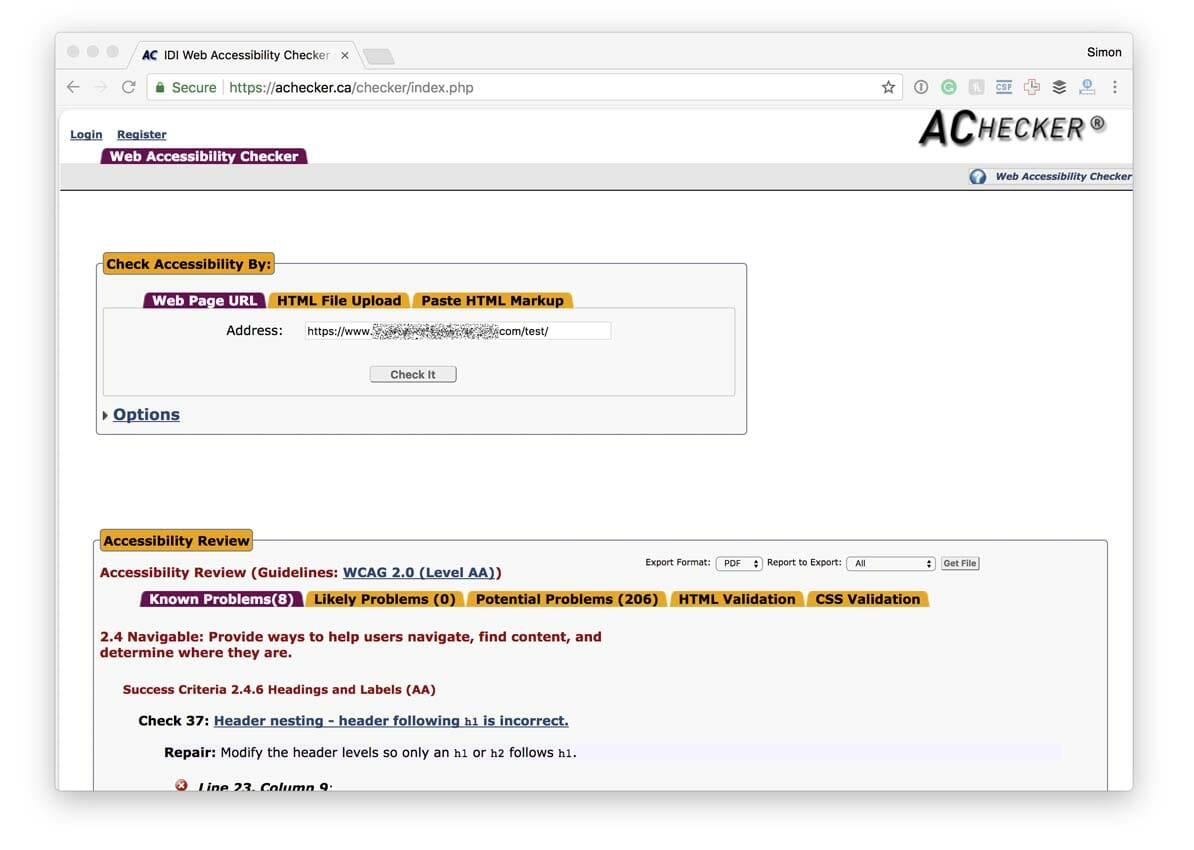
I went to https://www.securityheaders.com and scanned their site and yes they have whitelisted my website and CDN. This was being sent in a header from their server to any connecting client.

I quickly double-checked the banks Content Security Policy (CSP) with https://cspvalidator.org/ and they too confirmed the bank was telling their customers that my website was ok to load files from.

I would not be worried if a florist’s website had white-listed my website but a bank that has 250 physical branches, 2,500 employees in a country that has 29 million people.

Below is the banks Content Security Policy.

https://cspvalidator.org/ screenshot of the banks csp

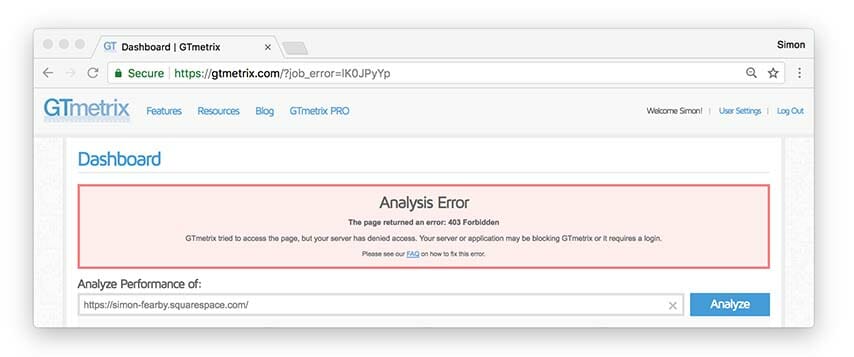
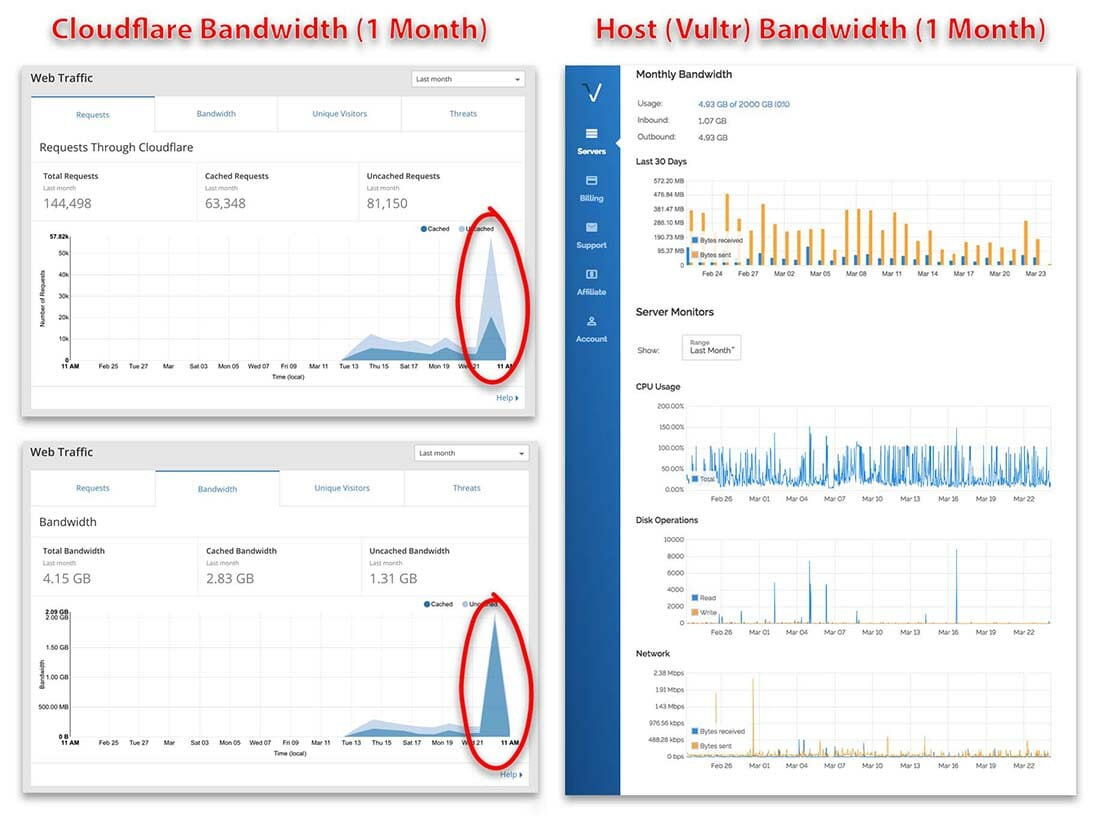
I thought I had been hacked into so I downloaded my Nginx log files (with MobaXTerm,) and scanned them for hits to my site from their website.

Screenshot of a years nginx logs.

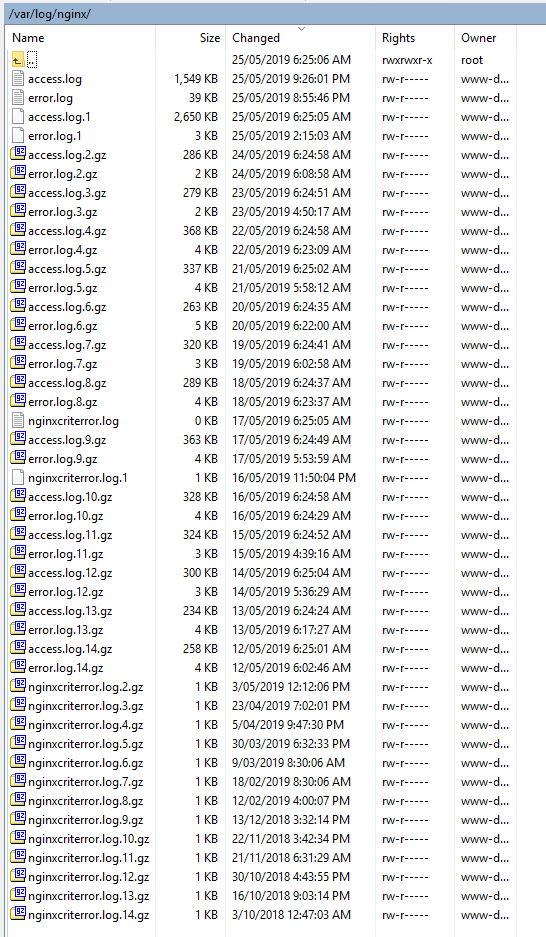
After I scanned the logs I could see that I had zero traffic from their website

I sent a direct message to Scott Helme on Twitter (CSP Guru) and he replied with advice on the CSP.

Blocking Traffic

As a precaution, I edited my /etc/nginx/sites-available/default file and added this to block all traffic from their site.

if ($http_referer ~* "##########\.com") {
        return 404;
}

I tested and reloaded my Nginx config and restarted my web server

nginx -t
nginx -s reload
/etc/init.d/nginx restart

I also emailed my website CDN’s admin at https://ewww.io/ and asked them to block traffic from the bank as a precaution. They responded quickly as said this was done and they enabled extra logging in case more information was needed data.

If you need a good and fast WordPress Content Delivery Network (CDN) check out https://ewww.io/. They are awesome. Read my old review of ewww.io here.

I contacted the Bank

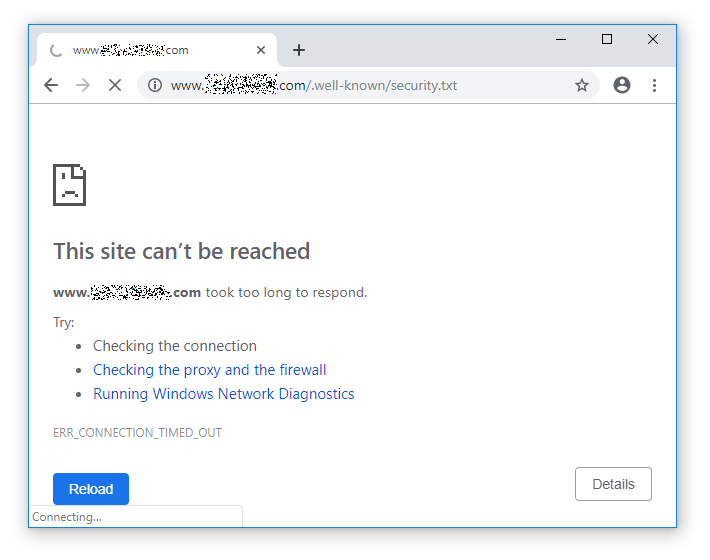
I searched the bank’s website for a way to contact them, their website was slow, their contact page was limited, they have a chat feature but I needed to log in with FaceBook (I don’t use FaceBook)

I viewed their contact us web page and they had zero dedicated security contacts listed. The CIO was only contactable via phone only.

They did not have a security.txt file on their website.

http://www.bankdomain.com/.well-known/security.txt file not found

TIP: If you run a website, please consider creating a security.txt file, information here.

I then viewed their contact us page and emailed everyone I could.

I asked if they could..

  • Check their logs for malicious files loaded from my site
  • Please remove the references to my website and CDN from their CSP.
  • Hinted they may want to review your CI/CD logs to see why this happened

My Server Hardening (to date)

My website was already hardened but was my site compromised?

Hardening actions to date..

  • Using a VPS firewall, Linux firewall 2x software firewalls
  • I have used the free Lynis Scan
  • Whitelisting access to port 22 to limited IP’s
  • Using hardware 2FA keys on SSH and WordPress Logins
  • Using the WordFence Security Plugin
  • Locked down unwanted ports.
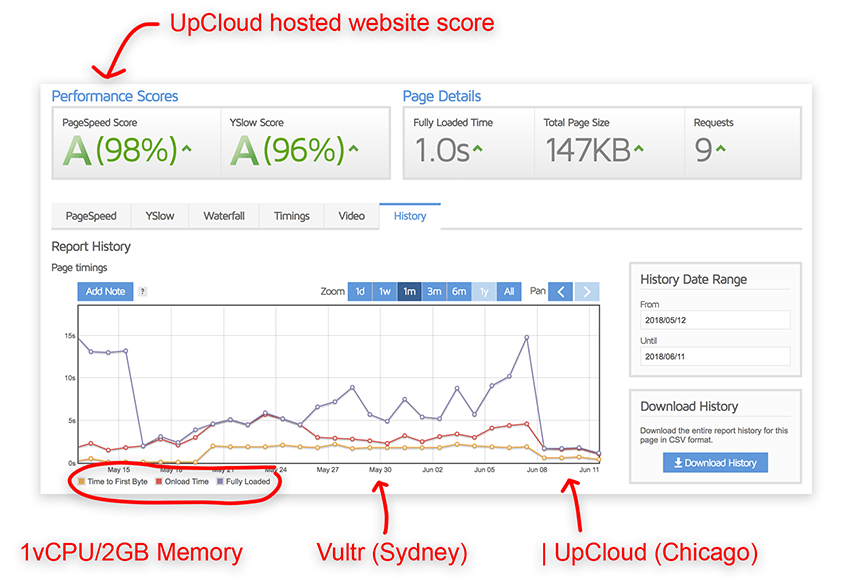
  • I had a strong HTTPS certificate and website configuration (test here)
  • I have set up appropriate security headers (test here). I did need to re-setup a Content Security Policy (keep reading)
  • Performed many actions (some blogged a while ago) here: https://fearby.com/article/securing-ubuntu-cloud/
  • etc

I had used the free version of Lynis before but now is the time to use the Lynis Enterprise.

A free version of Lynis can be installed from Github here: https://github.com/CISOfy/lynis/

What is Lynis Enterprise?

Lynis Enterprise software is commercial auditing, system hardening, compliance testing tool for AIX, FreeBSD, HP-UX, Linux, macOS, NetBSD, OpenBSD, Solaris etc. The Enterprise version is a paid version (with web portal). Lynis Enterprise has more features over the free version.

Snip from here: “Lynis is a battle-tested security tool for systems running Linux, macOS, or Unix-based operating system. It performs an extensive health scan of your systems to support system hardening and compliance testing. The project is open-source software with the GPL license and available since 2007.”

Visit the Lynis Enterprise site here: https://cisofy.com/solutions/#lynis-enterprise.

I created a Lynis Enterprise Trial

I have used the free version of Lynis in the past (read here), but the Enterprise version offers a lot of extra features (read here).

Screenshot of https://cisofy.com/lynis-enterprise/why-upgrade/

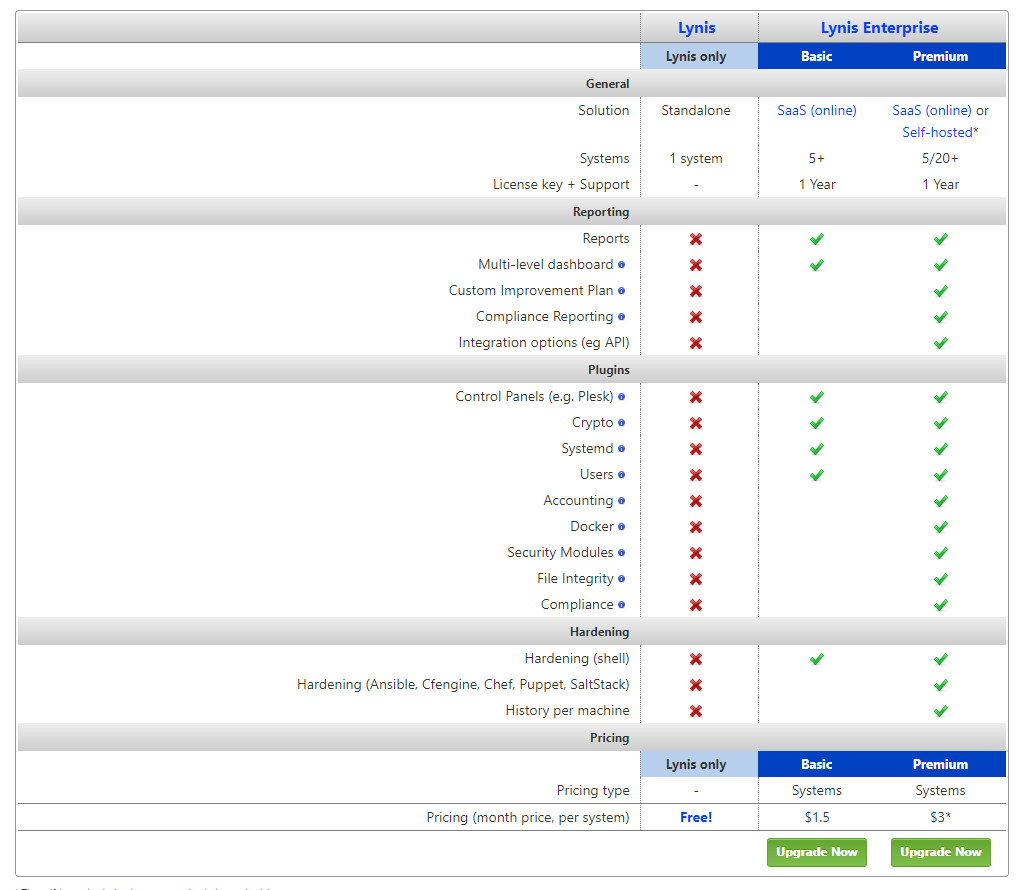
View the main Lynis Enterprise site here and the pricing page here

View a tour of features here: https://cisofy.com/lynis-enterprise/

Create a Cisofy Trial Account

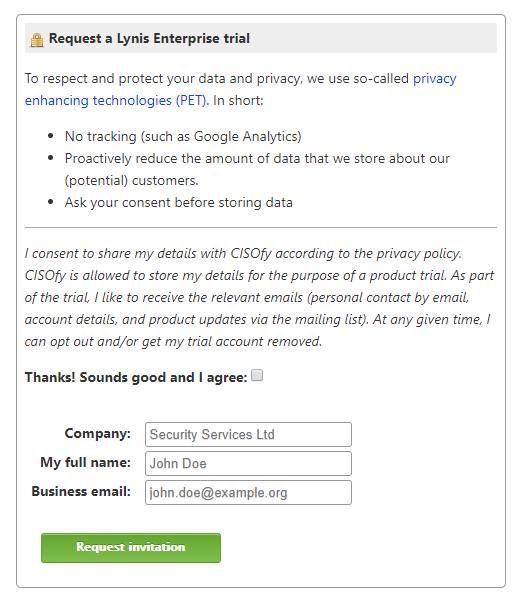
You can request a trial of Lynis Enterprise here: https://cisofy.com/demo/

Request a Lynis Enterprise trial screenshot

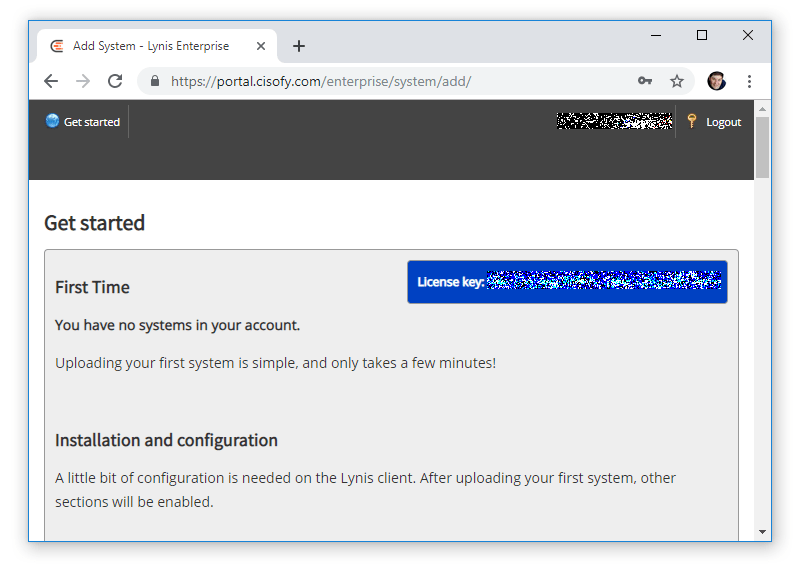
After the trial account was set up I logged in here. Upon login, I was prompted to add a system to my account (also my licence key was visible)

Lynis portal  main screen

Install Lynis (Clone GIT Repo/latest features)

I am given 3 options to install Lynis from the add system page here.

  1. Add the software repository and install the client (The suggested and easiest way to install Lynis and keep it up-to-date).
  2. Clone the repository from Github (The latest development version, containing the most recent changes)
  3. Manually install or activate an already installed Lynis.

I will clone a fresh install from Github as I prefer seeing the latest issues, latest changes from GitHub notifications. I like getting notifications about security.

I logged into my server via SSH and ran the following command(s).

sudo apt-get instal git
mkdir /thefolder
cd /thefolder
git clone https://github.com/CISOfy/lynis

Cloning into 'lynis'...
remote: Enumerating objects: 7, done.
remote: Counting objects: 100% (7/7), done.
remote: Compressing objects: 100% (7/7), done.
remote: Total 10054 (delta 0), reused 1 (delta 0), pack-reused 10047
Receiving objects: 100% (10054/10054), 4.91 MiB | 26.60 MiB/s, done.
Resolving deltas: 100% (7387/7387), done.

I logged into https://portal.cisofy.com/ and clicked ‘Add’ system to find my API key

I noted my licence key.

I then changed to my Lynis folder

cd lynis

I then created a “custom.prf” file

touch custom.prf

I ran this command to activate my licence (I have replaced my licence with ########’s).

View the documentation here.

./lynis configure settings license-key=########-####-####-####-############:upload-server=portal.cisofy.com

Output:

Configuring setting 'license-key'
Setting changed
Configuring setting 'upload-server'
Setting changed

I performed my first scan and uploaded the report.

TIP: Make sure you have curl installed

./lynis audit system --upload

After the scan is complete, make sure you see the following.

Data upload status (portal.cisofy.com) [ OK ]

I logged into https://portal.cisofy.com/enterprise/systems/ and I could view my systems report.

You can read the basic Lynis documentation here: https://cisofy.com/documentation/lynis/

Manual Lynis Scans

I can run a manual scan at any time

cd /thefolder/lynis/
sudo ./lynis audit system --upload

To view results I can login to https://portal.cisofy.com/

Automated Lynis Scans

I have created a bash script that updates Lynis (basically running ‘sudo /usr/bin/git pull origin master’ in the lynis folder)

#!/bin/bash

sendemail -f [email protected] -t [email protected] -u "CRON: Updating Lynis (yourserver.com) START" -m "/folder/runlynis.sh" -s smtp.gmail.com:587 -o tls=yes -xu [email protected] -xp ***my*google*gsuite*email*app*password***

echo "Changing Directory to /folder/lynis"
cd /folder/lynis

echo "Updating Lynis"
sudo /usr/bin/git pull origin master

sendemail -f [email protected] -t [email protected] -u "CRON: Updated Lynis (yourserver.com) END" -m "/folder/runlynis.sh" -s smtp.gmail.com:587 -o tls=yes -xu recipi[email protected] -xp ***my*google*gsuite*email*app*password***

This is my bash script that runs Lynis scans and emails the report

#!/bin/bash

sendemail -f [email protected] -t [email protected] -u "CRON: Run Lynis (yourserver.com) START" -m "/folder/runlynis.sh" -s smtp.gmail.com:587 -o tls=yes -xu [email protected] -xp ***my*google*gsuite*email*app*password***

echo "Running Lynis Scan"
cd /utils/lynis/
sudo /utils/lynis/lynis audit system --upload > /folder/lynis/lynis.txt

sendemail -f [email protected] -t [email protected] -u "CRON: Run Lynis (yourserver.com) END" -m "/folder/runlynis.sh" -s smtp.gmail.com:587 -o tls=yes -xu [email protected] -xp ***my*google*gsuite*email*app*password***  -a /folder/lynis/lynis.txt

I set up two cron jobs to update Lynis (from Git) and to scan with Lynis every day.

#Lynis Update 11:55PM
55 21 * * * /bin/bash /folder/runlynis.sh && curl -fsS --retry 3 https://hc-ping.com/########-####-####-####-############ > /dev/null

#Lynis Scan 2AM
0 2 * * * /bin/bash /folder/runlynis.sh && curl -fsS --retry 3 https://hc-ping.com/########-####-####-####-############ > /dev/null

Thanks to sendemail I get daily emails

I have set up cronjob motoring and emails at the start and end of the bash scripts.

The attachment is not a pretty text file report but a least I can see the output of the scan (without logging into the portal).

Maybe I add the following file also

/var/log/lynis.log

Lynis Enterprise (portal.cisofy.com)

Best of all Lynis Enterprise comes with a great online dashboard available at
https://portal.cisofy.com/enterprise/dashboard/.

Lynis Enterprise Portal

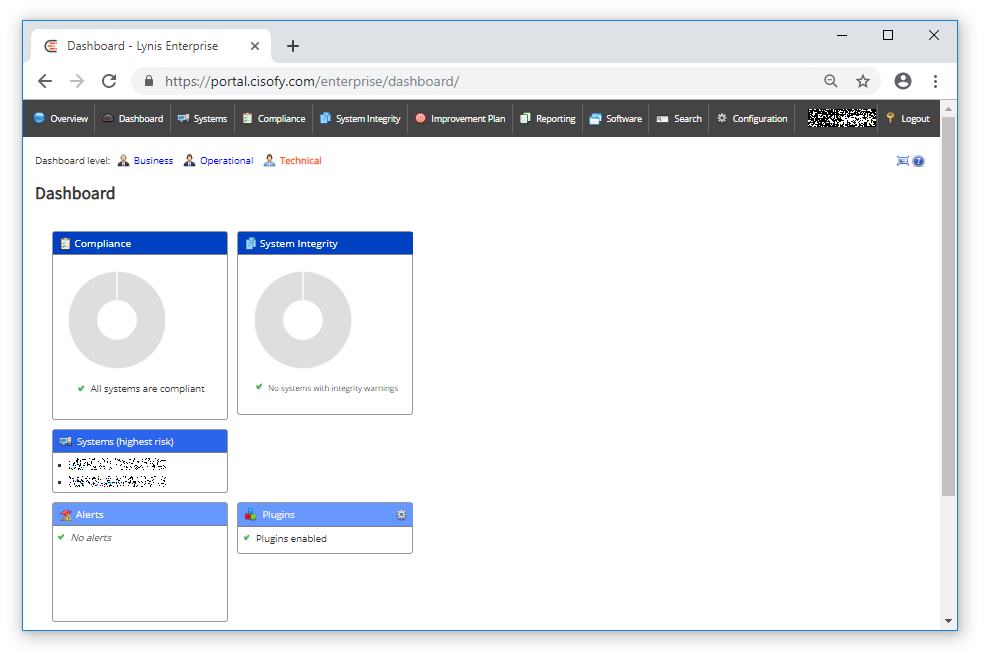
Dashboard (portal.cisofy.com)

Clicking the ‘Dashboard‘ button in the toolbar at the top of the portal reveals a summary of your added systems, alerts, compliance, system integrity, Events and statistics.

Dashboard button

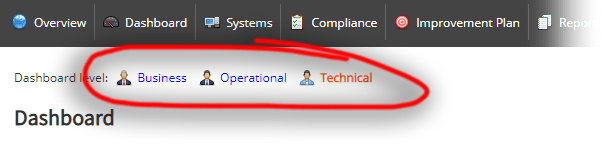
The dashboard has three levels

  • Business (less information)
  • Operational
  • Technical (more information)

Read about the differences here.

three dashboard breadcrumbs

Each dashboard has a limited number of elements, but the technical dashboard has all the elements.

Technical Dashboard

Lynis Enterprise Dashboard https://portal.cisofy.com/enterprise/dashboard/

From here you can click and open server scan results (see below)
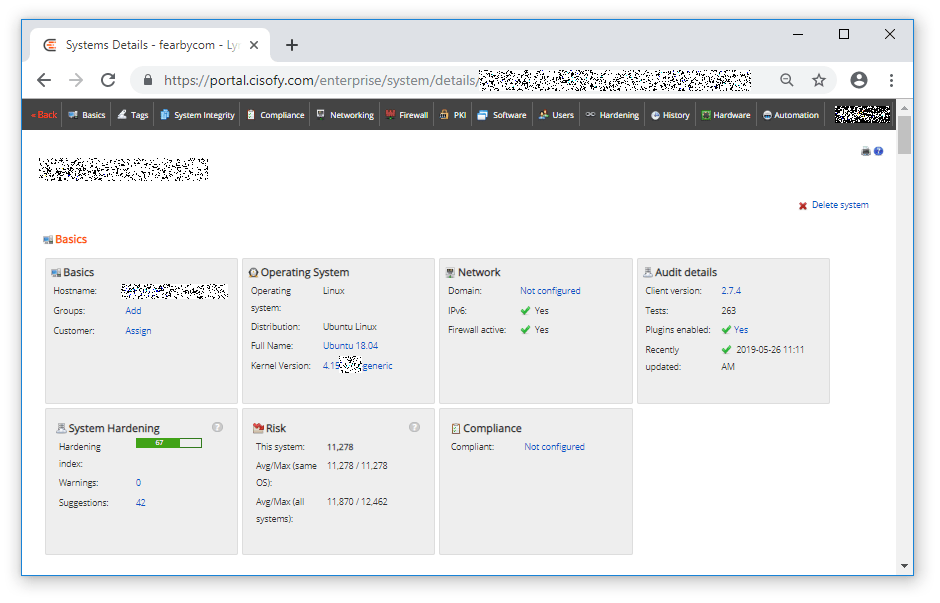
Server Details

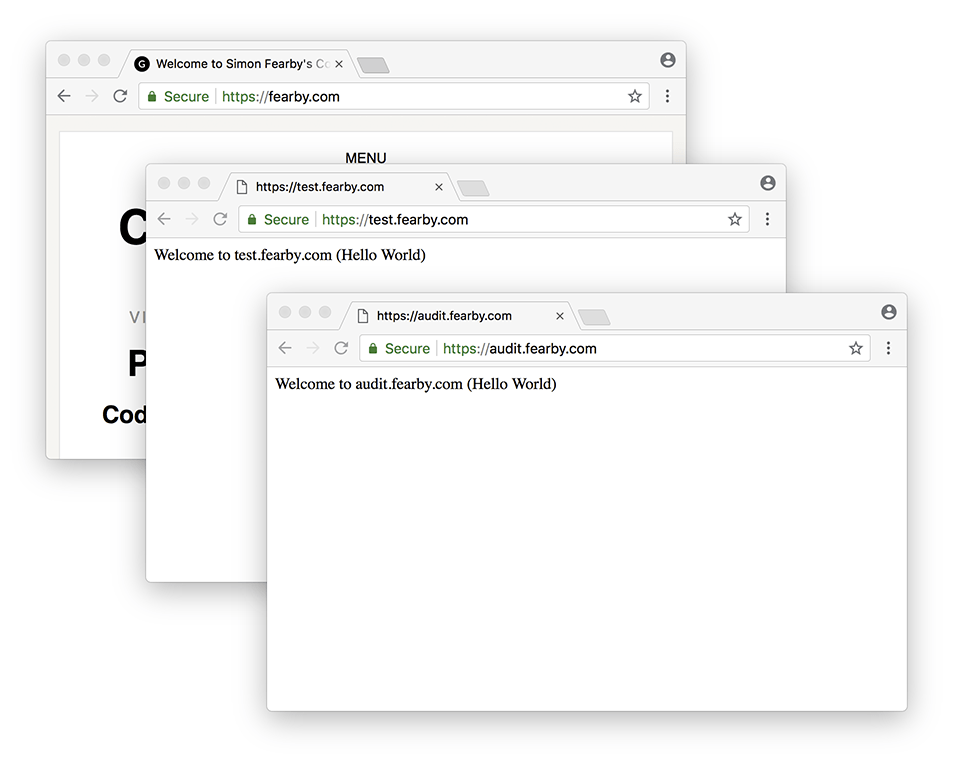
If you click on a server name you can see detailed information. I created 2 test servers (I am using the awesome UpCloud host)

A second menu appears when you click on a server

Linus Menu

Test Server 01: Ubuntu 18.04 default Scan Results (66/100)

Ubuntu Server Score 66/100

Test Server 02: Debian 9.9 default Scan Results (65/100)

Server

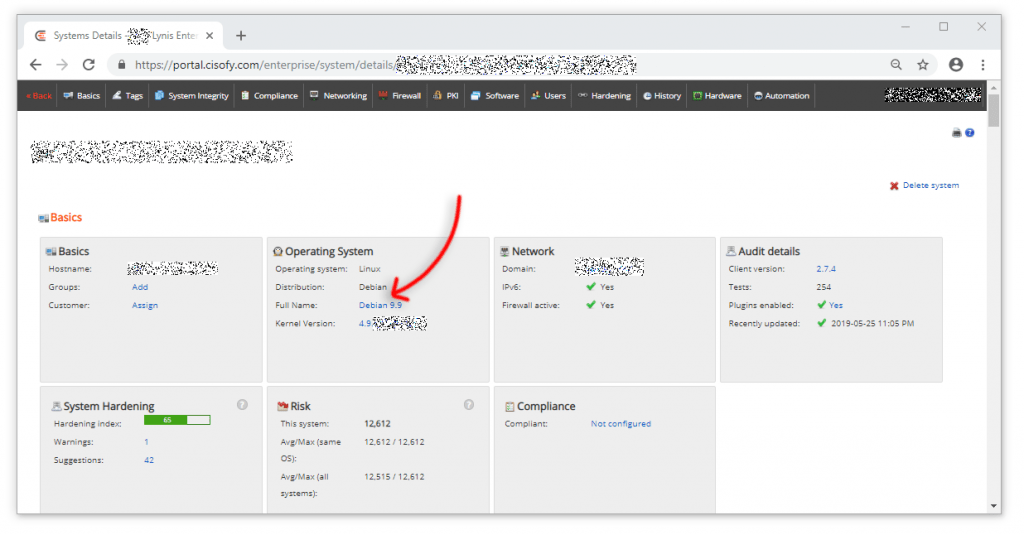
It is interesting to see Debian is 1 point below Ubuntu.

The server page will give a basic summary and highlights like the current and previous hardening score, open ports, firewall status, installed packages, users.

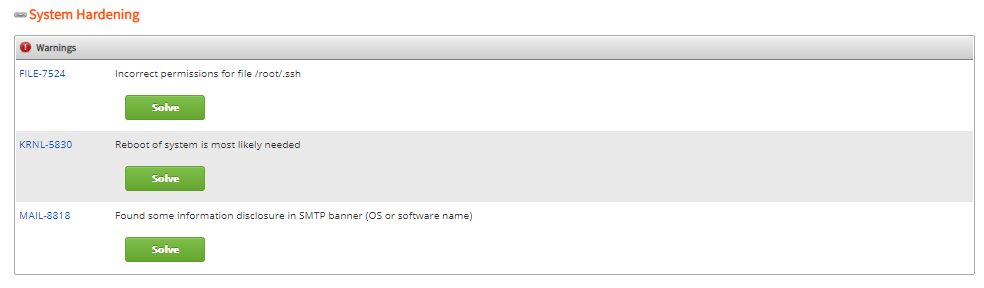
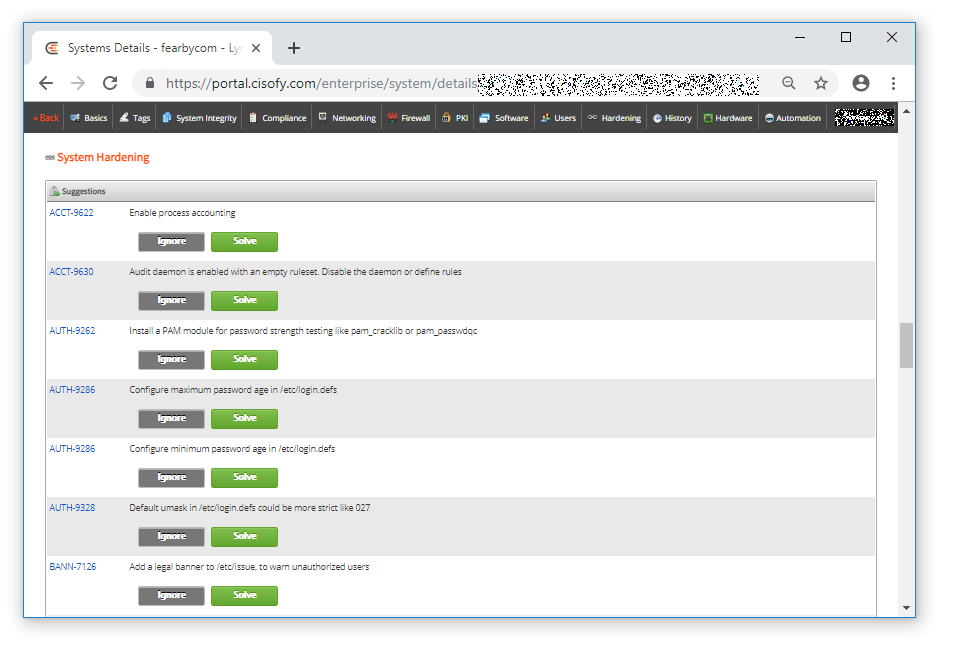
When I click the server name to load the report I can click to see ‘Warnings’ or ‘Suggestions’ to resolve

Suggested System Hardening Actions

I had 47 system hardening recommendations on one system

Lynis identified quick wins.

Some of the security hardening actions included the following.

e.g

  • Audit daemon is enabled with an empty ruleset. Disable the daemon or define rules
  • Incorrect permissions for file /root/.ssh
  • A reboot of the system is most likely needed
  • Found some information disclosure in SMTP banner (OS or software name)
  • Configure maximum password age in /etc/login.defs
  • Default umask in /etc/login.defs could be more strict like 027
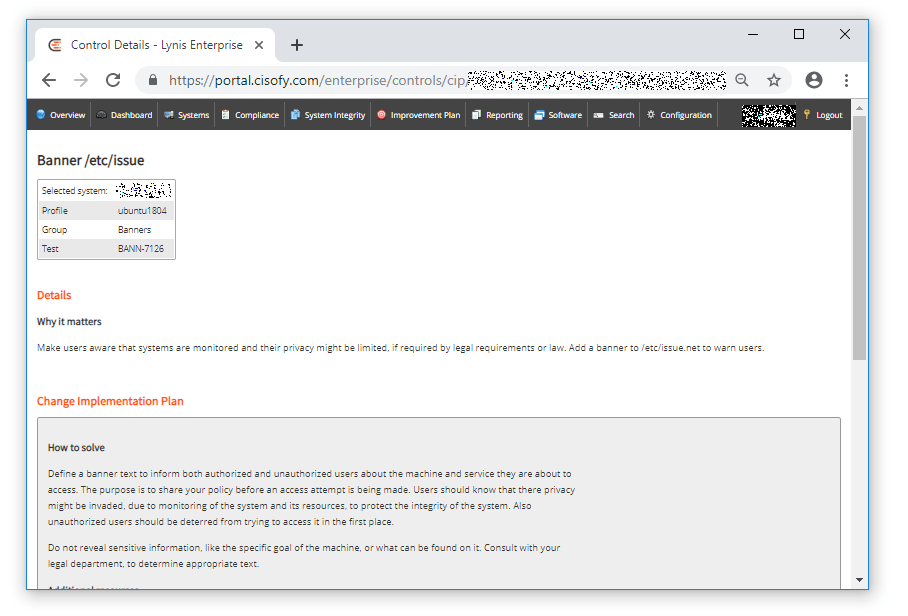
  • Add a legal banner to /etc/issue.net, to warn unauthorized users
  • Check available certificates for expiration
  • To decrease the impact of a full /home file system, place /home on a separate partition
  • Install a file integrity tool to monitor changes to critical and sensitive files
  • Check iptables rules to see which rules are currently not used
  • Harden compilers like restricting access to root user only
  • Disable the ‘VRFY’ command
  • Add the IP name and FQDN to /etc/hosts for proper name resolving
  • Purge old/removed packages (59 found) with aptitude purge or dpkg –purge command. This will clean up old configuration files, cron jobs and startup scripts.
  • Remove any unneeded kernel packages
  • Determine if automation tools are present for system management
  • etc

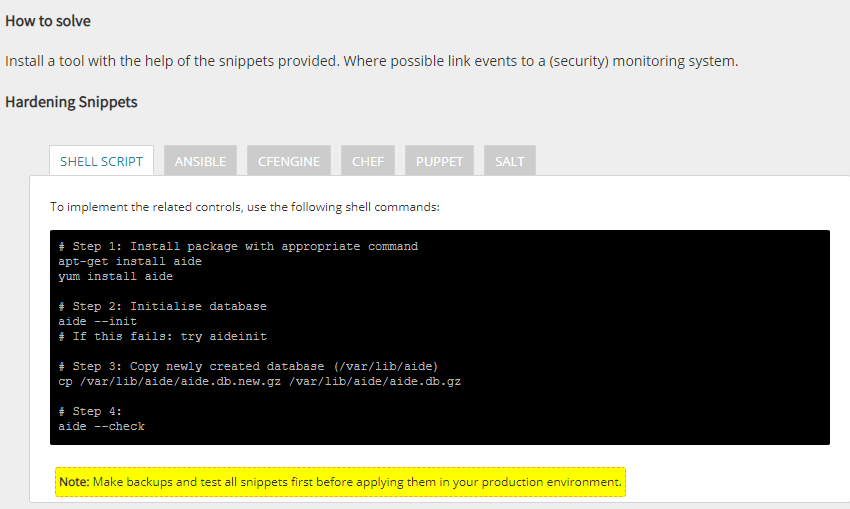
Hardening Suggestion (Ignore or Solve)

If you click ‘Solve‘ Cisofy will provide a link to detailed information to help you solve issues.

Suggested fix: ACCT-9630 Audit daemon is enabled with an empty ruleset. Disable the daemon or define rules

I will not list every suggested problem and fix but here are some fixes below.

ACCT-9630 Audit daemon is enabled with an empty ruleset. Disable the daemon or define rules (fixed)

TIP: If you don’t have auditd installed run this command below to install it

sudo apt-get install auditd
/etc/init.d/auditd start
/etc/init.d/auditd status

I added the following to ‘/etc/audit/rules.d/audit.rules‘ (thanks to the solution recommendations on the Cisofy portal.

# This is an example configuration suitable for most systems
# Before running with this configuration:
# - Remove or comment items which are not applicable
# - Check paths of binaries and files

###################
# Remove any existing rules
###################

-D

###################
# Buffer Size
###################
# Might need to be increased, depending on the load of your system.
-b 8192

###################
# Failure Mode
###################
# 0=Silent
# 1=printk, print failure message
# 2=panic, halt system
-f 1

###################
# Audit the audit logs.
###################
-w /var/log/audit/ -k auditlog

###################
## Auditd configuration
###################
## Modifications to audit configuration that occur while the audit (check your paths)
-w /etc/audit/ -p wa -k auditconfig
-w /etc/libaudit.conf -p wa -k auditconfig
-w /etc/audisp/ -p wa -k audispconfig

###################
# Monitor for use of audit management tools
###################
# Check your paths
-w /sbin/auditctl -p x -k audittools
-w /sbin/auditd -p x -k audittools

###################
# Special files
###################
-a exit,always -F arch=b32 -S mknod -S mknodat -k specialfiles
-a exit,always -F arch=b64 -S mknod -S mknodat -k specialfiles

###################
# Mount operations
###################
-a exit,always -F arch=b32 -S mount -S umount -S umount2 -k mount
-a exit,always -F arch=b64 -S mount -S umount2 -k mount

###################
# Changes to the time
###################
-a exit,always -F arch=b32 -S adjtimex -S settimeofday -S stime -S clock_settime -k time
-a exit,always -F arch=b64 -S adjtimex -S settimeofday -S clock_settime -k time
-w /etc/localtime -p wa -k localtime

###################
# Use of stunnel
###################
-w /usr/sbin/stunnel -p x -k stunnel

###################
# Schedule jobs
###################
-w /etc/cron.allow -p wa -k cron
-w /etc/cron.deny -p wa -k cron
-w /etc/cron.d/ -p wa -k cron
-w /etc/cron.daily/ -p wa -k cron
-w /etc/cron.hourly/ -p wa -k cron
-w /etc/cron.monthly/ -p wa -k cron
-w /etc/cron.weekly/ -p wa -k cron
-w /etc/crontab -p wa -k cron
-w /var/spool/cron/crontabs/ -k cron

## user, group, password databases
-w /etc/group -p wa -k etcgroup
-w /etc/passwd -p wa -k etcpasswd
-w /etc/gshadow -k etcgroup
-w /etc/shadow -k etcpasswd
-w /etc/security/opasswd -k opasswd

###################
# Monitor usage of passwd command
###################
-w /usr/bin/passwd -p x -k passwd_modification

###################
# Monitor user/group tools
###################
-w /usr/sbin/groupadd -p x -k group_modification
-w /usr/sbin/groupmod -p x -k group_modification
-w /usr/sbin/addgroup -p x -k group_modification
-w /usr/sbin/useradd -p x -k user_modification
-w /usr/sbin/usermod -p x -k user_modification
-w /usr/sbin/adduser -p x -k user_modification

###################
# Login configuration and stored info
###################
-w /etc/login.defs -p wa -k login
-w /etc/securetty -p wa -k login
-w /var/log/faillog -p wa -k login
-w /var/log/lastlog -p wa -k login
-w /var/log/tallylog -p wa -k login

###################
# Network configuration
###################
-w /etc/hosts -p wa -k hosts
-w /etc/network/ -p wa -k network

###################
## system startup scripts
###################
-w /etc/inittab -p wa -k init
-w /etc/init.d/ -p wa -k init
-w /etc/init/ -p wa -k init

###################
# Library search paths
###################
-w /etc/ld.so.conf -p wa -k libpath

###################
# Kernel parameters and modules
###################
-w /etc/sysctl.conf -p wa -k sysctl
-w /etc/modprobe.conf -p wa -k modprobe
###################

###################
# PAM configuration
###################
-w /etc/pam.d/ -p wa -k pam
-w /etc/security/limits.conf -p wa -k pam
-w /etc/security/pam_env.conf -p wa -k pam
-w /etc/security/namespace.conf -p wa -k pam
-w /etc/security/namespace.init -p wa -k pam

###################
# Puppet (SSL)
###################
#-w /etc/puppet/ssl -p wa -k puppet_ssl

###################
# Postfix configuration
###################
#-w /etc/aliases -p wa -k mail
#-w /etc/postfix/ -p wa -k mail
###################

###################
# SSH configuration
###################
-w /etc/ssh/sshd_config -k sshd

###################
# Hostname
###################
-a exit,always -F arch=b32 -S sethostname -k hostname
-a exit,always -F arch=b64 -S sethostname -k hostname

###################
# Changes to issue
###################
-w /etc/issue -p wa -k etcissue
-w /etc/issue.net -p wa -k etcissue

###################
# Log all commands executed by root
###################
-a exit,always -F arch=b64 -F euid=0 -S execve -k rootcmd
-a exit,always -F arch=b32 -F euid=0 -S execve -k rootcmd

###################
## Capture all failures to access on critical elements
###################
-a exit,always -F arch=b64 -S open -F dir=/etc -F success=0 -k unauthedfileacess
-a exit,always -F arch=b64 -S open -F dir=/bin -F success=0 -k unauthedfileacess
-a exit,always -F arch=b64 -S open -F dir=/home -F success=0 -k unauthedfileacess
-a exit,always -F arch=b64 -S open -F dir=/sbin -F success=0 -k unauthedfileacess
-a exit,always -F arch=b64 -S open -F dir=/srv -F success=0 -k unauthedfileacess
-a exit,always -F arch=b64 -S open -F dir=/usr/bin -F success=0 -k unauthedfileacess
-a exit,always -F arch=b64 -S open -F dir=/usr/local/bin -F success=0 -k unauthedfileacess
-a exit,always -F arch=b64 -S open -F dir=/usr/sbin -F success=0 -k unauthedfileacess
-a exit,always -F arch=b64 -S open -F dir=/var -F success=0 -k unauthedfileacess

###################
## su/sudo
###################
-w /bin/su -p x -k priv_esc
-w /usr/bin/sudo -p x -k priv_esc
-w /etc/sudoers -p rw -k priv_esc

###################
# Poweroff/reboot tools
###################
-w /sbin/halt -p x -k power
-w /sbin/poweroff -p x -k power
-w /sbin/reboot -p x -k power
-w /sbin/shutdown -p x -k power

###################
# Make the configuration immutable
###################
-e 2

# EOF

I reloaded my audit daemon config

auditctl -R /etc/audit/rules.d/audit.rules

Further configuration can be added (read this), read the auditd man page here or read logs you can use the ‘auditsearch‘ tool (read the Ubuntu Man Page here)

Here is a great guide on viewing audit events.

Because we have this rule ( ‘-w /etc/passwd -p wa -k etcpasswd ) to monitor the passwords file, If I read the contents of \etc\passwd it will show up in the audit logs.

We can verify the access of this file by running this command

ausearch -f /etc/passwd

Output

ausearch -f /etc/passwd
----
time->Mon Jun 10 16:58:13 2019
type=PROCTITLE msg=audit(##########.897:3639): proctitle=##########################
type=PATH msg=audit(##########.897:3639): item=1 name="/etc/passwd" inode=1303 dev=fc:01 mode=0100644 ouid=0 ogid=0 rdev=00:00 nametype=NORMAL cap_fp=0000000000000000 cap_fi=0000000000000000 cap_fe=0 cap_fver=0
type=PATH msg=audit(##########.897:3639): item=0 name="/etc/" inode=12 dev=fc:01 mode=040755 ouid=0 ogid=0 rdev=00:00 nametype=PARENT cap_fp=0000000000000000 cap_fi=0000000000000000 cap_fe=0 cap_fver=0
type=CWD msg=audit(##########.897:3639): cwd="/root"
type=SYSCALL msg=audit(##########.897:3639): arch=c000003e syscall=257 success=yes exit=3 a0=ffffff9c a1=556241ea9650 a2=441 a3=1b6 items=2 ppid=1571 pid=1572 auid=0 uid=0 gid=0 euid=0 suid=0 fsuid=0 egid=0 sgid=0 fsgid=0 tty=pts0 ses=446 comm="nano" exe="/bin/nano" key="etcpasswd"

I might write a list of handy ausearech commands and blog about this in the future

SSH Permissions (fixed)

to fish the ssh permissions warning I ran the command to show the issue on my server

./lynis show details FILE-7524
2019-05-25 23:00:04 Performing test ID FILE-7524 (Perform file permissions check)
2019-05-25 23:00:04 Test: Checking file permissions
2019-05-25 23:00:04 Using profile /utils/lynis/default.prf for baseline.
2019-05-25 23:00:04 Checking /etc/lilo.conf
2019-05-25 23:00:04   Expected permissions:
2019-05-25 23:00:04   Actual permissions:
2019-05-25 23:00:04   Result: FILE_NOT_FOUND
2019-05-25 23:00:04 Checking /root/.ssh
2019-05-25 23:00:04   Expected permissions: rwx------
2019-05-25 23:00:04   Actual permissions: rwxr-xr-x
2019-05-25 23:00:04   Result: BAD
2019-05-25 23:00:04 Warning: Incorrect permissions for file /root/.ssh [test:FILE-7524] [details:-] [solution:-]
2019-05-25 23:00:04 Using profile /utils/lynis/custom.prf for baseline.
2019-05-25 23:00:04 Checking permissions of /utils/lynis/include/tests_homedirs
2019-05-25 23:00:04 File permissions are OK
2019-05-25 23:00:04 ===---------------------------------------------------------------===

I tightened permissions on the /root/.ssh folder with this command

chmod 700 /root/.ssh

Configure minimum/maximum password age in /etc/login.defs (fixed)

I set a maximum and minimum password age in ‘/etc/login.defs‘

Defaults

PASS_MAX_DAYS   99999
PASS_MIN_DAYS   0
PASS_WARN_AGE   7

Add a legal banner to /etc/issue, to warn unauthorized users (fixed)

I edited ‘/etc/issue’ on Ubuntu and Linux

Ubuntu 18.04 default

Ubuntu 18.04.2 LTS \n \l

Debian Default

Debian GNU/Linux 9 \n \l

Cisofy said this “Define a banner text to inform both authorized and unauthorized users about the machine and service they are about to access. The purpose is to share your policy before an access attempt is being made. Users should know that there privacy might be invaded, due to monitoring of the system and its resources, to protect the integrity of the system. Also unauthorized users should be deterred from trying to access it in the first place.“

Done

Default umask in /etc/login.defs could be more strict like 027 (fixed)

Related files..

  • /etc/profile
  • /etc/login.defs
  • /etc/passwd

I edited ‘/etc/login.defs’ and set

UMASK           027

I ran

umask 027 /etc/profile
umask 027 /etc/login.defs
umask 027 /etc/passwd

Check iptables rules to see which rules are currently not used (fixed)

I ran the following command to review my firewall settings

iptables --list --numeric --verbose

TIP: Scan for open ports with ‘nmap’

Watch this handy video if you are not sure how to use nmap

Install nmap

sudo apt-get install nmap

I do set firewall rules in ufw (guide here) and ufw is a front end for iptables.

Scan for open ports with nmap

nmap -v -sT localhost

Starting Nmap 7.60 ( https://nmap.org ) at 2019-06-12 22:09 AEST
Initiating Connect Scan at 22:09
Scanning localhost (127.0.0.1) [1000 ports]
Discovered open port 443/tcp on 127.0.0.1
Discovered open port 22/tcp on 127.0.0.1
Discovered open port 8080/tcp on 127.0.0.1
Discovered open port 25/tcp on 127.0.0.1
Discovered open port 80/tcp on 127.0.0.1
Completed Connect Scan at 22:09, 0.02s elapsed (1000 total ports)
Nmap scan report for localhost (127.0.0.1)
Host is up (0.00012s latency).
Not shown: 994 closed ports
PORT     STATE SERVICE
22/tcp   open  ssh
25/tcp   open  smtp
80/tcp   open  http
443/tcp  open  https
8080/tcp open  http-proxy

Everything looked good.

Harden compilers like restricting access to root user only (fixed)

Cicofy said

Compilers turn source code into binary executable code. For a production system a compiler is usually not needed, unless package upgrades are performed by means of their source code (like FreeBSD ports collection). If a compiler is found, execution should be limited to authorized users only (e.g. root user).

To solve this finding, remove any unneeded compiler or change the file permissions. Usually chmod 700 or chmod 750 will be enough to prevent normal users from using a compiler. Related compilers are as, cc, ld, gcc, go etc. To determine what files are affected, check the Lynis log file, then chmod these files.

I ran

chmod 700 /usr/bin/as
chmod 700 /usr/bin/gcc

Turn off PHP information exposure (fixed)

Cisofy siad

Disable the display of version information by setting the expose_php option to 'Off' in php.ini. As several instances of PHP might be installed, ensure that all related php.ini files have this setting turned off, otherwise this control will show up again.

This was already turned off but a unused php.ini may have been detected.

I searched for all php.ini files

find / -name php.ini

Output

/etc/php/7.3/apache2/php.ini
/etc/php/7.3/fpm/php.ini
/etc/php/7.3/cli/php.ini

yep, the cli version of php.ini had the following

expose_php = On

I set this to Off

Purge old/removed packages (59 found) with aptitude purge or dpkg –purge command. This will cleanup old configuration files, cron jobs and startup scripts. (fixed)

Cisofy said

While not directly a security concern, unpurged packages are not installed but still have remains left on the system (e.g. configuration files). In case software is reinstalled, an old configuration might be applied. Proper cleanups are therefore advised.

To remove the unneeded packages, select the ones marked with the 'rc' status. This means the package is removed, but the configuration files are still there.

I ran the following recommended command

dpkg -l | grep "^rc" | cut -d " " -f 3 | xargs dpkg --purge

Done

Install debsums utility for the verification of packages with known good database. (fixed)Cisofy said

Install the debsums utility to do more in-depth auditing of your packages.

I ran the following suggested command

apt-get install debsums

I googled and found this handy page

I scanned packages and asked ‘debsums” to only show errors with this command

sudo debsums -s

The only error was..

debsums: missing file /usr/bin/pip (from python-pip package)

I did not need pip so I removed it

apt-get remove --purge python-pip

Install a PAM module for password strength testing like pam_cracklib or pam_passwdqc (fixed)

I ignore this as I do not allow logins via password and only I have an account (it’s not a multi user system).

I white list logins to IP’s.

I only allow ssh access with a private key and long passphrase.

I have 2FA OTP enabled at logins.

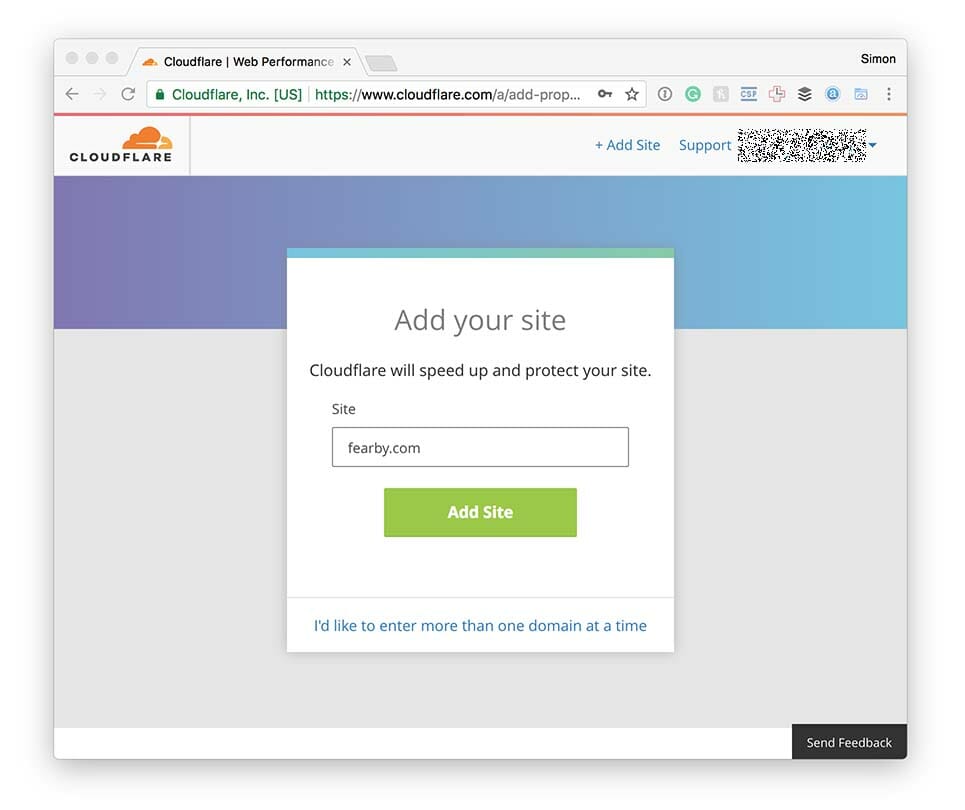
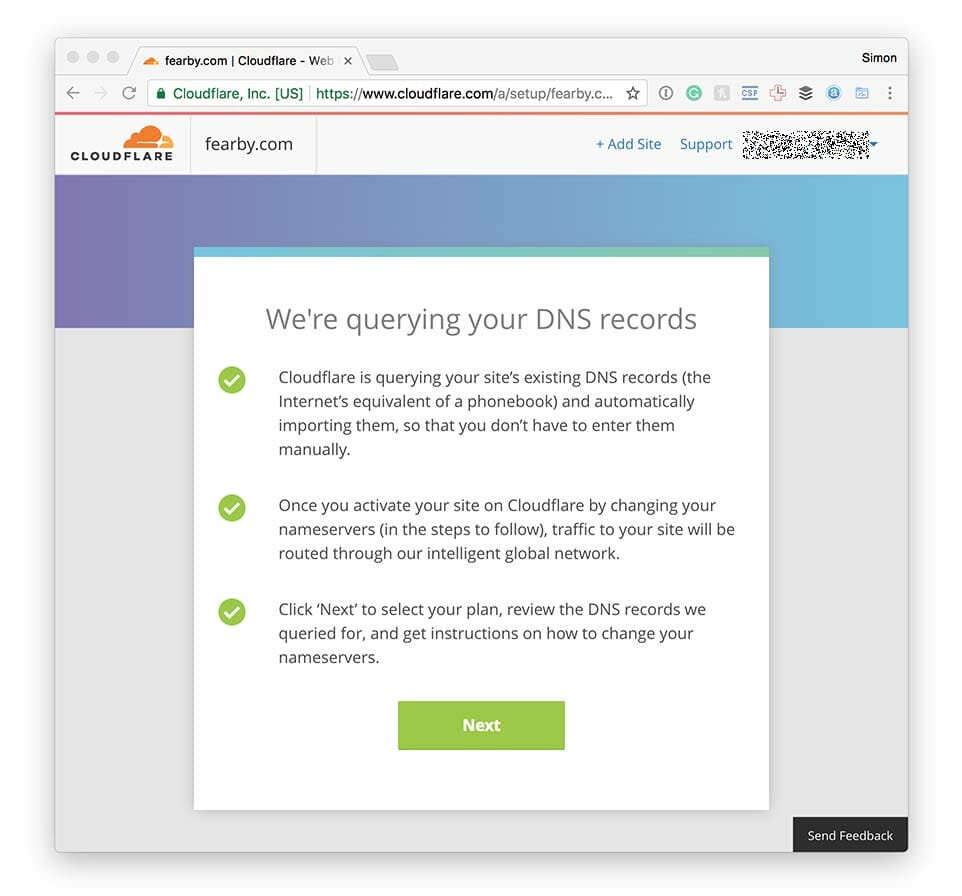
I have cloudflare over my domain.

I setup fail2ban to auto block logins using this guide

Reboot (fixed)

I restated the server

shutdown -r now

Done

Check available certificates for expiration (fixed)

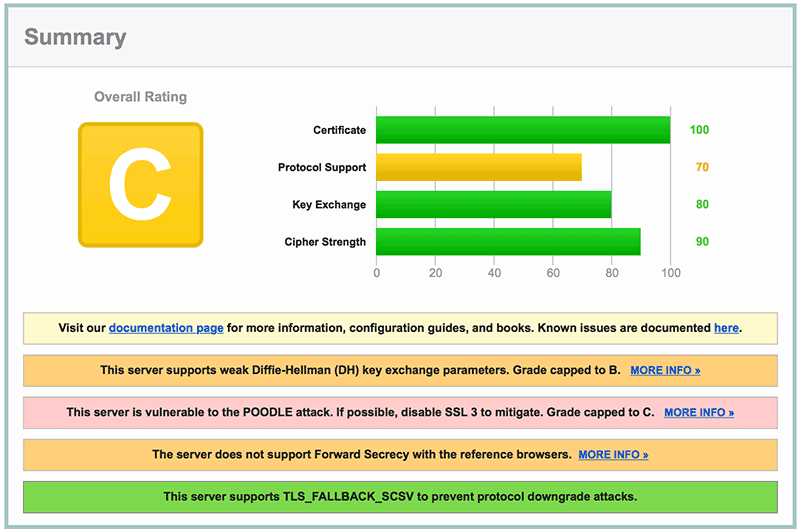
I tested my SSL certificate with https://dev.ssllabs.com

https://dev.ssllabs.com/ scan of my site

Add legal banner to /etc/issue.net, to warn unauthorized users (fixed)

Cisofy said…

Define a banner text to inform both authorized and unauthorized users about the machine and service they are about to access. The purpose is to share your policy before an access attempt is being made. Users should know that there privacy might be invaded, due to monitoring of the system and its resources, to protect the integrity of the system. Also unauthorized users should be deterred from trying to access it in the first place.

Do not reveal sensitive information, like the specific goal of the machine, or what can be found on it. Consult with your legal department, to determine appropriate text.

I edited the file ‘/etc/issue.net’ and added a default pre login message (same as ‘/etc/issue’).

Install Apache mod_evasive to guard webserver against DoS/brute force attempts (ignored)

I ignored this message and I don’t use the Apache (I use the Nginx web server). I have added Apache to be blocked from installing.

I clicked Ignore in the Cisofy portal.

Ignore Button

Install Apache modsecurity to guard webserver against web application attacks (ignored)

I clicked Ignore for this one too

Ignore Button

Check your Nginx access log for proper functioning (reviewed)

Cisofy said…

Disabled logging:
Check in the Lynis log for entries which are disabled, or in the nginx configuration (access_log off).

Missing logging:
Check for missing log files. They are references in the configuration of nginx, but not on disk. The Lynis log will reveal to what specific files this applies.

I checked my Nginx config (‘/etc/nginx/nginx.conf‘) for all log references and ensured the logs were writing to disk (OK).

I checked my ‘/etc/nginx/sites-available/default‘ config and I did have 2 settings of ‘access_log off ‘ (this was added during the setup for two sub reporting subfolders for the Nixstats agent.

I restarted Nginx

nginx -t
nginx -s reload
/etc/init.d/nginx restart

Check what deleted files are still in use and why. (fixed)

Cisofy said..

Why it matters
Deleted files may sometimes be in use by applications. Normally this should not happen, as an application should delete a file and release the file handle. This test might discover malicious software, trying to hide its presence on the system. Investigate the related files by determining which application keeps it open and the related reason.

Details
The following details have been found as part of the scan.

/lib/systemd/systemd-logind(systemd-l)
/tmp/ib1ekCtf(mysqld)
/tmp/ibhuK1At(mysqld)
/tmp/ibmTO5F5(mysqld)
/tmp/ibR0dkxD(mysqld)
/tmp/ibvf69KH(mysqld)
/tmp/.ZendSem.gq3mnz(php-fpm7.)
/usr/bin/python3.6(networkd-)
/usr/bin/python3.6(unattende)
/var/log/mysql/error.log.1(mysqld)

I ran the following command to show deleted files in use

lsof | grep deleted

I noticed on my database server a php-fpm service was using files. I don’t have a webserver enabled on this server, so I uninstalled the web-based services.

I have separate web and database servers.

sudo apt-get remove apache*
sudo apt-get remove -y --purge nginx*
sudo apt-get remove -y --purge php7*
sudo apt autoremove

Check DNS configuration for the dns domain name (fixed)

Cisofy said..

Some software can work incorrectly when the system can't resolve itself. 
Add the IP name and fully qualified domain name (FQDN) to /etc/hosts. Usually this is done with an entry of 127.0.0.1, or 127.0.1.1 (to leave the localhost entry alone). 

I edited my ‘/etc/hosts’ file

I added a domain name to the end of the localhost entry and added a new line with my server(s) IP and domain name

Disable the ‘VRFY’ command (fixed)

I was advised to run this command

postconf -e disable_vrfy_command=yes

(Debian) Enable sysstat to collect accounting (no results) (fixed)

Cisofy said..

The sysstat is collection of utilities to provide system information insights. While one should aim for the least amount of packages, the sysstat utilities can be a good addition to help recording system details. They can provide insights for performance monitoring, or guide in discovering unexpected events (like a spam run). If you already use extensive system monitoring, you can safely ignore this control.

I ran the suggested commands

apt-get install sysstat
sed -i 's/^ENABLED="false"/ENABLED="true"/' /etc/default/sysstat

More info on sysstat here.

Consider running ARP monitoring software (arpwatch,arpon) (fixed)

Cisofy said

Networks are very dynamic, often with devices come and go as they please. For sensitive machines and network zones, you might want to know what happens on the network itself. An utility like arpwatch can help tracking changes, like new devices showing up, or others leaving the network.

I read this page to setup and configure arpwatch

sudo apt-get install arpwatch
/etc/init.d/arpwatch start

I will add more on how to use arpwatch soon

Disable drivers like USB storage when not used, to prevent unauthorized storage or data theft (fixed)

Cosofy siad..

Disable drivers like USB storage when not used. This helps preventing unauthorized storage, data copies, or data theft.

I ran the suggested fix

echo "# Block USB storage" >> /etc/modprobe.d/disable-usb-storage.conf
echo "install usb-storage /bin/false" >> /etc/modprobe.d/disable-usb-storage.conf

Determine if automation tools are present for system management (ignored)

I ignored this one

Ignore Button

One or more sysctl values differ from the scan profile and could be tweaked

Cisofy said..

By means of sysctl values we can adjust kernel related parameters. Many of them are related to hardening of the network stack, how the kernel deals with processes or files. This control is a generic test with several sysctl variables (configured by the scan profile).

I was advised to adjust these settings

  • net.ipv4.conf.all.send_redirects=0
  • net.ipv4.conf.default.accept_source_route=0
  • kernel.sysrq=0
  • net.ipv4.conf.all.log_martians=1
  • net.ipv4.conf.default.log_martians=1
  • kernel.core_uses_pid=1
  • kernel.kptr_restrict=2
  • fs.suid_dumpable=0
  • kernel.dmesg_restrict=1

I edited ‘/etc/sysctl.conf‘ and made the advised changes along with these (I Googled each item first)

Install a file integrity tool to monitor changes to critical and sensitive files (fixed)

Cisofy said..

To monitor for unauthorized changes, a file integrity tool can help with the detection of such event. Each time the contents or the properties of a file change, it will have a different checksum. With regular checks of the related integrity database, discovering changes becomes easy. Install a tool like AIDE, Samhain or Tripwire to monitor important system and data files. Additionally configure the tool to alert system or security personnel on events.

It also gave a solution

# Step 1: Install package with appropriate command
apt-get install aide
yum install aide

# Step 2: Initialise database
aide --init
# If this fails: try aideinit

# Step 3: Copy newly created database (/var/lib/aide)
cp /var/lib/aide/aide.db.new.gz /var/lib/aide/aide.db.gz

# Step 4:
aide --check

I installed ‘aide’ (read the guide here).

TIP: Long story but the steps above were not exactly correct. Thanks to this post for I was able to set up aide. without seeing this error.

Couldn't open file /var/lib/aide/please-dont-call-aide-without-parameters/aide.db.new for writing

This is how I installed aide

apt-get install aide
apt-get install aide-common

I initialised aide.

aideinit

This was the important part (I was stuck for hours on this one)

aide.wrapper --check

I can run the following to see what files have changed.

I could see many files have changed since the initial scan (e.g mysql, log files nano search history).

Nice

Now lets schedule daily checks and create a cron job.

cat /folder/runaide.sh
#!/bin/bash

sendemail -f [email protected] -t [email protected] -u "CRON: AIDE Run (yourserver.com) START" -m "/folder/runaide.sh" -s smtp.gmail.com:587 -o tls=yes -xu [email protected] -xp ***my*google*gsuite*email*app*password***

MYDATE=`date +%Y-%m-%d`
MYFILENAME="Aide-"$MYDATE.txt
/bin/echo "Aide check !! `date`" > /tmp/$MYFILENAME
/usr/bin/aide.wrapper --check > /tmp/myAide.txt
/bin/cat /tmp/myAide.txt|/bin/grep -v failed >> /tmp/$MYFILENAME
/bin/echo "**************************************" >> /tmp/$MYFILENAME
/usr/bin/tail -100 /tmp/myAide.txt >> /tmp/$MYFILENAME
/bin/echo "****************DONE******************" >> /tmp/$MYFILENAME

#/usr/bin/mail -s"$MYFILENAME `date`" [email protected] < /tmp/$MYFILENAME

sendemail -f [email protected] -t [email protected] -u "CRON: AIDE Run (yourserver.com) END" -m "/folder/runaide.sh" -s smtp.gmail.com:587 -o tls=yes -xu [email protected] -xp ***my*google*gsuite*email*app*password*** -a /tmp/$MYFILENAME -a /tmp/myAide.txt

Above thanks to this post

I setup a cron job to run this daily

#Run AIDE
0 6 * * * /folder/runaide.sh && curl -fsS --retry 3 https://hc-ping.com/######-####-####-####-############> /dev/null

ACCT-9622 – Enable process accounting. (fixed)

Solution:

Install “acct” process and login accounting.

sudo apt-get install acct

Start the “acct” service

/etc/init.d/acct start
touch /var/log/pacct
chown root /var/log/pacct
chmod 0644 /var/log/pacct
accton /var/log/pacct 

Check the status

/etc/init.d/acct status
* acct.service - LSB: process and login accounting
   Loaded: loaded (/etc/init.d/acct; generated)
   Active: active (exited) since Sun 2019-05-26 19:42:15 AEST; 4min 42s ago
     Docs: man:systemd-sysv-generator(8)
    Tasks: 0 (limit: 4660)
   CGroup: /system.slice/acct.service

May 26 19:42:15 servername systemd[1]: Starting LSB: process and login accounting...
May 26 19:42:15 servername acct[27419]: Turning on process accounting, file set to '/var/log/account/pacct'.
May 26 19:42:15 servername systemd[1]: Started LSB: process and login accounting.
May 26 19:42:15 servername acct[27419]:  * Done.

Run CISOfy recommended commands

touch /var/log/pacct
chown root /var/log/pacct
chmod 0644 /var/log/pacct
accton /var/log/pacct 

Manual Scan of Lynis

I re-ran an audit of the system (and uploaded the report to the portal) so I can see how I am progressing.

./lynis audit system --upload

I then checked the error status and the warnings were resolved.

Progress?

I rechecked my servers and all warnings are solved, now I just need to work on information level issues

Warning level errors fixed,  and informational to go

Cisofy Portal Overview

Quick breakdown of the Cisofy Portal

Overview Tab (portal.cisofy.com)

The Overview lab displays any messages, change log, API information, add a new system link, settings etc.

Lynis Overview tab

Dashboard Tab (portal.cisofy.com)

The dashboard tab will display compliant systems any outdated systems, alerts and events.

Lynis Dashboard screenshot https://portal.cisofy.com/enterprise/dashboard/

TIP: If you have a system that reports “Outdated” run the following command.
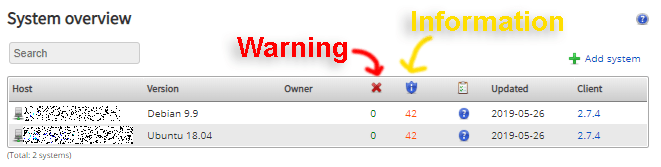
./lynis audit system --upload

Systems Tab (portal.cisofy.com)

The systems tab shows all systems, OS version, warnings, information counts, the date the system’s client last uploaded a report and the client version.

Systems tab shows all systems, OS version, warnings, information counts, date client last uploaded a report update and client version

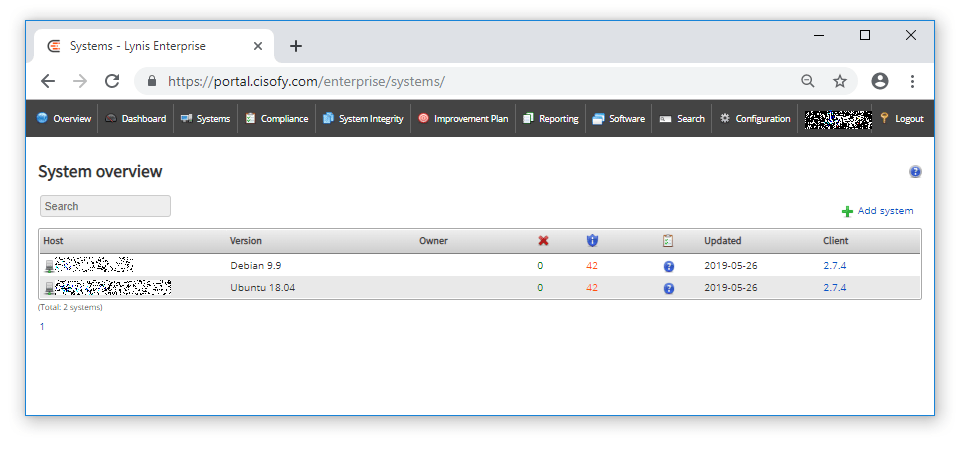
If you are making many changes and manual Lynis scans keep an eye on your upload credits, You can see by the above and below image, I have lowered my suggested actions to harden my servers (red text).

Lynis scans reached

Clicking a host name reveals a summary of the system.

Clicking a system reveals a summary of the system.

Remaining information level issues are listed.

I can click Solve and see more information about the issue to resolve.

TIP: I thought it would be a good idea to copy this list to a spreadsheet for detailed tracking.

Spreadsheet listing issues to complete and done

I had another issue appear a few days later.

Compliance Tab (portal.cisofy.com)

A lot of information is listed here.

Compliance Tab

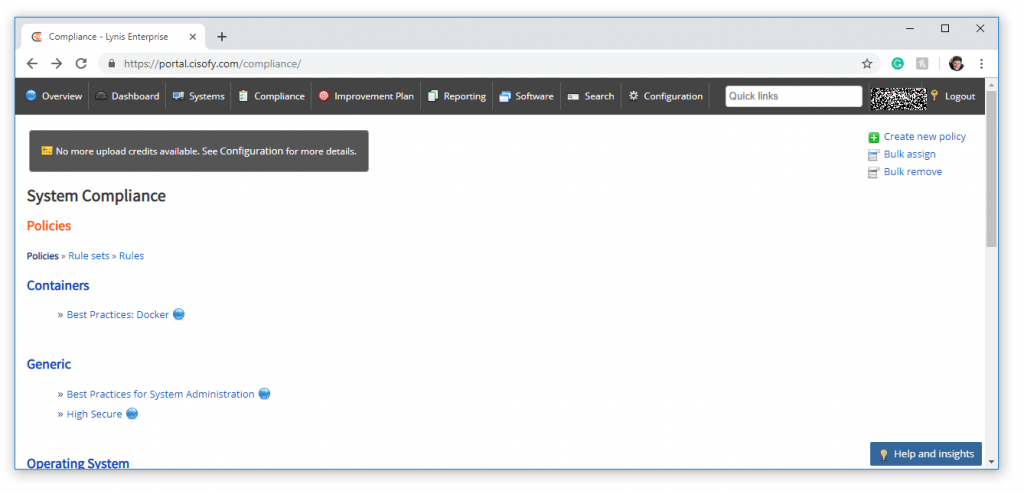
Best practice guides are available

best practice ghttps://portal.cisofy.com/compliance/udes

I could go on an on but https://cisofy.com/ is awesome.

TIP: Manually updating Lynis

from the command line I can view the Linus version with this command

./lynis --version
2.7.4

To update the Lynis git repository from the Lynis folder run this command

git pull
Already up to date.

Automatically updating and running Lynis scans

I added the following commands to my crontab to update then scan and report Lynis results to the portal.

TIP: Use https://crontab.guru/ to choose the right time to run commands (I chose 5 mins past 1 AM every day to update and 5 mins past 2 AM to run a scan.


#Lynis Update
5 1 * * * root -s /bin/bash -c 'cd /utils/lynis && /usr/bin/git pull origin master'

#Lynis Scan
5 2 * * * root -s /bin/bash -c '/utils/lynis/lynis audit system --upload'

Troubleshooting

fyi: Lynis Log file location: /var/log/lynis.log

Cisofy Enterprise Conclusion

Pros:

  • I can learn so much about securing Linux just from the Cisofy Fix recommendations.
  • I have secured my server beyond what I thought possible.
  • Very active development on Github: https://github.com/CISOfy/lynis/
  • Cisofy has a very good inteface and updates often.
  • New security issues are synced down and included in new scans (if you update)

Cons:

  • I am unable to pay for this for my servers here in Australia (European legal issues).
  • Needs Hardware 2FA

Tips

Make sure you have curl installed to allow reports to upload. I had this error on Debian 9.4.

View the latest repository version information here.

I added my Lynis folder to the Linux $PATH variable

export PATH=$PATH:/folder/lynis

Fatal: can’t find curl binary. Please install the related package or put the binary in the PATH. Quitting..

Lynis Enterprise API

View the Lynis Enterprise API documentation here

Lynis Enterprise Support

Support can be found here, email support [email protected].

Getting started guide is found here.

Bonus: Setting Up Content Security Policy and reporting violations to https://report-uri.com/

I have a few older posts on Content Security Policies (CSP) but they are a bit dated.

  • 2016 – Beyond SSL with Content Security Policy, Public Key Pinning etc
  • 2018 – Set up Feature-Policy, Referrer-Policy and Content Security Policy headers in Nginx

Wikipedia Definition of a Content Security Policy

Content Security Policy (CSP) is a computer security standard introduced to prevent cross-site scripting (XSS), clickjacking and other code injection attacks resulting from execution of malicious content in the trusted web page context.[1] It is a Candidate Recommendation of the W3C working group on Web Application Security,[2] widely supported by modern web browsers.[3] CSP provides a standard method for website owners to declare approved origins of content that browsers should be allowed to load on that website—covered types are JavaScript, CSS, HTML frames, web workers, fonts, images, embeddable objects such as Java applets, ActiveX, audio and video files, and other HTML5 features.

If you want to learn about to setup CSP’s head over to https://report-uri.com/products/content_security_policy or https://report-uri.com/home/tools and read more.

I did have Content Security Policies (CSP) set up a few years back, but I had issues with broken resources. A lack of time on my behalf to investigate the issues forced me to disable the Content Security Policy (CSP). I should have changed the “Content-Security-Policy” header to “Content-Security-Policy-Report-Only.”

I will re-add the Content Security Policy (CSP) to my site but this time I will not disable it and will report to https://report-uri.com/, and if need be I will change the header from “content-security-policy” to “content-security-policy-report-only”. That way a broken policy won’t take down my site in future.

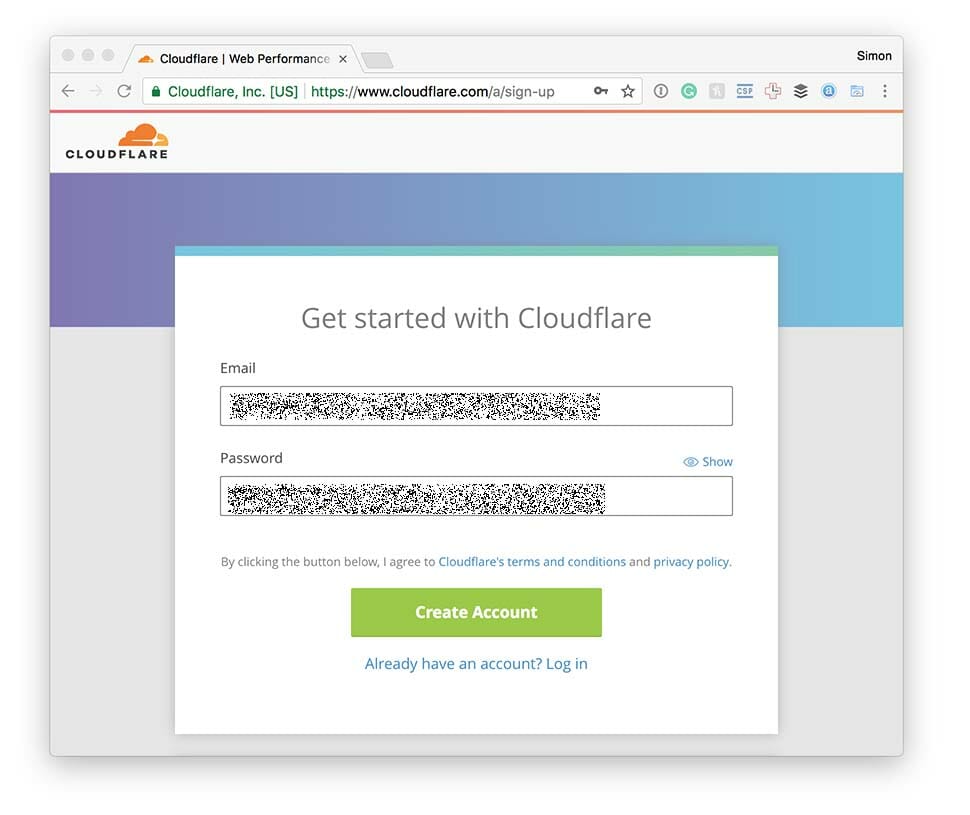
If you want to set up a Content Security Policy header and with good reporting of any violations of your CSP policy simply head over to https://report-uri.com/ and create a new account.

Read the official Report URI help documents here: https://docs.report-uri.com/.

Create a Content Security Policy

The hardest part of creating a Content Security Policy is knowing what to add where.

You could generate your own Content Security Policy by heading here (https://report-uri.com/home/generate) but that will take a while.

Create a CSP

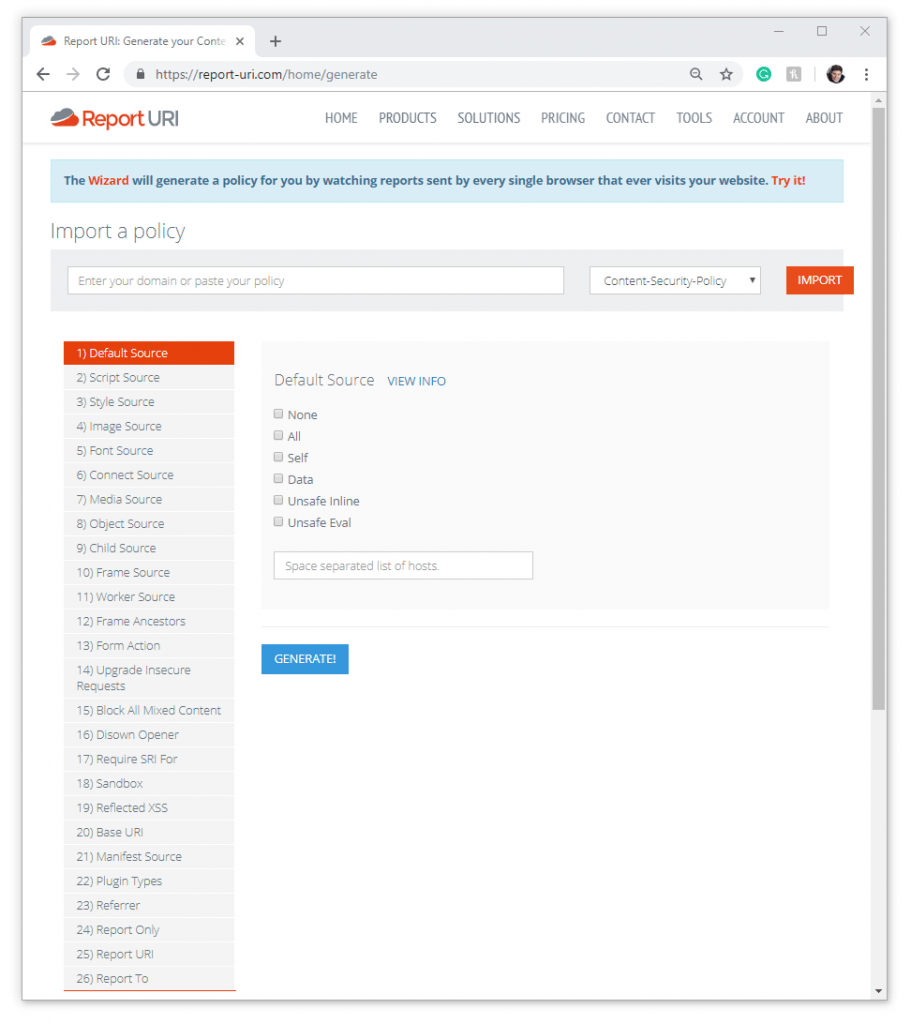
TIP: Don’t make your policy live straight away by using the “Content-Security-Policy” header, instead use the “Content-Security-Policy-Report-Only” header.

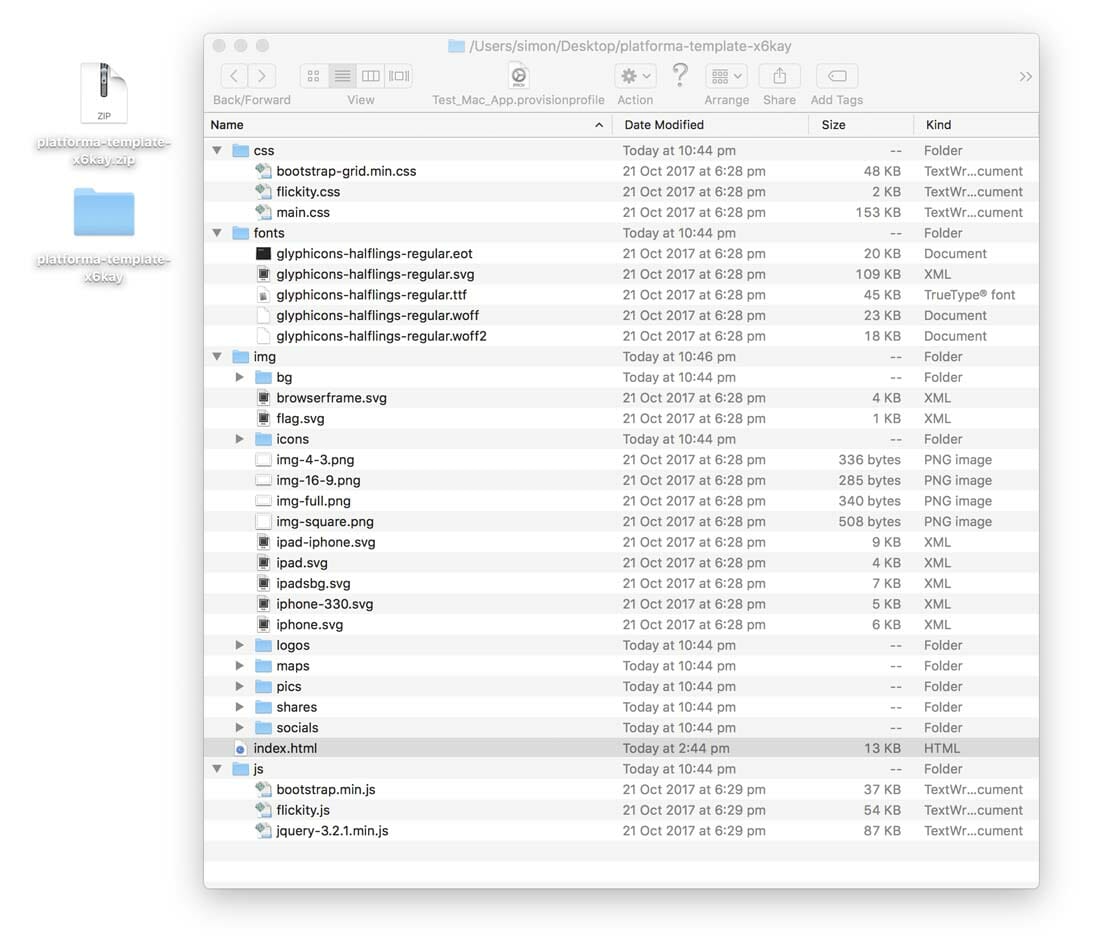
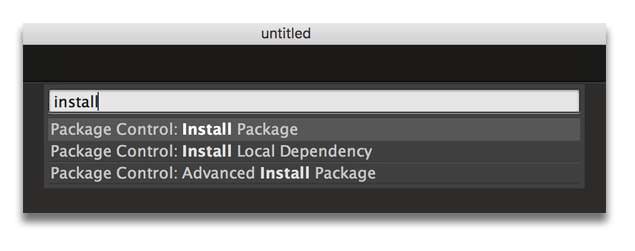
To create a content Security Policy faster I would recommend you to use this Firefox plugin to generate a starter Content Security Policy.

Screenshot of https://addons.mozilla.org/en-US/firefox/addon/laboratory-by-mozilla/

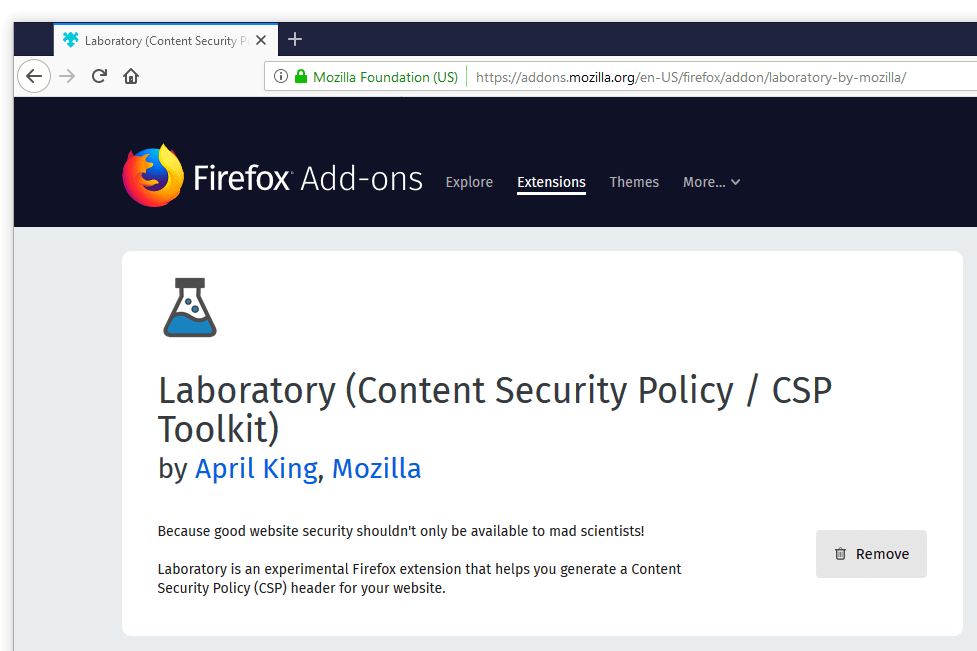
Install this plugin to Firefox, enable it and click the Plugins icon and ensure “Record this site…” is ticked.

Laboratory plugin inFirefix

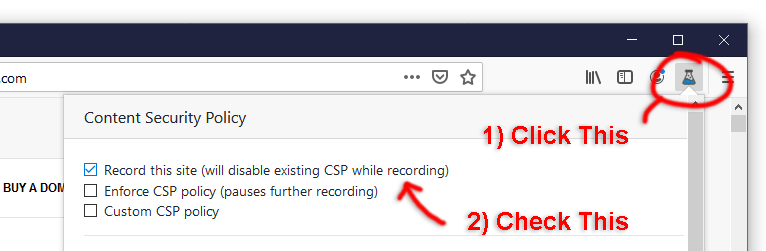
Then simply browse to your site (browse as many pages as possible) and a Content Security Policy will be generated based on the content on the page(s) loaded.

TIP: Always review the generated CSP, it allows everything needed to display your site.

Export the CSP from the Firefox plugin to the clipboard

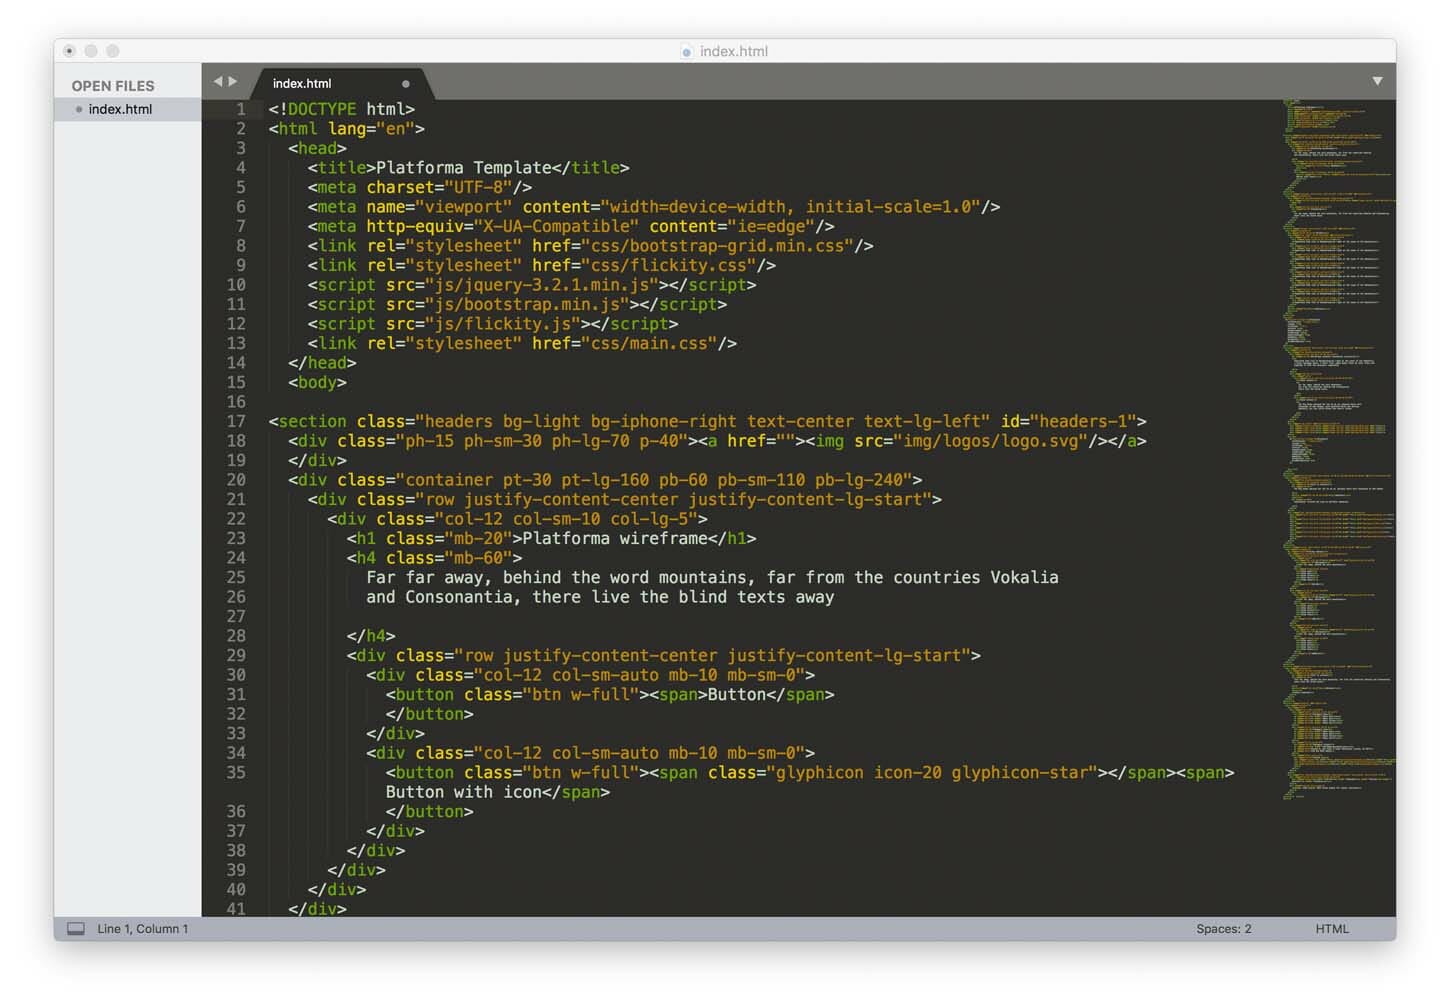
This is the policy that was generated for me in 5 minutes browsing 20 pages.

default-src 'none'; connect-src 'self' https://onesignal.com/api/v1/apps/772f27ad-0d58-494f-9f06-e89f72fd650b/icon https://onesignal.com/api/v1/notifications https://onesignal.com/api/v1/players/67a2f360-687f-4513-83e8-f477da085b26 https://onesignal.com/api/v1/players/67a2f360-687f-4513-83e8-f477da085b26/on_session https://yoast.com/feed/widget/; font-src 'self' data: https://fearby-com.exactdn.com https://fonts.gstatic.com; form-action 'self' https://fearby.com https://syndication.twitter.com https://www.paypal.com; frame-src 'self' https://en-au.wordpress.org https://fearby.com https://googleads.g.doubleclick.net https://onesignal.com https://platform.twitter.com https://syndication.twitter.com https://www.youtube.com; img-src 'self' data: https://a.impactradius-go.com https://abs.twimg.com https://fearby-com.exactdn.com https://healthchecks.io https://pagead2.googlesyndication.com https://pbs.twimg.com https://platform.twitter.com https://secure.gravatar.com https://syndication.twitter.com https://ton.twimg.com https://www.paypalobjects.com; script-src 'self' 'unsafe-eval' 'unsafe-inline' https://adservice.google.com.au/adsid/integrator.js https://adservice.google.com/adsid/integrator.js https://cdn.onesignal.com/sdks/OneSignalPageSDKES6.js https://cdn.onesignal.com/sdks/OneSignalSDK.js https://cdn.syndication.twimg.com/tweets.json https://fearby-com.exactdn.com/wp-content/cache/fvm/1553589606/out/footer-45a3439e.min.js https://fearby-com.exactdn.com/wp-content/cache/fvm/1553589606/out/footer-e6604f67.min.js https://fearby-com.exactdn.com/wp-content/cache/fvm/1553589606/out/footer-f4213fd6.min.js https://fearby-com.exactdn.com/wp-content/cache/fvm/1553589606/out/header-1583146a.min.js https://fearby-com.exactdn.com/wp-content/cache/fvm/1553589606/out/header-823c0a0e.min.js https://fearby-com.exactdn.com/wp-content/piwik.js https://onesignal.com/api/v1/sync/772f27ad-0d58-494f-9f06-e89f72fd650b/web https://pagead2.googlesyndication.com/pagead/js/adsbygoogle.js https://pagead2.googlesyndication.com/pagead/js/r20190610/r20190131/show_ads_impl.js https://pagead2.googlesyndication.com/pub-config/r20160913/ca-pub-9241521190070921.js https://platform.twitter.com/js/moment~timeline~tweet.a20574004ea824b1c047f200045ffa1e.js https://platform.twitter.com/js/tweet.73b7ab8a56ad3263cad8d36ba66467fc.js https://platform.twitter.com/widgets.js https://s.ytimg.com/yts/jsbin/www-widgetapi-vfll-F3yY/www-widgetapi.js https://www.googletagservices.com/activeview/js/current/osd.js https://www.youtube.com/iframe_api; style-src 'self' 'unsafe-inline' https://fonts.googleapis.com/ https://onesignal.com/sdks/ https://platform.twitter.com/css/ https://ton.twimg.com/tfw/css/; worker-src 'self' 

I can truncate starter Content Security Polity and remove some elements. Remove duplicated entries to separate files on a remote server add a wildcard (if I trust the server).

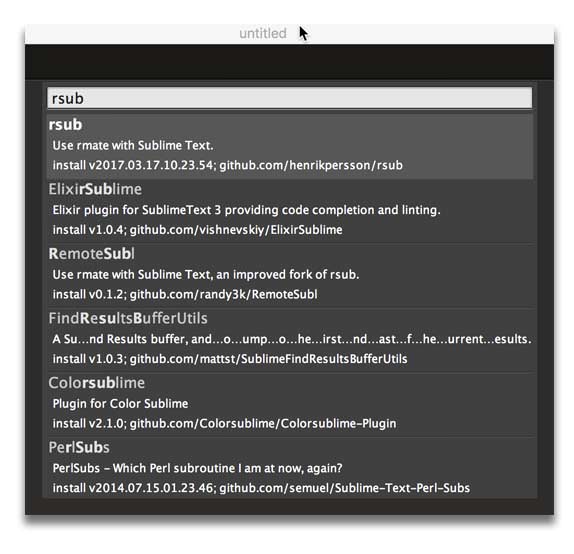
I truncated the policy with the help of the sublime text editor and Report URI CSP Generator.

I added this to the file ‘/etc/nginx/sites-available/default’

add_header "Content-Security-Policy-Report-Only" "default-src 'self' https://fearby.com/; script-src 'self' 'unsafe-inline' 'unsafe-eval' https://adservice.google.com.au https://adservice.google.com https://cdn.onesignal.com https://cdn.syndication.twimg.com https://fearby-com.exactdn.com https://onesignal.com https://pagead2.googlesyndication.com https://platform.twitter.com https://s.ytimg.com https://www.googletagservices.com https://www.youtube.com; style-src 'self' 'unsafe-inline' https://fonts.googleapis.com https://onesignal.com https://platform.twitter.com https://ton.twimg.com; img-src 'self' data: https://a.impactradius-go.com https://abs.twimg.com https://fearby-com.exactdn.com https://healthchecks.io https://pagead2.googlesyndication.com https://pbs.twimg.com https://platform.twitter.com https://secure.gravatar.com https://syndication.twitter.com https://ton.twimg.com https://www.paypalobjects.com; font-src 'self' data: https://fearby-com.exactdn.com https://fonts.gstatic.com; connect-src 'self' https://onesignal.com https://yoast.com; object-src https://fearby.com/; frame-src 'self' https://en-au.wordpress.org https://fearby.com https://googleads.g.doubleclick.net https://onesignal.com https://platform.twitter.com https://syndication.twitter.com https://www.youtube.com; worker-src 'self'; form-action 'self' https://fearby.com https://syndication.twitter.com https://www.paypal.com; report-uri https://fearby.report-uri.com/r/d/csp/reportOnly";

I added the following to the file ‘/etc/nginx/sites-available/default‘ (inside the server node).

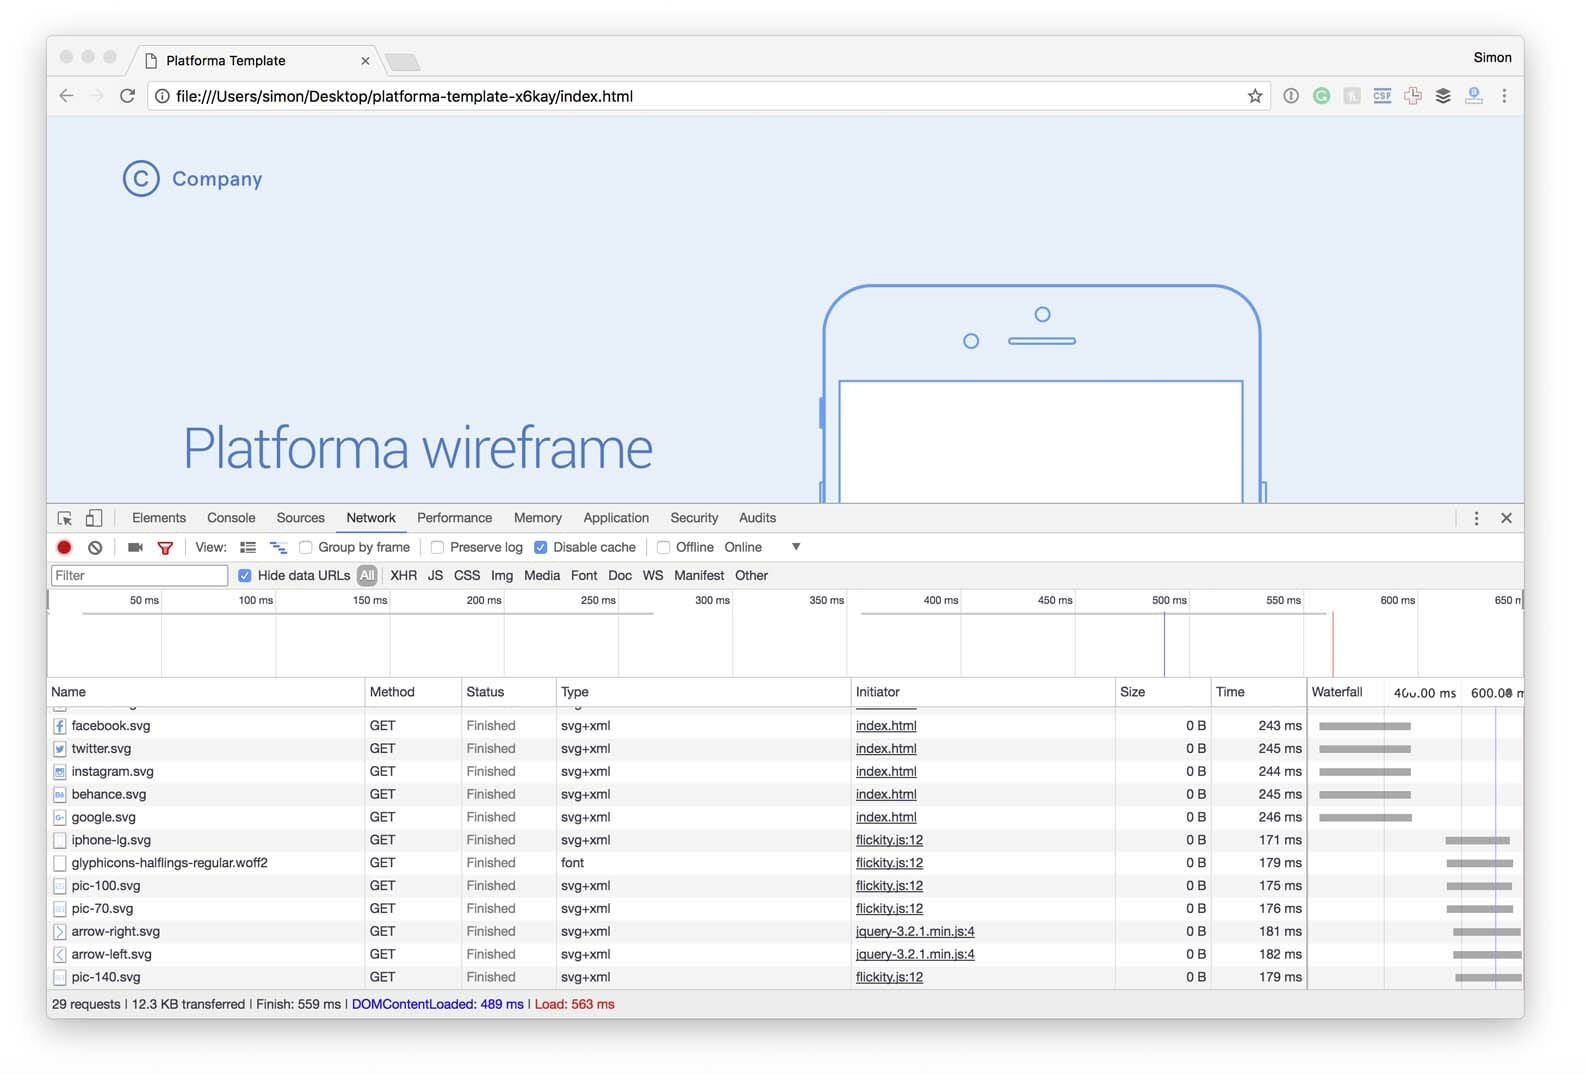
Any issues with the Content Security policy will be reported to my web browsers development console and to https://report-uri.com/.

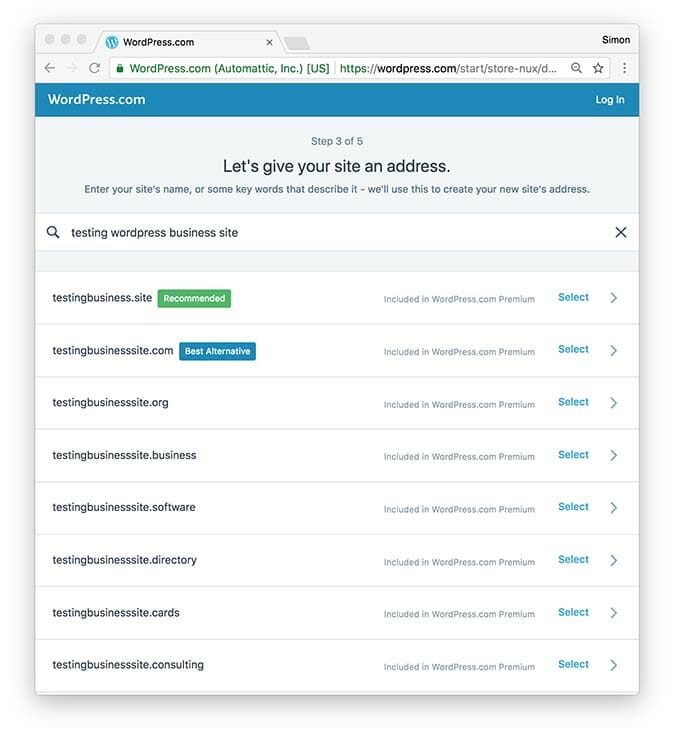
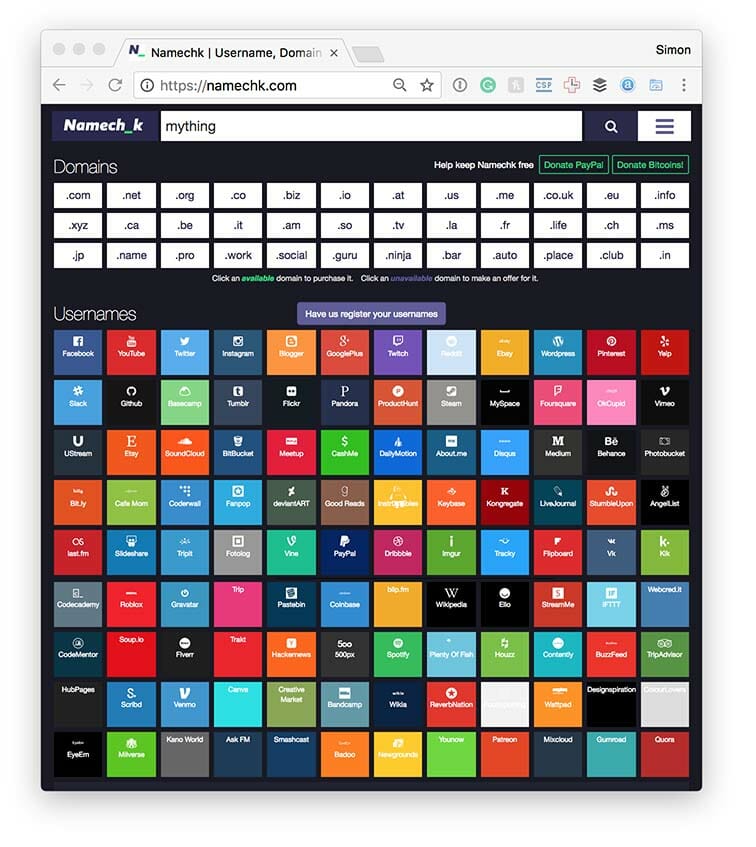
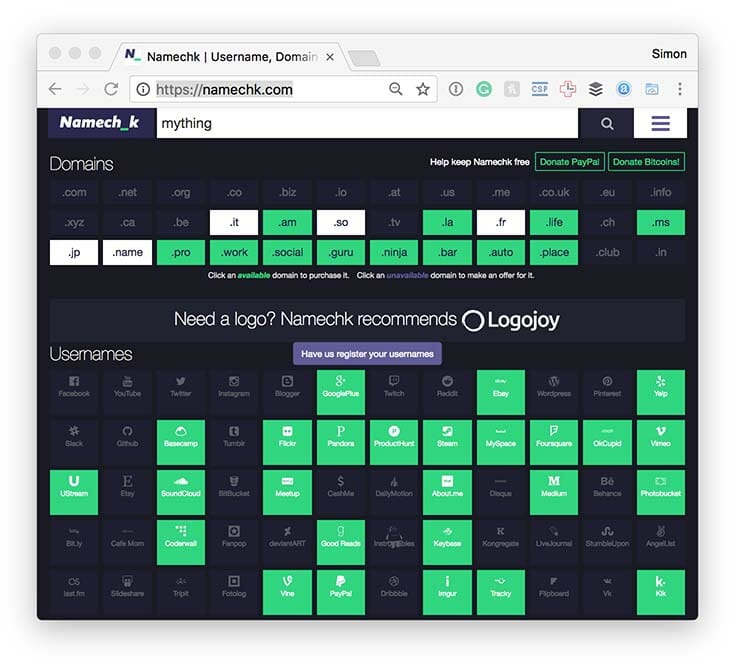
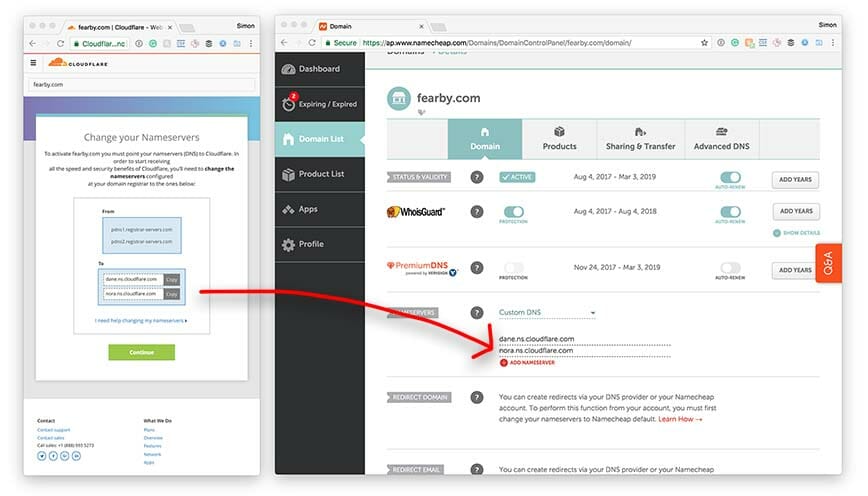
My Chrome development console reports an issue with a graphic not loading from Namecheap.

Namecleap icon not loading

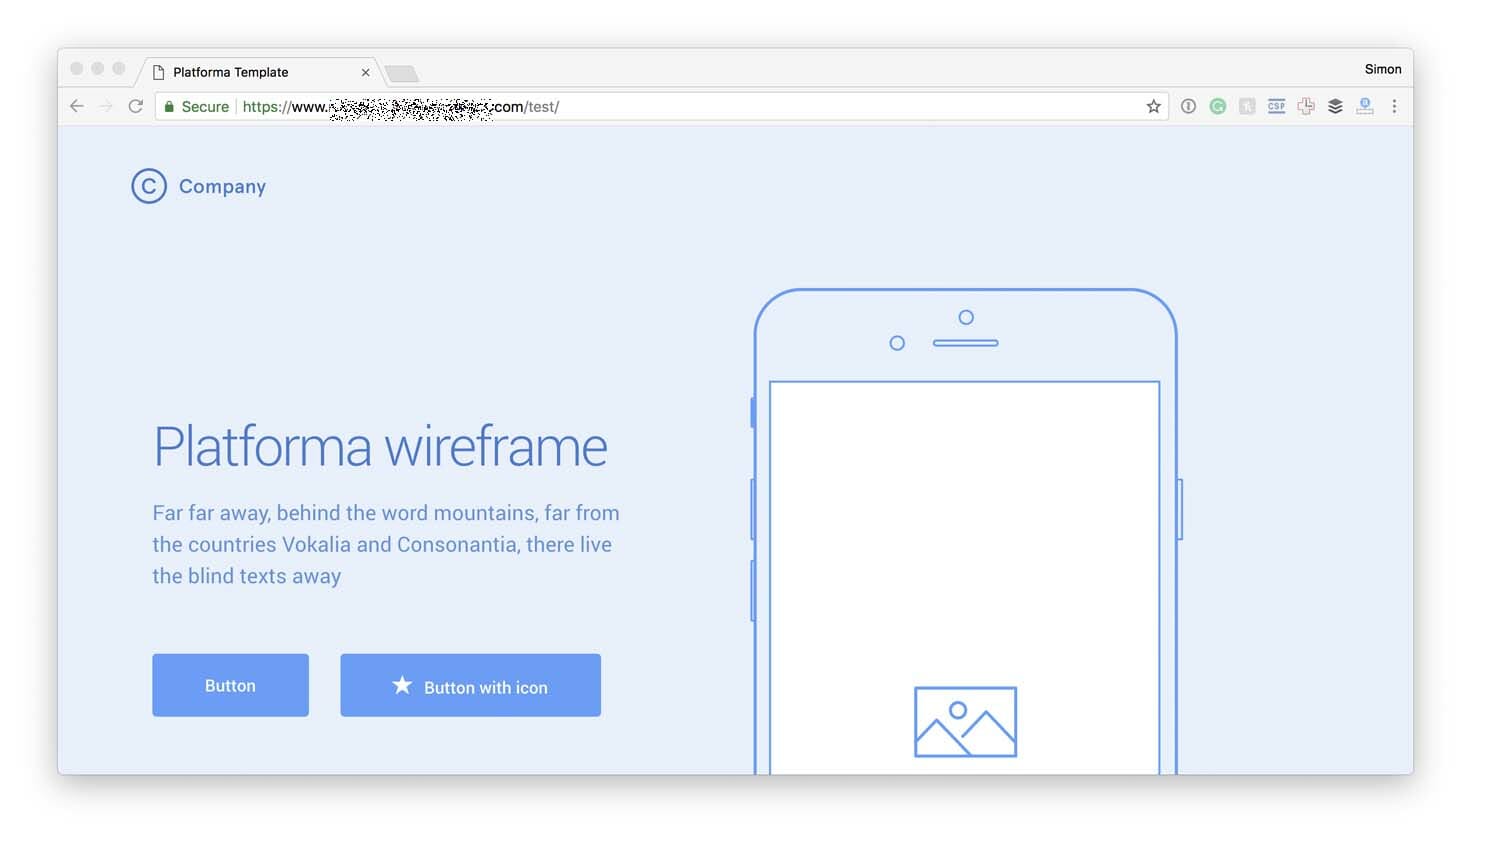
The event was also reported to the Report URI server.

Screenshot of reports at https://report-uri.com/account/reports/csp/

Don’t forget to check the reports often. When you have no more issues left you can make the Policy live by renaming the “Content-Security-Policy-Report-Only” header to “Content-Security-Policy”.

FYI: I had directive reports of ‘script-src-elem’ and it looks like they are new directives added to Chrome 75.

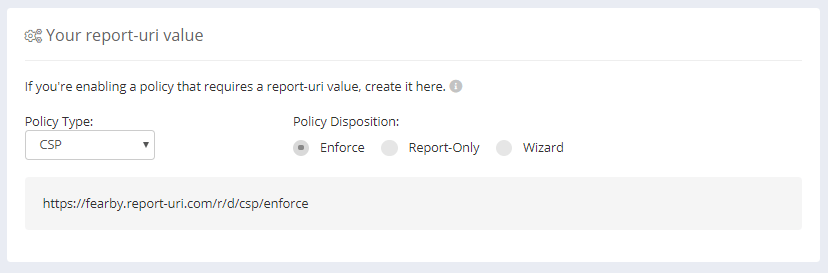
Don’t forget to visit the Report URI setup page and get a URL for where live reports get sent to.

Screenshot of https://report-uri.com/account/setup/

If you go to the Generate CSP page and import your website’s policy you can quickly add new exclusions to your policy

After a few months of testing and tweaking the policy, I can make it live (‘Content-Security-Policy’).

Lynis Enterprise

I have learned so much by using Lynis Enterprise from https://cisofy.com/

I am subscribed to issues notifications at https://github.com/CISOfy/lynis/issues/ and observe about 20 notifications a day in this GitHub community. Maybe one day I will contribute to this project?

Finally, Did the Bank reply?

Yes but it was not very informative.

Dear Simon,

Thank you very much  for the information and we have completely removed the reference that you have raised concern.
We are extremely sorry and apology for the inconvenience caused due to this mistake.

We are thankful for the information and support you have extended.

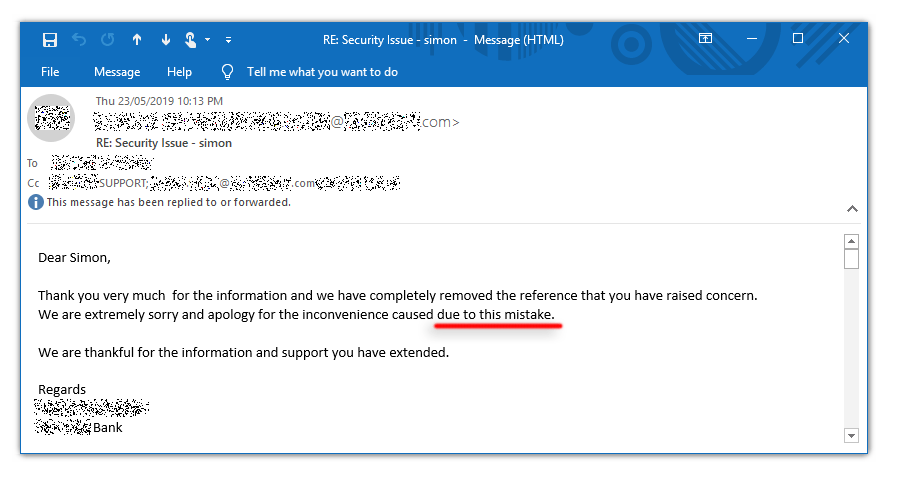
I tried to inquire how this happened and each time the answer was vague.

Thank you for your support. This was mistakenly used during the testing and we have warned the vendor as well.
I like to request you to close the ticket for this as we have already removed this.

We like to assure such things won’t happen in future.

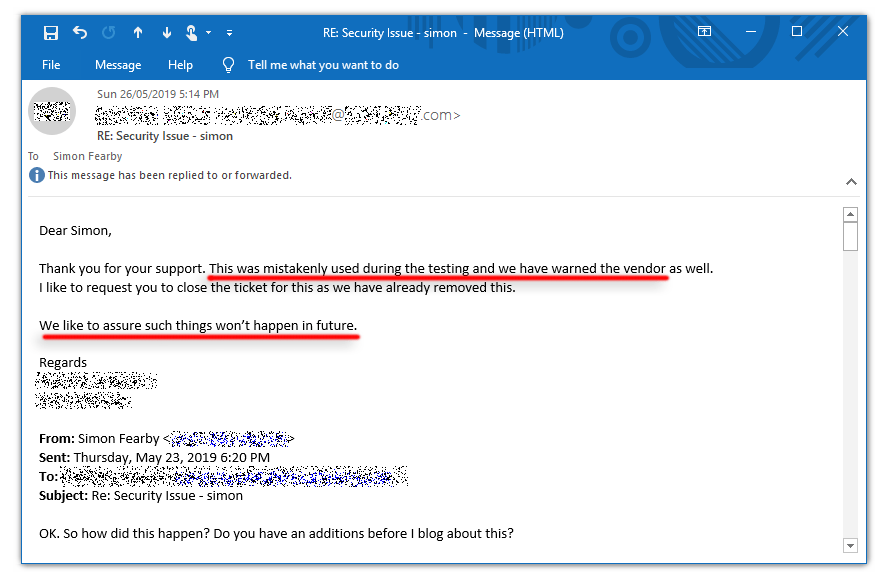
It looks like the bank used my blog post to create their CSP.

Oh well at least I have a secured my servers.

Thanks for reading.


Version:

v1.1 – Changed the URL, Removed Ads and added a Lynis Enterprise Conclusion

v1.01 – Fixed the URL

v1.0 – Initial Version

Filed Under: 2nd Factor, CDN, Content Security Policy, Cron, Database, Debian, NGINX, One Signal, PHP, Security, Ubuntu, Vulnerabilities, Vulnerability, Weakness, Website Tagged With: Bank, Cisofy, Content Security Policy, Hacked, Linus

Adding two sub domains (one pointing to a new UpCloud VM and the other pointing to an NGINX subsite) on Ubuntu 18.04

June 27, 2018 by Simon

Here is how I added two subdomains (one pointing to a new UpCloud VM and the other pointing to an NGINX subsite) on Ubuntu 18.04

If you have not read my previous posts I have now moved my blog to the awesome UpCloud host (signup using this link to get $25 free credit). I compared Digital Ocean, Vultr and UpCloud Disk IO here and UpCloud came out on top by a long way (read the blog post here). Here is my blog post on moving from Vultr to UpCloud.

UpCloud performance is great.

Upcloud Site Speed in GTMetrix

Buy a domain name from Namecheap here.

Domain names for just 88 cents!

Goal(s)

Setup 2x subdomains on https://fearby.com

– Sub Domain #1: https://test.fearby.com (pointing to a dedicated UpCloud VM in Singapore for testing).

– Sub Domain #2: https://audit.fearby.com (pointing to a sub-website on the NGINX/VM that runs https://fearby.com )

Let’s set up the first Sub Domain (dedicated VM) and SSL

Backup

Do back up your server first.

VM

I created a second server ($5 month or $0.07c hour 1,024MB Memory, 25GB Disk, 1024 GB Month Data Transfer) at UpCloud. If you don’t already have an account at UpCloud use this link to signup and get $25 free credit ( https://www.upcloud.com/register/?promo=D84793 ). Read my blog post on why UpCloud is awesome and how I moved my domain to UpCloud.

Once I spun up a second server I obtained the IPv4 and IPv6 IP addresses of the new “test” VM from the UpCloud dashboard.

IPV4 IP: 94.237.65.54
IPV6 IP: 2a04:3543:1000:2310:24b7:7cff:fe92:468c

DNS

These DNS records were already in place with my DNS provider (Cloudflare).

A fearby.com 209.50.48.88
AAAA fearby.com 2605:7380:1000:1310:24b7:7cff:fe92:0d64

I added these DNS records for the subdomains.

I added a new A NAME record for the new shared NGINX subdomain (for https://audit.fearby.com), this subdomain will be a sub-website that is running off the same server as https://fearby.com

A audit 209.50.48.88
AAAA audit 2605:7380:1000:1310:24b7:7cff:fe92:0d64

I added another set of records for the new dedicated VM  subdomain (for https://test.fearby.com)

A test 94.237.65.54
AAAA test 2a04:3543:1000:2310:24b7:7cff:fe92:468c

I waited for DNS to replicate around the globe by watching https://www.whatsmydns.net/

Setup a Firewall

On the new dedicated https://test.fearby.com VM, I installed the ufw firewall.

sudo apt-get install ufw

I configured the firewall to allow minimum ports (and added whitelisted IP for port 22 and added UpCloud DNS servers). I will lock this down some more later.

TIP: If your ISP does not offer a dedicated IP try a VPN. I use https://cyberghostvpn.com on OSX and Android.

Firewall rules.

sudo ufw status numbered

     To                         Action      From
     --                         ------      ----
[ 1] 22                         ALLOW IN    x.x.x.x
[ 2] 80                         ALLOW IN    Anywhere
[ 3] 443                        ALLOW IN    Anywhere
[ 4] 53                         ALLOW IN    93.237.127.9
[ 5] 53                         ALLOW IN    93.237.40.9
[ 6] 25                         DENY IN     Anywhere
[ 7] 80 (v6)                    ALLOW IN    Anywhere (v6)
[ 8] 443 (v6)                   ALLOW IN    Anywhere (v6)
[ 9] 53                         ALLOW IN    2a04:3540:53::1
[10] 53                         ALLOW IN    2a04:3544:53::1
[11] 22                         ALLOW IN    x.x.x.x.x.x.x.x.x
[12] 25 (v6)                    DENY IN     Anywhere (v6)

I enabled the firewall.

sudo ufw enable

Install NGINX (on https://test.fearby.com)

On the new dedicated https://test.fearby.com VM I…

Created a new www root

mkdir /www-root

Set permissions

sudo chown -R www-data:www-data /www-root

Installed NGINX

sudo apt-get update
sudo apt-get install nginx

I created a placeholder webpage

sudo nano /www-root/index.html

Configured the root value in /etc/nginx/sites-available/default

Created a symbolic link of the nginx config

sudo ln -s /etc/nginx/sites-available/default /etc/nginx/sites-enabled/default

Lets Encrypt SSL

I have previously setup Lets encrypt on Ubuntu 16.04 but not 18.04. Certbot had info on setting up Lets Encrypt for 14.x 16.x and 17.x but not 18.x

Full credit for the SSL steps goes to @Linuxize ( tips on setting up Lets Encrypt on Ubuntu 18.04 ). Check out https://linuxize.com/

I installed Lets Encrypt certbot

sudo apt update
sudo apt install certbot

I created a new Diffie–Hellman key

mkdir -p /etc/ssl/certs/
sudo openssl dhparam -out /etc/ssl/certs/dhparam.pem 2048

Map requests to http://test.fearby.com/.well-known/acme-challenge to /var/lib/letsencrypt/.well-known ( Read the linuxize post for detailed steps ).

mkdir -p /var/lib/letsencrypt/.well-known
chgrp www-data /var/lib/letsencrypt
chmod g+s /var/lib/letsencrypt

Create a /etc/nginx/snippets/letsencrypt.conf on http://test.fearby.com and enforce the redirect.

location ^~ /.well-known/acme-challenge/ {
  allow all;
  root /var/lib/letsencrypt/;
  default_type "text/plain";
  try_files $uri =404;
}

Create a /etc/nginx/snippets/ssl.conf file on http://test.fearby.com

ssl_dhparam /etc/ssl/certs/dhparam.pem;

ssl_session_timeout 1d;
ssl_session_cache shared:SSL:50m;
ssl_session_tickets off;

ssl_protocols TLSv1 TLSv1.1 TLSv1.2;
ssl_ciphers 'ECDHE-ECDSA-CHACHA20-POLY1305:ECDHE-RSA-CHACHA20-POLY1305:ECDHE-ECDSA-AES128-GCM-SHA256:ECDHE-RSA-AES128-GCM-SHA256:ECDHE-ECDSA-AES256-GCM-SHA384:ECDHE-RSA-AES256-GCM-SHA384:DHE-RSA-AES128-GCM-SHA256:DHE-RSA-AES256-GCM-SHA384:ECDHE-ECDSA-AES128-SHA256:ECDHE-RSA-AES128-SHA256:ECDHE-ECDSA-AES128-SHA:ECDHE-RSA-AES256-SHA384:ECDHE-RSA-AES128-SHA:ECDHE-ECDSA-AES256-SHA384:ECDHE-ECDSA-AES256-SHA:ECDHE-RSA-AES256-SHA:DHE-RSA-AES128-SHA256:DHE-RSA-AES128-SHA:DHE-RSA-AES256-SHA256:DHE-RSA-AES256-SHA:ECDHE-ECDSA-DES-CBC3-SHA:ECDHE-RSA-DES-CBC3-SHA:EDH-RSA-DES-CBC3-SHA:AES128-GCM-SHA256:AES256-GCM-SHA384:AES128-SHA256:AES256-SHA256:AES128-SHA:AES256-SHA:DES-CBC3-SHA:!DSS';
ssl_prefer_server_ciphers on;

ssl_stapling on;
ssl_stapling_verify on;
resolver 8.8.8.8 8.8.4.4 valid=300s;
resolver_timeout 30s;

add_header Strict-Transport-Security "max-age=15768000; includeSubdomains; preload";
add_header X-Frame-Options SAMEORIGIN;
add_header X-Content-Type-Options nosniff;

Let’s get a certificate

sudo certbot certonly --agree-tos --email your@email.com --webroot -w /var/lib/letsencrypt/ -d test.fearby.com

Certificates have been created 🙂

ls -al /etc/letsencrypt/live/test.fearby.com/
total 12
drwxr-xr-x 2 user user 4096 Jun 26 11:30 .
drwx------ 3 user user 4096 Jun 26 11:30 ..
-rw-r--r-- 1 user user  543 Jun 26 11:30 README
lrwxrwxrwx 1 user user   39 Jun 26 11:30 cert.pem -> ../../archive/test.fearby.com/cert1.pem
lrwxrwxrwx 1 user user   40 Jun 26 11:30 chain.pem -> ../../archive/test.fearby.com/chain1.pem
lrwxrwxrwx 1 user user   44 Jun 26 11:30 fullchain.pem -> ../../archive/test.fearby.com/fullchain1.pem
lrwxrwxrwx 1 user user   42 Jun 26 11:30 privkey.pem -> ../../archive/test.fearby.com/privkey1.pem

Now lets edit “/etc/nginx/sites-available/default” on https://test.fearby.com VM and add the cert paths.

server {
        listen 80 default_server;
        listen [::]:80 default_server;

        listen 443 ssl http2;
        listen [::]:443 ssl http2;

        if ($scheme != "https") {
                return 301 https://$host$request_uri;
        }

        ssl_certificate /etc/letsencrypt/live/test.fearby.com/fullchain.pem;
        ssl_certificate_key /etc/letsencrypt/live/test.fearby.com/privkey.pem;
        ssl_trusted_certificate /etc/letsencrypt/live/test.fearby.com/chain.pem;

        include snippets/ssl.conf;

        #ssl_stapling on; # Requires nginx >= 1.3.7
        # add_header Strict-Transport-Security "max-age=63072000; includeSubdomains; preload";

        add_header X-Frame-Options DENY;
        add_header X-Content-Type-Options nosniff;
        add_header X-XSS-Protection "1; mode=block";

        root /www-root/;

        include snippets/letsencrypt.conf;

        index index.html;

        server_name test.fearby.com;

        location / {
                try_files $uri $uri/ =404;
        }
}

Reload NGINX

sudo systemctl reload nginx

or

sudo nginx -t
sudo nginx -s reload
sudo systemctl reload nginx

Now let’s setup the second subdomain (subsite off https://fearby.com) and SSL

VM

I already have NGINX on https://fearby.com set up a second site.

DNS

We have already set up a DNS record for https://audit.fearby.com (above)

Firewall

Already configured at https://fearby.com

SSL

Because I had an existing Comodo certificate on https://fearby.com I am going to repeat the steps above to generate a new certificate but save the NGINX config to /etc/nginx/sites-available/audit.fearby.com (this activates the second site)

TIP: Follow the Linuxize guide here (for creating ssl.conf, letsencrypt.conf etc config files), Do a backup and restore if need be.

I created a new Diffie–Hellman key

mkdir -p /etc/ssl/certs/
sudo openssl dhparam -out /etc/ssl/certs/dhparam.pem 2048

Let’s get a certificate

sudo certbot certonly --agree-tos --email [email protected] --webroot -w /var/lib/letsencrypt/ -d audit.fearby.com

Configure NGINX

Map requests to http://audit.fearby.com/.well-known/acme-challenge to /var/lib/letsencrypt/.well-known ( Read the linuxize post for detailed steps ).

mkdir -p /var/lib/letsencrypt/.well-known
chgrp www-data /var/lib/letsencrypt
chmod g+s /var/lib/letsencrypt

I created a new NGINX site ( /etc/nginx/sites-available/audit.fearby.com )

#proxy_cache_path /tmp/nginx-cache keys_zone=one:10m;#
server {
        root /www-audit-root;

        # Listen Ports
        listen 80;
        listen [::]:80;
        listen 443 ssl http2;
        listen [::]:443 ssl http2;

        # Default File
        index index.html index.php index.htm;

        # Server Name
        server_name audit.fearby.com;

        include snippets/letsencrypt.conf;

        location / {
                try_files $uri $uri/ =404;
        }

        ssl_certificate /etc/letsencrypt/live/audit.fearby.com/fullchain.pem;
        ssl_certificate_key /etc/letsencrypt/live/audit.fearby.com/privkey.pem;
        ssl_trusted_certificate /etc/letsencrypt/live/audit.fearby.com/chain.pem;

        ssl_dhparam /etc/ssl/certs/auditdhparam.pem;

        ssl_session_timeout 1d;
        #ssl_session_cache shared:SSL:50m;
        ssl_session_tickets off;

        ssl_protocols TLSv1 TLSv1.1 TLSv1.2;
        ssl_ciphers 'ECDHE-ECDSA-CHACHA20-POLY1305:ECDHE-RSA-CHACHA20-POLY1305:ECDHE-ECDSA-AES128-GCM-SHA256:ECDHE-RSA-AES128-GCM-SHA256:ECDHE-ECDSA-AES256-GCM-SHA384:ECDHE-RSA-AES256-GCM-SHA384:DHE-RSA-AES128-GCM-SHA256:DHE-RSA-AES256-GCM-SHA38$

        ssl_prefer_server_ciphers on;

        ssl_stapling on;
        ssl_stapling_verify on;

        #resolver 8.8.8.8 8.8.4.4 valid=300s;
        #resolver_timeout 30s;

        add_header Strict-Transport-Security "max-age=15768000; includeSubdomains; preload";
        add_header X-Frame-Options SAMEORIGIN;
        add_header X-Content-Type-Options nosniff;

        if ($scheme != "https") {
                return 301 https://$host$request_uri;
        }
}

I created a symbolic link of the config file

sudo ln -s /etc/nginx/sites-available/audit.fearby.com /etc/nginx/sites-enabled/audit.fearby.com

Reload NGINX

sudo systemctl reload nginx

or

sudo nginx -t
sudo nginx -s reload
sudo systemctl reload nginx

How to test the certificate renewal

sudo certbot renew --dry-run

Automate the renewal in crontab (every 12 hours)

I set this crontab entry up on https://fearby.com and https://test.fearby.com

crontab -e
0 */12 * * * root test -x /usr/bin/certbot -a \! -d /run/systemd/system && perl -e 'sleep int(rand(3600))' && certbot -q renew --renew-hook "systemctl reload nginx"

Conclusion

Yes, I haVe 2 subdomains (1x dedicated VM and the other is a sub-website off an existing server) with SSL certificates.

Ping Results

ping -c 4 fearby.com
PING fearby.com (209.50.48.88): 56 data bytes
64 bytes from 209.50.48.88: icmp_seq=0 ttl=44 time=220.000 ms
64 bytes from 209.50.48.88: icmp_seq=1 ttl=44 time=290.602 ms
64 bytes from 209.50.48.88: icmp_seq=2 ttl=44 time=311.938 ms
64 bytes from 209.50.48.88: icmp_seq=3 ttl=44 time=330.841 ms

--- fearby.com ping statistics ---
4 packets transmitted, 4 packets received, 0.0% packet loss
round-trip min/avg/max/stddev = 220.000/288.345/330.841/41.948 ms

ping -c 4 test.fearby.com
PING test.fearby.com (94.237.65.54): 56 data bytes
64 bytes from 94.237.65.54: icmp_seq=0 ttl=44 time=333.590 ms
64 bytes from 94.237.65.54: icmp_seq=1 ttl=44 time=252.433 ms
64 bytes from 94.237.65.54: icmp_seq=2 ttl=44 time=271.153 ms
64 bytes from 94.237.65.54: icmp_seq=3 ttl=44 time=292.685 ms

--- test.fearby.com ping statistics ---
4 packets transmitted, 4 packets received, 0.0% packet loss
round-trip min/avg/max/stddev = 252.433/287.465/333.590/30.200 ms

ping -c 4 audit.fearby.com
PING audit.fearby.com (209.50.48.88): 56 data bytes
64 bytes from 209.50.48.88: icmp_seq=0 ttl=44 time=281.662 ms
64 bytes from 209.50.48.88: icmp_seq=1 ttl=44 time=307.676 ms
64 bytes from 209.50.48.88: icmp_seq=2 ttl=44 time=227.985 ms
64 bytes from 209.50.48.88: icmp_seq=3 ttl=44 time=215.566 ms

--- audit.fearby.com ping statistics ---
4 packets transmitted, 4 packets received, 0.0% packet loss
round-trip min/avg/max/stddev = 215.566/258.222/307.676/37.845 ms

Webpage Results

Screenshow showing the main site and 2 subdomains in a web browser

Troubleshooting

If you are having troubles generating the initial certificate check that you have not blocked port 80 and don’t have “Strict-Transport-Security” heavers enabled.

sudo certbot certonly --agree-tos --email [email protected] --webroot -w /var/lib/letsencrypt/ -d g
Saving debug log to /var/log/letsencrypt/letsencrypt.log
Obtaining a new certificate
Performing the following challenges:
http-01 challenge for yoursubdomain.domain.com
Using the webroot path /var/lib/letsencrypt for all unmatched domains.
Waiting for verification...
Cleaning up challenges
Failed authorization procedure. yoursubdomain.domain.com (http-01): urn:acme:error:unauthorized :: The client lacks sufficzLlmg_w6Tc: q%!(EXTRA string=<html>
<head><title>404 Not Found</title></head>
<body bgcolor="white">
<center><h1>404 Not Found</h1></center>
<hr><center>)

IMPORTANT NOTES:
 - The following errors were reported by the server:

   Domain: yoursubdomain.domain.com
   Type:   unauthorized
   Detail: Invalid response from
   http://yoursubdomain.domain.com/.well-known/acme-challenge/_QA3jblEydx5mE8I8OdRsd2EdHIj4R-przLlmg_w6Tc:
   q%!(EXTRA string=<html>
   <head><title>404 Not Found</title></head>
   <body bgcolor="white">
   <center><h1>404 Not Found</h1></center>
   <hr><center>)

   To fix these errors, please make sure that your domain name was
   entered correctly and the DNS A record(s) for that domain
   contain(s) the right IP address.

I re-ran the certbot command but pointed to the real /www-root (not/var/lib/letsencrypt/)

Create a new

mkdir /www-root/.well-known/
mkdir /www-root/.well-known/acme-challenge/
sudo certbot certonly --agree-tos --email y[email protected] --webroot -w /www-root -d yoursubdomain.domain.com

I hope this guide helps someone.

Please consider using my referral code and get $25 credit for free.

https://www.upcloud.com/register/?promo=D84793

Ask a question or recommend an article

[contact-form-7 id=”30″ title=”Ask a Question”]

Revision History

v1.1 Troubleshooting

v1.0 Initial Post

Filed Under: Linux, NGINX, ssl, Subdomain, Ubuntu, UpCloud, VM, Website Tagged With: a, Adding, an, and, domains, new, nginx, on, one, other, pointing, sub, subsite, the, to, two, Ubuntu 18.04, UpCloud, vm

How to purchase your own domain name and set up a web server from $5 a month

March 28, 2018 by Simon

This guide will show technically minded people how you can purchase your own domain name, set up a web server on Vultr with an online store using WordPress/WooCommerce from $5 a month. Warning this post is technical (if you have never used SSH, Ubuntu, Linux Command Line, hate risk or are not patient then this is NOT the guide you are after).

I personally recommend (not a paid endorsement) the free WooCommerce plugin for the free WordPress.org CMS on the free Ubuntu Operating system with the free NGINX web server and the free MYSQL database engine and free SSL certificates from Lets Encrypt.

Update 2018: For the best performing VM host (UpCloud) read my guide on the awesome UpCloud VM hosts (get $25 free credit by signing up here).

Buy a domain name from Namecheap here.

Domain names for just 88 cents!

Sorry for using the word free a lot but I like free things.  One of the benefits of a using a self-managed server is you get the option to install free software and configure the server how you want and secure it how you want. Truth be told managed ho (e.g CPanel, etc) are in the business of making money via monthly feed, expensive SSL certificates, taxing your transactions or pushing you to higher-priced tiers.

Legend:

  • Self Managed Server = A server that you create, you configure patch and support (all the reward and risk is owned by you and costs are low).
  • Hosted Server = A server you have partial control of and the hosts manage the server and support (You hand away all risk and most of the control and pay for support/features).

I moved to a self-managed server after I was paying $25/m for a poorly performing website and $150/y for a poor quality  SSL certificate and a slice of a server that seemed to always say “Usage Limit Exceeded”. Why pay for an insecure website that my visitors could not view because the usage limit was exceeded.

Bad CPanel SSL Certificate

fyi: Fearby.com costs me $10 a month for a server and $5/m for CDN abilities.

CPanel hosts are an option when you don’t want to self-manage a service and take on the hassle but be prepared for server limitations (The image below was taken on an older CPanel based hosts before I moved to a self-managed Vultr server)

cpenal_usage_exceeded

I recently discovered a well known and established website hosting service (that I used to use) and a friend is still using is insecure. My friend’s site has a static website on it but the server underneath was very old and insecure. Having a secure web server should be at the top of your list with any self-managed or hosted website (this will help search engine optimization and prevent risks to your website visitors).

Static Website

Sites like Virus Total, SSL Labs and Alexa Site Info , Qualys are good ways to review a site’s credibility.

fyi: The awesome https://seositecheckup.com/ is awesome for evaluating our sites SEO score.

Before we set up a server with WordPress on your own server let’s quickly look at the alternative commercial ready to go website builders.

Alternative (paid) DIY Website Builders

The following leading commercial sites will allow you to build a site online.

  • https://www.wix.com/
  • https://www.squarespace.com/
  • https://www.shopify.com.au/
  • https://www.weebly.com/au
  • https://www.wordpress.com

In my opinion, five things matter with setting up site online website.

  • Setup Costs, Monthly Cost and Commissions (what are the hidden charges)
  • Security (having a food SSL Certificate is key to having a good organic traffic from search engines)
  • Site Speed (Having a slow site will impact search engine optimization and drive visitors away)
  • Accessibility (if your site is not WCAG accessible it will not rank high on search engines).
  • Control (will you be able to do everything you want too, nothing worse than going so far and being limited)

Ok, let’s see how much it will cost to set up a simple business site on the sites above.

Wix 

Setup: Goto https://www.wix.com/, Login to Wix, click Create Site, click Business, Click Choose a Template, Edit the page, Click Save, Click “Connect your own customized domain“, Click “Connect a domain you already own“.

I was redirected to a Wix plan pricing page where I need to choose a plan to continue. From what I researched you cant control HTML on Wix so can’t add a MailChimp newsletter signup form so you would have to go with the $24.5/m option to enable Email Campaigns.

Wix Plans Chooser

I could not see information about included SSL certificates, SEO or other chargers.  SSL is free after you pay right?

The Wix editor appears OK (it may take a bit of learning though).

Wix Editoer

I clicked publish and the site was live

Wix site published

A quick check of the SSL, Accessibility and SEO and no obvious deal breakers here apart from the price and platform lock-in.

Wix Checkup

I performed a security check on the site with https://freescan.qualys.com (passed)

Conclusion: I hear Wix templates are hard to change so choose your template wisely, A large collection of apps are available that you can add to the site.

Although Wix was nice and it does include a full-featured look at the engine it is not for me ($24/m USD is too expensive).

Squarespace 

Squarespace basic websites cost $16/$25 a month or $34/52 for online stores: https://www.squarespace.com/pricing/

SquareSpace Pricing

Setup a Squarespace website: Goto https://www.squarespace.com/, Click Start a Free Trial, Choose a Template, Create an Account (a quick read of the terms of service and privacy policy, #scary), SpareSpace sites are pre-published?

Square Space Build

Loading the webpage on a non-logged-in (with SquareSpace login) browser displays a trial warning.  Trial pages are essentially restricted (unlike Wix).

Login Challenge

The mobile view does not match the template?  I guess the chosen template is more of a vibe and not a template.

Mobile view

Setting up a Squarespace website may take some time. Squarespace does have some nifty advance options in a slide-out menu though.

Squarespace Settings

Because the public view of the page is restricted I cannot scan it with WCAG accessibility tools. Scanning the site performance speeds with gtmetrix also fails.

Performance Rejected

Squarespace is well known to be difficult to set up a website when compared to other drag and drop editors (but Squarespace sites do look nice).

I am not paying $54/m for a website so let’s move on.

Shopify

Shopify Setup: Goto https://shopify.com and click Create, Sign up and enter your store name. Complete the wizard. 

Shopify

Choose a Shopify Plan

Shopify Plan

Scalping transactions, no thanks. let’s move on.

Weebly

Weebly Setup: Goto https://www.weebly.com/au and click Get Started under Create Store. Enter your account details and click Create Your Site, enter the name of the store, Click I’m just trying Weebly, click the type of product you will be selling.

Weebly Site Setup

Weebly Setup

Theme Selection

Theme Select

Choose a Domain

Domain Select

Publish the site

Publish

Clicking publish appears to be a dead end.

Verify Weebly

“Please contact Weebly Support to verify your account”, No Thanks, let’s move on.

One candidate remains and that is WordPress hosted (wordpress.com not wordpress.org).

WordPress.com

WordPress.com offer hosted plans for WordPress in the cloud.

Setup a WordPress site, the only one that removes WordPress branding and allows third-party plugins to be installed it the Business plans for $33 a month.

WordPress Plans

Setup Basics

Wordpress

Choose a WordPress theme.

Choose Theme

Assign a Domain

WordPress Domain

In order to buy a domain, you need to log in (top right) with an account

My working WordPress account (is no longer working), it was in my password manager.

wordpresscomerror

I seem to be stuck in a signup loop

Wordpress

Time to move on. Time to set up my own server on Vultr and setup WordPress and  WooCommerce,

But, before we do, let’s ensure our name is secure online.

Search for your Name/Brand

Do search for your website (or thing) in search engines to see if your name is already taken, don’t buy a domain that is owned or has IP or trademark presence. It is a  good idea to use sites like https://namechk.com/ to see if your site or social media is already taken.

https://namechk.com/

namechk.com will allow you to search for name availability online.  The name “mything” is not fully available online.

https://namechk.com/ 2

You will want to see all green squares (name available) below before buying a domain name. This looks better.

Namechk ok

I would recommend you create your social media accounts before or right after buying your domain. Sites like Twitter will insist on short usernames names so get your social media sites first.

Trademark and Brand Search

Also, perform a trademark and IP search.

Australian Trademark Search: https://search.ipaustralia.gov.au/trademarks/search/quick

United States Trademark Database: https://www.uspto.gov/trademarks-application-process/search-trademark-database

Global brand Search: http://www.wipo.int/branddb/en/

etc

Self Managed Warning

I tend to go the “self-managed server route” and install the free WordPress CMS because:

  • I can.
  • I am tight.
  • I like having full control (usually the best features for online web hosts are hidden behind subscriber tiers, you can install and do whatever you want on your own server like build API’s, distributed MySQL servers, install MongoDB or Redis , use up to date PHP etc).
  • I have been stung by CPanel hosts charging $150/y for a crappy SSL certificate (You can set up your own SSL certificate for $0 and set up super secure SSL rules).
  • I can manage WordPress via the command line
  • I can upgrade the server and restore it whenever I want.
  • I can manage my own server performance (e.g setup PHP child workers) or install a Content Delivery Network.
  • I can direct domain email to google G Suite, see pricing here.
  • etc.

There are many reasons why you would not want to “self-manage” your own server

  • Technical Requirements (and time to support).
  • Higher Risk.
  • Applying Updates and Patches.
  • etc.

Being technically minded and choosing a “self-managed web servers” can take away time from the fun stuff like SEO, Site Design, customer needs, branding etc.

Self Managed Costs

For $5 a month you can buy a server with enough memory to install WordPress (cheaper if you don’t need WordPress)

Vultr is great. Vultr does have ready to go servers that you can deploy that have WordPress all set up.

wordpress-template

The Vultr template above does use the Centos OS (read my guide setting up Centos on a different service provider here) but I prefer to manually setup a server with Ubuntu 16.04 OS on Vultr.

With $5 server you can do what you want with it.  I have blogged before about setting up your own Server. e.g Installing Centos and Ubuntu server on Digital Ocean.  Digital Ocean does not have data centres in Australia and this kills scalability. AWS is good but 4x the price of Vultr. I have blogged about setting up and AWS server here (and upgrading an AWS instance). I tried to check out Alibaba Cloud but the verification process was broken so I decided to check our Vultr.

Manual Setup of Vultr on an Ubuntu 16.04 server

  • Deploy a Vultr Server – Guide here  ($2.5/m to New Jersey or Florida or $5/m to Sydney,  I would recommend you opt-in for the auto backup for $0.50c/m and $1/m respectively).
  • Setup NGINX.
  • Setup PHP and PHP-FPM (see guide above), consider adding PHP child workers.
  • Setup and secure MySQL (see guide above), create a database for WordPress to use.
  • Instal Adminder MySQL GUI (guide here).
  • Setup a free Lets Encrypt SSL certificate (guide here).
  • Install WordPress (and Jetpack plugin).
  • Install WordPress CLI.
  • Instal the WooCommerce Storefront WordPress Theme.
  • Install WooCommerce Plugin.
  • Secure Ubuntu.
  • Also consider linking your domain to Cloudflare to boost performance, scanning your site with Qualys Freescan and OWASP ZAP).
  • Consider setting up a WordPress image compressor and CDN plugin. like EWWW.io

Manual WooCommerce Plugin Setup

Once you setup Woocommerce you can set up the store defaults. Go to the WordPress dashboard and click WooCommerce Settings

Woo Commerce Settings

Settings – General

General

  • Set Address, City and State and Postcode
  • Set allowed countries to sell in (e.g Australia)
  • Set allowed countries to ship items to (e.g Australia)
  • Set Enable Taxes
  • Set Currency
  • etc

Settings – Products

Products

  • Set Weight
  • Set Dimensions
  • Enable Product Reviews
  • Enable Star Ratings on Reviews
  • etc

Settings – Shipping

Shipping

  • Enable Shipping Calculator
  • Add Shipping Classes
  • Shipping Zones
  • etc.

Settings – Checkout

Settings checkout

  • Force Secure Checkup
  • Create a Terms and Conditions page (and set).
  • etc

Settings – Account

Accounts

  • Set Account Options
  • etc

Settings – Emails

Emails

  • Set Email Preferences
  • Set Email Header Image
  • Set Email Colour
  • Set Footer Text
  • etc

Settings – API

API

  • API can be disabled if you don’t need it.

Optional Actions

  • Setup Yoast Plugin
  • Setup other plugins

Instaling a Woo Commerce Child Theme

Go to https://woocommerce.com/product-category/themes/storefront-child-theme-themes/ and choose a theme.

Themes

Purchase and Install the desired child theme (I uploaded it to my /wp-content/themes/ folder with forklift). I chose a free deli theme.

Goto your WordPress then themes folder and activate your new child theme.

Activate Theme

Post Site Setup

Just because your site is live does not mean you can rest.

SEO Optimization

Do use sites like https://seositecheckup.com/ and follow recommended actions to improve your SEO like updating meta tags.

More Reading

Attaching an email to your domain

You can pay $5 a month and link a G Suite email to your domain.

  • Dedicated professional Google G Suite email account for $5 a month with 30GB storage (If you don’t want ot to buy a G Suite email and link it to your domain then you don’t need this).

Once you have a G Suite account you can link other domains (and domain emails) to it. You can login to your G Suite emails via G Mail and send emails from apps or the command line.

Why Vultr

I use the server host Vultr as they have data centres all around the world and the support of great, Digital Ocean is good too but they don’t have data centres in my country (Australia). Vultr allows you to deploy all over the world upgrade servers, move servers, add storage and restore servers.

Alternatively, you can buy a $2.5/m server and generate  a static website

I use the Platforma Web HTML generator to build mobile and WCAG compliant websites.

Buying a domain,  I buy my domains from https://www.namecheap.com/  it is a good idea to look for coupons first at https://www.namecheap.com/promos/coupons.aspx before buying a domain.

Once you buy a domain you can point it to a Vultr server and upload your website.

I hope this helps someone.

Donate and make this blog better

Ask a question or recommend an article

[contact-form-7 id=”30″ title=”Ask a Question”]

Revision History

v.1.2 WordPress WooCommerce

v1.1 SEO

v1.0 Initial Draft

Filed Under: Ubuntu, VM, Vultr, Website, Wordpress Tagged With: $5, a, and, domain, from, How, month, name, own, purchase, seo, server, set up, to, web, your

Setting up a website to use Cloudflare on a VM hosted on Vultr and Namecheap

March 13, 2018 by Simon

This guide will show how you can set up a website to use Cloudflare on a VM hosted on Vultr and Namecheap

I have a number of guides on moving hasting away form CPanel, Setting up VM’s on AWS, Vultr or Digital Ocean along with installing and managing WordPress from the command line. This post will show how to let Cloudflare handle the DNS for the domain.

Update 2018: For the best performing VM host (UpCloud) read my guide on the awesome UpCloud VM hosts (get $25 free credit by signing up here).

Snip from here “Cloudflare’s enterprise-class web application firewall (WAF) protects your Internet property from common vulnerabilities like SQL injection attacks, cross-site scripting, and cross-site forgery requests with no changes to your existing infrastructure.”

Buy a Domain 

Buy a domain name from Namecheap here.

Domain names for just 88 cents!

Cloudflare Benefits (Free Plan)

  • DDoS Attack Protection (Huge network to absorb attacks DDoS attacks over 600Gbps are no problem for our 15 Tbps networks)
  • Global CDN
  • Shared SSL certificate (I disabled this and opted to use my own)
  • Access to audit logs
  • 3 page rules (maximum)

View paid plan options here.

Cloudflare CDN map

Cloudflare CDN says it can load assets up to 2x faster, 60% less bandwidth from your servers by delivering assets from 127 data centres.

Cloudflare Global Network

Setup

You will need to sign up at cloudflare.com

Cloudflare

After you create an account you will be prompted to add a siteAdd SiteCloudflare will pull your public DNS records to import.

Query DNS

You will be prompted to select a plan (I selected free)

Plan Select

Verify DNS settings to import.

DNS Import

You will now be asked to change your DNS nameservers with your domain reseller

DNS Nameservers

TIP: If you have an SSL cert (e.g Lets Encrypt) already setup head to the crypto section and select ” Full (Strict)” to prevent ERR_TOO_MANY_REDIRECTS errors.

Strict SSL

Cloudflare UI

I asked Twitter if they could kindly load my site so I could see if Cloudflare dashboard/stats were loading.

Could I kindly ask if you are reading this that you visit https://t.co/9x5TFARLCt, I am writing a @Cloudflare blog post and need to screenshot stats. Thanks in advance

— Simon Fearby (Developer) (@FearbySoftware) March 13, 2018

The Cloudflare CTO responded.  🙂

Sure thing 🙂

— John Graham-Cumming (@jgrahamc) March 13, 2018

Confirm Cloudflare link to a domain from the OSX Comand line

host -t NS fearby.com
fearby.com name server dane.ns.cloudflare.com.
fearby.com name server nora.ns.cloudflare.com.

Caching Rule

I set up the following caching rule to cache everything for 8 hours instead of WordPress pages

Page Rules

“fearby.com.com/wp-*” Cache level: Bypass

“fearby.com.com/wp-admin/post.php*” Cache level: Bypass

“fearby.com/*” Cache Everything, Edge Cache TTL: 8 Hours

Cache Results

Cache appears to be sitting at 50% after 12 hours.  having cache os dynamic pages out there is ok unless I need to fix a typo, then I need to login to Cloudflare and clear the cache manually (or wait 8 hours)

Performance after a few hours

DNS times in gtmetrix have now fallen to a sub 200ms (Y Slow is now a respectable A, it was a C before).  I just need to wait for caching and minification to kick in.

DNS Improved

webpagetest.org results are awesome

See here: https://www.webpagetest.org/result/180314_PB_7660dfbe65d56b94a60d7a604ca250b3/

  • Load Time: 1.80s
  • First Byte 0.176s
  • Start Render 1.200s

webpagetest

Google Page Speed Insights Report

Mobile: 78/100

Desktop: 87/100

Check with https://developers.google.com/speed/pagespeed/insights/

Update 24th March 2018 Attacked?

I noticed a spike in and traffic (incoming and threats) on the 24th of March 2018.

I logged into Cloudflare on my mobile device and turned on Under Attack Mode.

Under Attack Flow

Cloudflare was now adding a delay screen in the middle of my initial page load. Read more here.  A few hours after the Attach started it was over.

After the Attack

I looked at the bandwidth and found no increase in traffic from my initial host VM. Nice.

cloudflare-attack-001

Thanks, Cloudflare.

Cloudflare Pros

  • Enabling Attack mode was simple.
  • Soaked up an attack.
  • Free Tier
  • Many Reports
  • Option to force HTTPS over HTTP
  • Option to ban/challenge suspicious IP’s and set challenge timeframes.
  • Ability to setup IP firewall rules and Application Firewalls.
  • User-agent blocking
  • Lockdown URL’s to IP’s (pro feature)
  • Option to minify Javascript, CSS and HTML
  • Option to accelerate mobile links
  • Brotli compression on assets served.
  • Optio to enable BETA Rocket loader for Javascript performance tweaks.
  • Run Javascript service workers from the 120+ CDN’s
  • Page/URL rules o perform custom actions (redirects, skip cache, Encryption etc)
  • HTTP/2 on, IPV6 ON
  • Option to setup load balancing/failover
  • CTO of Cloudflare responded in Twitter 🙂
  • Option to enable rate limiting (charged at 10,000 hits for $0.05c)
  • Option to block countries (pro feature)
  • Option to install apps in Cloudflare like(Goole Analytics,

Cloudflare Cons

  • No more logging into NameCheap to perform DNS management (I now goto Cloudflare, Namecheap are awesome).
  • Cloudflare Support was slow/confusing (I ended up figuring out the redirect problem myself).
  • Some sort of verify Cloudflare Setup/DNS/CDN access would be nice. After I set this up my gtmetrix load times were the same and I was not sure if DNS needs to replicate? Changing minify settings in Cloudflare did not seem to happen.
  • WordPress draft posts are being cached even though page riles block wp-admin page caching.
  • Would be nice to have ad automatic Under Attack mode
  • Now all sub-domains were transferred in the setup ( id did not know for weeks)

Cloudflare status

Check out https://www.cloudflarestatus.com/ for status updates.

Don’t forget to install the CloudFlare Plugin for WordPress if you use WordPress.

More Reading

Check out my OWASP Zap and Kali Linux self-application Penetration testing posts.

I hope this guide helps someone.

Ask a question or recommend an article

[contact-form-7 id=”30″ title=”Ask a Question”]

Revision History

v1.8 host Command from the OSX CLI

v1.7 Subdomain error

v1.6 Cloudflare Attack

v1.5 WordPress Plugin

v1.4 More Reading

v1.3 added WAF snip

v1.2 Added Google Page Speed Insights and webpage rest results

v1.1 Added Y-Slow

v1.0 Initial post

Filed Under: Analytics, App, Cache, CDN, Cloud, Cloudflare, DNS, Domain, Hosting, LetsEncrypt, Marketing, Secure, Security, SEO, Server, VM, Vultr, Website, Wordpress Tagged With: a, and, Cloudflare, hosted, namecheap, on, Setting, to, up, use, vm, vultr, website

Using Platforma Web Wireframe Kit to build a website (prototype)

November 24, 2017 by Simon

I have blogged before about building a server for users to install WordPress, optimizing images in WordPress,  deploying WordPress via CLI, moving WordPress, speeding up WordPress and securing WordPress but what do you do if you want a non-WordPress site without the support hassles?

Recently I gave the https://platforma.ws iOS prototyping library extensions a test.  I was delighted to find they had a Web Wireframe Kit (generation suite) for prototyping and exporting working websites. You can try the free version or buy a licence here.

Creating a Website with Platforma Web Wireframe Kit

Goto https://platforma.ws and click HTML Generator (or click here)

You will be presented with an empty website ready for your attention.

platformaweb001

Adding Website Elements

It’s as simple as clicking a purple add button.

Add Items to Webiste

This reveals a number of HTML templates samples that you can drag and drop to your website design.

Add Element

You can then choose a category (e.g “Header”) and see the elements of the available sample.

Categories

Simply drag and drop the elements out into your design.

Drag and Drop

Now, Let’s click the purple Add  (in the top left) button and add a sample Header section, sample Contents, sample Slider, sample Body, sample first Call to Action section, sample Pricing Table, sample second Call to Action section, sample Footer section.

30 seconds later and I have generated designed a site ready to edit the exported HTML.

Designed Site

Exporting Your Site from Platforma

Click on the Export button (in the top right).

Export

I was greeted with the following export screen, this page explains the difference in export options: http://app.platforma.ws/docs/

I don’t need “node.js” or “gulp” “Advanced Version” (PUG + STYLUS) so I’ll choose “Simple Version” (HTML + CSS + JS).

Export Options

You will need to enter a licence key to continue the export.

Enter Licence Key

The website export download came down just fine.

Code

The code looks ok, I did notice that images were missing alt tags so I added those in.

Code

Any Errors in the Code (in Chrome)?

Nope, Chrome loads the code with no errors.

Loading the SIte

Testing Online

How about HTML5 and WCAG 2.0 AA

I uploaded the zip file to my server (using the scp command), I could have used SFTP.

scp /local/folder/local-file.zip [email protected]:/www/destination-folder/

I unzipped the site with

sudo apt-get install unzip
unzip filename.zip

The site loads just fine in a web browser

Load

Accessibility

I used https://achecker.ca/checker/index.php to test the site with WCAG 2.0 AA, the only remaining issues I found were in relation to the multiple H1, H2 etc tags (this can be fixed by moving the H CSS code to custom classes and removing H1, H2 etc tags altogether (and reference the custom class matching the H* tags)).

WCAG

fyi: The potential WCAG problems that were being alerted were in relation to…

  • My alt tags were potentially short
  • Potential Colour warnings
  • Potential Contrast warnings
  • Missing a “Skip to content” block
  • Reporting of placeholder graphics and alt tags (a checker is smart)
  • etc

I tested the sites HTML compliance with https://validator.w3.org/, the code passed with flying colours.

HTML5

Customizing

I could not find a way to edit the elements in the http://app.platforma.ws/# like the Platforma iOS Adobe XD Kit but you can quickly edit in your HTML after exporting (using your editor of choice like Dreamweaver, Sublime or Notepad).

Conclusion

Platforma Web Wireframe Kit is an essential tool for anyone wanting to build quick web prototype (or even live sites) website for themselves, clients etc. I am very impressed with the code created.

Read More

Check out my guide, Using Adobe XD and Platforma Web Wireframe Kit to prototype an iOS app.

Donate and make this blog better

Ask a question or recommend an article

[contact-form-7 id=”30″ title=”Ask a Question”]

Revision History

v1.1 Added more, fixed  a bit.

etc

Filed Under: Advice, App, iOS, UI, UX, Web Prototype, Website, Wordpress Tagged With: a, build, Kit, Platforma, prototype, to, Using, web, website, Wireframe

Create your first Hello World Electron app on OSX

September 27, 2017 by Simon

Electron allows you to build cross-platform desktop apps with JavaScript, HTML, and CSS based on NodeJS. Electron’s home is https://electron.atom.io

Electron will allow you to build a web app and package it up to run locally with HTML and bootstrap or more advanced widgets like https://www.jqwidgets.com/ or ExtJS. Marc Fearby is creating a Git starter project for Electron with Sencha here. You can happily develop a local web app and have back-end available by an APIs if need be (read my guide on setting up and configuring a server and securing it and installing an SSL certificate).

Nodejs

Electorn requires NodeJS, please confirm your node version (in my case I have an old version installed)

node --version
v0.12.4

Run the node installer from https://nodejs.org/en/download/

Electron Hello

Now I have the newer version on OSX

node --version
v6.11.3

Create a folder for you Electron project (e.g  ~/Documents/ElectronApps/HelloWorld ).

Project Home

Navigate to that folder in the terminal

cd ~/Documents/ElectronApps/HelloWorld/
pwd
/Users/simon/Documents/ElectronApps/HelloWorld

Now type: npm init

npm init
This utility will walk you through creating a package.json file.
It only covers the most common items, and tries to guess sensible defaults.

See `npm help json` for definitive documentation on these fields
and exactly what they do.

Use `npm install <pkg> --save` afterwards to install a package and
save it as a dependency in the package.json file.

Press ^C at any time to quit.
name: (HelloWorld) helloworld
version: (1.0.0) 0.0.1
description: Hello World in Electron
entry point: (index.js) app.js
test command: 
git repository: 
keywords: electron,hello,world
author: Simon Fearby
license: (ISC) 
About to write to /Users/simon/Documents/ElectronApps/HelloWorld/package.json:

{
  "name": "helloworld",
  "version": "0.0.1",
  "description": "Hello World in Electron",
  "main": "app.js",
  "scripts": {
    "test": "echo \"Error: no test specified\" && exit 1"
  },
  "keywords": [
    "electron",
    "hello",
    "world"
  ],
  "author": "Simon Fearby",
  "license": "ISC"
}

Installing Electron

sudo npm install electron --save-dev --verbose

verbose was added to allow you to see as the install could take  a while

...
Downloading electron-v1.7.8-darwin-x64.zip
[======>                                      ] 16.4% of 48.41 MB (319.96 kB/s)
...

Create a  javascript file as specified in your package.json

sudo nano app.js

Contents of app.js

const elcetron = require('electron');
const app = electron.app;

const path = require('path');
const url = require('url');

const BrowserWindow = electron.BrowserWindow;
var mainWindow;

app.on('ready', function() {

        mainWindow = newBrowserWindow({width: 1024, height: 768, backgroudColor: '#ffffff'});

        mainWindow.loadURL(url.format({pathname: path.join(__dirname, 'index.html'), protocol: 'file:', slashes: true } ));

});

Update the package.json to include a start command (electron .)

{
  "name": "helloworld",
  "version": "0.0.1",
  "description": "Hello World in Electron",
  "main": "app.js",
  "scripts": {
    "test": "echo \"Error: no test specified\" && exit 1",
    "start": "electron ."
  },
  "keywords": [
    "electron",
    "hello",
    "world"
  ],
  "author": "Simon Fearby",
  "license": "ISC",
  "devDependencies": {My contents
    "electron": "^1.7.8"
  }
}

Create an index.html file

sudo nano index.html

Contents

<!DOCTYPE html>
<html>
<head>
<meta charset="UTF-8">
<title>Hello World...</title>
</head>

<body>
Hello World...
</body>

</html>

Now we can start the app.

App

Electron Package Manager

You can install the Electron Packager to make Apps for desktop OS’s. Read more at https://github.com/electron-userland/electron-packager

Install the electron-packager module into your existing project.

sudo npm install electron-packager --save-dev

If you receive the error “-bash: electron-packager: command not found” try and install the packager globally

sudo npm install electron-packager -g

Now we will package the app for OSX

sudo electron-packager .
Packaging app for platform darwin x64 using electron v1.7.8
Wrote new app to /Users/simon/Documents/ElectronApps/HelloWorld/helloworld-darwin-x64

I can now uninstall the electron packager from my project as it is now installed globally

sudo npm remove electron-packager

Building apps on OSX

Build an OSX App

electron-packager .

Rebuild an OSX app

sudo electron-packager . --overwrite

This will build an OSX app

OSX App

Building apps on Windows

1) Ensure nodejs is installed (reboot if required)

node win

2) Test your app (npm start)
NPM Start

3) Install Electron Packager Globally

npm install electron-packager -g

4) Don’t forget to install Electron on Windows

npm install electron --save-dev --verbose

5) You can now package a Windows executable (TIP: Run the command as an Administrator to prevent write errors).

electron-packager .

Win EXE

Advanced electron-packager commands

Build and specify a build number

electron-packager ./ helloworld --build-version=0.0.1

Build ap with icons

electron-packager . --overwrite --arch=x64 --platform=darwin --prune=true --out=release-builds --icon=assets/icons/mac/icon.icns

Building linux app

electron-packager . --overwrite --icon=assets/icons/png/icon.png --platform=linux --arch=x64 --prune=true --out=release-builds

Use sites like https://iconverticons.com/online/to generate icns files and place them in “assets\icons\mac\icons.icns”

View electron-packager issues here: https://github.com/electron-userland/electron-packager/issues

More to come..

Donate and make this blog better


Ask a question or recommend an article
[contact-form-7 id=”30″ title=”Ask a Question”]

Revision History

v1.0 Initial Post (24th Sep 2017)

etc

Filed Under: App, Web Design, Website Tagged With: app, electron, NodeJS, web app

Setup Ruby, Rails, Gem and a command line twitter tool to query Twitter on Ubuntu 16.04 via a Twitter App

September 17, 2017 by Simon

Below is how I setup Ruby, Rails, Gem and a command-line twitter tool to query Twitter on Ubuntu 16.04 via a Twitter App

Setup Twitter feed scraping on Ubuntu 16.04

At first, I had no network (I could not ping, run a system update or install packages (even though I had opened the firewall ports and disabled the firewall temporarily)? I fixed this by editing /etc/resolv.conf and added a google DNS entry.

sudo nano /etc/resolv.conf

Added the Google DNS server.

nameserver 8.8.8.8

Bingo, I can now ping and update my system.

Setup Ruby and Pre-Requisites

sudo apt-get update
sudo apt-get install git-core curl zlib1g-dev build-essential libssl-dev libreadline-dev libyaml-dev libsqlite3-dev sqlite3 libxml2-dev libxslt1-dev libcurl4-openssl-dev python-software-properties libffi-dev
git clone https://github.com/rbenv/rbenv.git ~/.rbenv
echo 'export PATH="$HOME/.rbenv/bin:$PATH"' >> ~/.bashrc
echo 'eval "$(rbenv init -)"' >> ~/.bashrc
exec $SHELL
git clone https://github.com/rbenv/ruby-build.git ~/.rbenv/plugins/ruby-build
echo 'export PATH="$HOME/.rbenv/plugins/ruby-build/bin:$PATH"' >> ~/.bashrc
exec $SHELL
rbenv install 2.4.1
rbenv global 2.4.1

If ruby 2.4.1 fails o install try and install the older ruby 2.2.1

Error

rbenv install 2.4.1
Downloading ruby-2.4.1.tar.bz2...
-> https://cache.ruby-lang.org/pub/ruby/2.4/ruby-2.4.1.tar.bz2
Installing ruby-2.4.1...

BUILD FAILED (Ubuntu 16.04 using ruby-build 20170914-2-ge40cd1f)
...

Optional Troubleshooting: Install Ruby 2.2.1 (if 2.4.1 fails to install)

rbenv install 2.2.1
rbenv global 2.2.1

Optional Troubleshooting: Ruby 2.2.1 is no longer recommended

rbenv install 2.2.1
Downloading ruby-2.2.1.tar.bz2...
-> https://cache.ruby-lang.org/pub/ruby/2.2/ruby-2.2.1.tar.bz2
Installing ruby-2.2.1...

WARNING: ruby-2.2.1 is nearing its end of life.
It only receives critical security updates, no bug fixes.
...

Or

Optional Install: Ruby 2.4.0

mkdir ~/.rbenv/cache
# download manually ruby file
wget https://cache.ruby-lang.org/pub/ruby/2.4/ruby-2.4.0.tar.bz2
# move file
mv ruby-2.4.0.tar.bz2 ~/.rbenv/cache
# do the install
rbenv install 2.4.0

Hopefully, Ruby is now installed

ruby -v
ruby 2.4.1p111 (2017-03-22 revision 58053) [x86_64-linux]

Install Bundler Gem

gem install bundler

Install Rails

curl -sL https://deb.nodesource.com/setup_8.x | sudo -E bash -

I skipped the Install (as I had node installed).

node -v
v6.11.3

Continue with rails install

gem install rails -v 5.1.3
rbenv rehash

Rails is installed

rails -v
Rails 5.1.3

Install the t gem (read more at the https://github.com/sferik/t GitHub repository)

gem install t

You can now authorize the t gem to use your twitter.

t authorize
Welcome! Before you can use t, you'll first need to register an
application with Twitter. Just follow the steps below:
  1. Sign in to the Twitter Application Management site and click
     "Create New App".
  2. Complete the required fields and submit the form.
     Note: Your application must have a unique name.
  3. Go to the Permissions tab of your application, and change the
     Access setting to "Read, Write and Access direct messages".
  4. Go to the Keys and Access Tokens tab to view the consumer key
     and secret which you'll need to copy and paste below when
     prompted.

But first let’s create a twitter app.

Goto https://apps.twitter.com/, login and create an app.

Twitter App

Twitter will provide app details when you create the app.

Created Twitter App

Go to Permissions and set “Read, Write and Access direct messages” and save changes.

Twitter App Permissions

Linking the Twitter app to t Gem

Now that the Twitter app is created let’s activate and link it to the t gem,

Run the following command to start the authorization process.

t authorize

The authorization process is dead simple, just follow the on-screen prompts.

Welcome! Before you can use t, you'll first need to register an
application with Twitter. Just follow the steps below:
  1. Sign in to the Twitter Application Management site and click
     "Create New App".
  2. Complete the required fields and submit the form.
     Note: Your application must have a unique name.
  3. Go to the Permissions tab of your application, and change the
     Access setting to "Read, Write and Access direct messages".
  4. Go to the Keys and Access Tokens tab to view the consumer key
     and secret which you'll need to copy and paste below when
     prompted.

Press [Enter] to open the Twitter Developer site.

Open: https://apps.twitter.com
Enter your API key: ########################
Enter your API secret: ################################################

In a moment, you will be directed to the Twitter app authorization page.
Perform the following steps to complete the authorization process:
  1. Sign in to Twitter.
  2. Press "Authorize app".
  3. Copy and paste the supplied PIN below when prompted.

Press [Enter] to open the Twitter app authorization page.

Open: https://api.twitter.com/oauth/authorize?oauth_callback=oob&oauth_consumer_key=################################################&oauth_signature=################################################&oauth_signature_method=HMAC-SHA1&oauth_timestamp=123456789&oauth_token=########################&oauth_version=1.0
Enter the supplied PIN: ######
Authorization successful.

This was easy.

fyi: Authorization (Twitter authorize app screenshot)

Authorize Twitter

fyi: Authorization (Twitter authorize app pin screenshot)

Auhorize Pin

Using T

T Help

t help
Commands:
  t accounts                          # List accounts
  t authorize                         # Allows an application to request user authorization
  t block USER [USER...]              # Block users.
  t delete SUBCOMMAND ...ARGS         # Delete Tweets, Direct Messages, etc.
  t direct_messages                   # Returns the 20 most recent Direct Messages sent to you.
  t direct_messages_sent              # Returns the 20 most recent Direct Messages you've sent.
  t dm USER MESSAGE                   # Sends that person a Direct Message.
  t does_contain [USER/]LIST USER     # Find out whether a list contains a user.
  t does_follow USER [USER]           # Find out whether one user follows another.
  t favorite TWEET_ID [TWEET_ID...]   # Marks Tweets as favorites.
  t favorites [USER]                  # Returns the 20 most recent Tweets you favorited.
  t follow USER [USER...]             # Allows you to start following users.
  t followers [USER]                  # Returns a list of the people who follow you on Twitter.
  t followings [USER]                 # Returns a list of the people you follow on Twitter.
  t followings_following USER [USER]  # Displays your friends who follow the specified user.
  t friends [USER]                    # Returns the list of people who you follow and follow you back.
  t groupies [USER]                   # Returns the list of people who follow you but you don't follow back.
  t help [COMMAND]                    # Describe available commands or one specific command
  t intersection USER [USER...]       # Displays the intersection of users followed by the specified users.
  t leaders [USER]                    # Returns the list of people who you follow but don't follow you back.
  t list SUBCOMMAND ...ARGS           # Do various things with lists.
  t lists [USER]                      # Returns the lists created by a user.
  t matrix                            # Unfortunately, no one can be told what the Matrix is. You have to see it for y...
  t mentions                          # Returns the 20 most recent Tweets mentioning you.
  t mute USER [USER...]               # Mute users.
  t muted [USER]                      # Returns a list of the people you have muted on Twitter.
  t open USER                         # Opens that user's profile in a web browser.
  t reach TWEET_ID                    # Shows the maximum number of people who may have seen the specified tweet in th...
  t reply TWEET_ID [MESSAGE]          # Post your Tweet as a reply directed at another person.
  t report_spam USER [USER...]        # Report users for spam.
  t retweet TWEET_ID [TWEET_ID...]    # Sends Tweets to your followers.
  t retweets [USER]                   # Returns the 20 most recent Retweets by a user.
  t retweets_of_me                    # Returns the 20 most recent Tweets of the authenticated user that have been ret...
  t ruler                             # Prints a 140-character ruler
  t search SUBCOMMAND ...ARGS         # Search through Tweets.
  t set SUBCOMMAND ...ARGS            # Change various account settings.
  t status TWEET_ID                   # Retrieves detailed information about a Tweet.
  t stream SUBCOMMAND ...ARGS         # Commands for streaming Tweets.
  t timeline [USER]                   # Returns the 20 most recent Tweets posted by a user.
  t trend_locations                   # Returns the locations for which Twitter has trending topic information.
  t trends [WOEID]                    # Returns the top 50 trending topics.
  t unfollow USER [USER...]           # Allows you to stop following users.
  t update [MESSAGE]                  # Post a Tweet.
  t users USER [USER...]              # Returns a list of users you specify.
  t version                           # Show version.
  t whoami                            # Retrieves profile information for the authenticated user.
  t whois USER                        # Retrieves profile information for the user.

Options:
  -C, [--color=COLOR]   # Control how color is used in output
                        # Default: auto
                        # Possible values: icon, auto, never
  -P, [--profile=FILE]  # Path to RC file
                        # Default: /root/.trc

Show linked twitter accounts with t

t accounts
yourappnamehere
  ###################### (active)

Show authorized twitter accounts

t set active yourtwitterappnamehere ########################
Active account has been updated to yourtwitterappnamehere.

Using t to query a Twitter user

t whois @fearbysoftware
ID           1468627891
Since        May 30  2013 (4 years ago)
Last update  Editing remote files locally with sublime text editor over ssh https://t.co/k5qSnHmUrP #VoteYes (7 hours ago)
Screen name  @FearbySoftware
Name         Simon Fearby
Tweets       4,797
Favorites    940
Listed       88
Following    1,933
Followers    616
Bio          Developing augmented reality mobile apps, websites, ardrino and raspberry pi code/circuits etc. Tweets are my own not my employer. Blog at https://t.co/Azo81pi8Yt
Location     Tamworth NSW, Australia
URL          http://www.fearby.com

Search Twitter for “fearby”

t search all "lang:en fearby"

Output:

t search all "lang:en fearby"

@FearbySoftware
@troyhunt Google AdWords have worked for me https://t.co/KGZAd0sWkG

@FearbySoftware
Blogged setting up my own Ubuntu server to replace Cpanel for $2.5 a month https://t.co/GZCIMesaqJ

@FearbySoftware
Blogged Securing an Ubuntu VM with a free LetsEncrypt SSL certificate in 1 Minute https://t.co/QWiyR2I9ur

@MedinaSports
JV boys ⚽️ tied Roy-Hart 1-1. AJ Seefeldt scored the lone goal w/ 20' left in regulation. Zach Fike & Cooper Fearby
made great saves in goal

@FearbySoftware
Today's SEO experiment : Not pimping blog posts results in half the user hits and impressions. https://t.co/Q9eCoUZy9n

@FearbySoftware
@0xDUDE any advice on security my MongoDB more? Need whitlist IP, use the non standard port and have usr/pwd
https://t.co/5TEDz8LCJo

@FearbySoftware
Creating and configuring a CentOS server on Digital Ocean https://t.co/aI3FYKSFQC

@FearbySoftware
Self Service Status Pages https://t.co/F6ZjN2sdfM

@FearbySoftware
Alibaba Cloud how good is it? https://t.co/YbuWgvyDz8

@breakingnewsng_
IGBONLA SIX: Four of freed students resume studies - …Say there’s nothing to fearBy Monsuru Olowoopejolagos—Two...
https://t.co/sosKnSpT3h

@AFairymary
RT @AFairymary: Congratulations to William Fearby, Author of the Month. https://t.co/jtP0Sn0QCl

@FearbySoftware
I guess I need to get an #iPhoneX to develop apps on an post updates to my free dev blog https://t.co/9x5TFARLCt
#apple #iOS11 #AppleEvent

@fearby_nick
RT @ndonnelly88_: @NJDevils How many retweets for free season tickets?

@PrincessMutanu
RT @CBooksFree: $0.99—Imagine Your Life Without Fear—by Max Lucado https://t.co/pUVi2wWM1J https://t.co/7YakQTjzZf

@corund
RT @FearbySoftware: Securing an Ubuntu VM with a free LetsEncrypt SSL certificate in 1 Minute https://t.co/QWiyR2I9ur
#free #SSL #website #wordpress #nodejs
...

Search Twitter for “fearby” (max 10) and output at CSV

t search all "lang:en fearby" --csv

See more commands here: https://github.com/sferik/t

This is great, I can interact with Twitter from the command line and apps without having to go full REST API and OAUTH development.

Calling T from NodeJS

Read the guide here on calling T from NodeJS.

Calling T from php (Under construction)

Coming soon (this PHP section is under development)

You may need to exclude “pcntl_exec” from being blocked in “php.ini” under “disable_functions”

find your php.ini by typing

find / -iname "php.ini"

Restart php

sudo service php7.0-fpm restart
php7.0-fpm stop/waiting
php7.0-fpm start/running, process #####
[email protected]:/www# service php7.0-fpm status
php7.0-fpm start/running, process #####

This section is under development,

Todo: Security.

Need a server?

Set up a Server on Vultr here for as low as $2.5 a month or set up a Server on Digital Ocean (and get the first 2 months free ($5/m server)). I have a guide on setting up a Vultr server here or Digital Ocean server here.  Don’t forget to add a free LetsEncrypt SSL Certificate and secure the server (read more here and here).

Still here, read more articles here or use the form below to ask a question or recommend an article.

Donate and make this blog better


Ask a question or recommend an article
[contact-form-7 id=”30″ title=”Ask a Question”]

Version History

v1.3.2 added Ruby 2.2.0 install info (29th Sep 2017)

v1.3.1 added Ruby 2.2.1 install info (27th Sep 2017)

v1.3 Querying T in NodeJS

Filed Under: Cloud, Firewall, Twitter, Website Tagged With: command line, gem, rails, ruy

How to use Sublime Text editor locally to edit code files on a remote server via SSH

September 16, 2017 by Simon

This guide will show you how to use Sublime Text editor locally to edit code files on a remote server via SSH.

This guide assumes oy already have a working SSH connection between your Mac and your remote server (with no firewall issues) and have configured SSH keys via modifying to authorized_keys file to enable SSH access.

Need a server?

I now use UpCLoud for cloud servers as they are super fast (read the blog post here). Get $25 free credit by signing up at UpCloud using this link.

UpCloud is way faster than Vulr.

Upcloud Site Speed in GTMetrix

Setting up slower region-specific servers can be found here. Set up a Server on Vultr here for as low as $2.5 a month or set up a Server on Digital Ocean (and get the first 2 months free ($5/m server)). I have a guide on setting up a Vultr server here or Digital Ocean server here.  Don’t forget to add a free LetsEncrypt SSL Certificate and secure the server (read more here and here).

Buy a domain name from Namecheap here.

Domain names for just 88 cents!

Setting up your local machine

Open Sublime Text 3 and press COMMAND+SHIFT+P to bring up the command bar and type Install and click Package Control: Install    Package and click it.

Sublime instal package

Wait a  few seconds for the packages list to show and type “rsub”

Sublime Install RSUB

Ok let’s make an SSH alias to your server on your Mac by typing “sudo nano ~/.ssh/config”

SSH Alias

Make these changes

ssh alias

File contents:

host mysrv
HostName www.myserver.com
User thesshuser
RemoteForward 52698 localhost:52698

Now we can connect to the server via SSH by typing “ssh mysrv”

ssh connect

After typing the server’s password you will be connected to the ssh server

ssh mysrv
[email protected]'s password: 
Welcome to Ubuntu 16.04.3 LTS (GNU/Linux 4.4.0-87-generic x86_64)

 * Documentation:  https://help.ubuntu.com
 * Management:     https://landscape.canonical.com
 * Support:        https://ubuntu.com/advantage

0 packages can be updated.
0 updates are security updates.


You have new mail.
Last login: Sat Sep 16 12:51:35 2017 from xx.xx.xx.xx
[email protected]:~#

Now on your local Mac load the following page in a web browser (and review the code): https://raw.github.com/aurora/rmate/master/rmate  and copy the contents to the clipboard.

On the remote server (the SSH one) type:

sudo nano /usr/local/bin/rmate

Now paste the contents or this page into nano editor and save it and exit nano.

Now run this chmod command to make the rmate file executable.

sudo chmod a+x /usr/local/bin/rmate

Now on the server, we can open any text file with rmate and have it open locally in Sublime via SSH.  Yes, Open a  file on a server and have it automatically open in locally 🙂

SSH

If you have many files to open then create a bash file to open files with rmate

sudo nano openfilesonmac.sh

Contents:

#!/bin/bash

rmate index.html 
rmate index1.html 
rmate index2.html 
rmate index3.html 
rmate index4.html 
rmate index5.html 
rmate index6.html 
rmate index7.html 
rmate index8.html 
rmate index9.html 
rmate index10.html

File permissions:

chmod +x openfilesonmac.sh

Now we can open may remote files locally by running the bash script.

All saves in Sublime locally are sent to the server 🙂

e.g

rmate /www/index.html
rmate /node/api/app01/app.js
rmate /www/dashboard/index.php

Still here, read more articles here or use the form below to ask a question or recommend an article.

Port Forwarding with vSSH on OSX

If you use a third party ssh program like vSSH you will also need to setup port forwarding to avoid this error

rmate test.txt
/usr/local/bin/rmate: connect: Connection refused
/usr/local/bin/rmate: line 384: /dev/tcp/localhost/52698: Connection refused
Unable to connect to TextMate on localhost:52698

How.

port forward

Now you can open remote files locally with SSH or vSSH too.

Donate and make this blog better


Ask a question or recommend an article
[contact-form-7 id=”30″ title=”Ask a Question”]

v1.4 Added UpCloud Info.

v1.3 vSSH Port forwarding.

Filed Under: Advice, Development, Server, Ubuntu, VM, Web Design, Website Tagged With: chmod, forward, port, rmate, ssh, sublime, vssh

Installing and managing WordPress with WP-CLI from the command line on Ubuntu

September 10, 2017 by Simon

Here is a really simple way to manually manage WordPress installations on Ubuntu.

My previous WordPress (and related) guides

  • Setting up Google Analytics on your website
  • Deploying WordPress to a Vultr VM via command line
  • Add Google AdWords to your WordPress blog
  • Securing an Ubuntu VM with a free LetsEncrypt SSL certificate in 1 Minute
  • Improving the speed of WordPress
  • Optimize images automatically in WordPress
  • Essential WordPress Plugins
  • Why choose a WordPress website over a static HTML site edited with Dreamweaver
  • Building a WordPress site from scratch

My Server Setup Guides

  • Useful Linux Terminal Commands
  • Moving WordPress to a new self managed server away from CPanel
  • Setting up a Vultr VM and configuring it
  • Creating and configuring a CentOS server on Digital Ocean
  • How to buy a new domain and SSL cert from NameCheap, a Server from Digital Ocean and configure it.
  • Creating an AWS EC2 Ubuntu 14.04 server with NGINX, Node and MySQL and phpMyAdmin
  • The quickest way to setup a scalable development ide and web server
  • Adding a commercial SSL certificate to a Digital Ocean VM

Go to https://make.wordpress.org/cli/handbook/installing/ and read the install instructions.

How to install wp-cli on Ubuntu

First read this post too install WordPress from the command line. You should install WordPress here.

Telnet to your server (SSH)

cd /www
mkdir wp-cli
cd wp-cli
pwd
/www/wp-cli
curl -O https://raw.githubusercontent.com/wp-cli/builds/gh-pages/phar/wp-cli.phar
  % Total    % Received % Xferd  Average Speed   Time    Time     Time  Current
                                 Dload  Upload   Total   Spent    Left  Speed
100 4191k  100 4191k    0     0  4535k      0 --:--:-- --:--:-- --:--:-- 4536k

Did the file download?

ls wp-cli.phar -al
-rw-r--r-- 1 root root 4292472 Sep 10 13:29 wp-cli.phar

Execute

/usr/bin/php ./wp-cli.phar --info

Make the file executable and move it to /usr/local/bin/wp

chmod +x wp-cli.phar
sudo mv wp-cli.phar /usr/local/bin/wp

Now you can run wp-cli by typing the following from the command line

wp --info

Read the official wp-cli quick start guide https://make.wordpress.org/cli/handbook/quick-start/

Ever since I moved my WordPress to a self-managed server I have not been able to update my plugins and I have not installed an  FTP server (by choice for security reasons).

Wordpress manual update plugins page

Let’s see if we can update plugin with wp-cli

cd /www
wp plugin update --all

Yes, it worked

Enabling Maintenance mode...
Downloading update from https://downloads.wordpress.org/plugin/add-to-any.1.7.17.zip...
Unpacking the update...
Installing the latest version...
Removing the old version of the plugin...
Plugin updated successfully.
Downloading update from https://downloads.wordpress.org/plugin/contact-form-7.4.9.zip...
Unpacking the update...
Installing the latest version...
Removing the old version of the plugin...
Plugin updated successfully.
Downloading update from https://downloads.wordpress.org/plugin/ewww-image-optimizer.3.6.1.zip...
Unpacking the update...
Installing the latest version...
Removing the old version of the plugin...
Plugin updated successfully.
Downloading update from https://downloads.wordpress.org/plugin/ewww-image-optimizer-cloud.3.6.1.zip...
Unpacking the update...
Installing the latest version...
Removing the old version of the plugin...
Plugin updated successfully.
Downloading update from https://downloads.wordpress.org/plugin/better-wp-security.6.6.0.zip...
Unpacking the update...
Installing the latest version...
Removing the old version of the plugin...
Plugin updated successfully.
Downloading update from https://www.wponlinesupport.com/edd-sl/package_download/removedapikey...
Warning: Download failed. "Unauthorized"
Downloading update from https://downloads.wordpress.org/plugin/wordpress-seo.5.4.zip...
Unpacking the update...
Installing the latest version...
Removing the old version of the plugin...
Plugin updated successfully.
Disabling Maintenance mode...
+----------------------------+-------------+-------------+---------+
| name                       | old_version | new_version | status  |
+----------------------------+-------------+-------------+---------+
| add-to-any                 | 1.7.16      | 1.7.17      | Updated |
| contact-form-7             | 4.8.1       | 4.9         | Updated |
| ewww-image-optimizer       | 3.5.1       | 3.6.1       | Updated |
| ewww-image-optimizer-cloud | 3.5.1       | 3.6.1       | Updated |
| better-wp-security         | 6.3.0       | 6.6.0       | Updated |
| wp-news-and-widget-pro     | 1.1.9       | 2.1.1       | Updated |
| wordpress-seo              | 5.1         | 5.4         | Updated |
+----------------------------+-------------+-------------+---------+
Success: Updated 7 of 7 plugins.

I have now updated all active plugins from one command line.

WordPress Plugins

I have been unable to update WordPress itself since I moved my website (without an FTP server).

Update WordPress

Let’s try and update WordPress with wp-cli.

Run this command.

cd /www
sudo wp core update

Success

Updating to version 4.8.1 (en_US)...
Downloading update from https://downloads.wordpress.org/release/wordpress-4.8.1-no-content.zip...
Unpacking the update...
Success: WordPress updated successfully.

WordPress version

Awesome 🙂

Now time to create a few executable bash files to update plugins and WordPress files in future.

Update WordPress Plugins Bash Script

sudo nano /scripts/updatewordpressplugins.sh

Contents

#!/bin/bash
cd /www
wp plugin update --all

Make Executable

chmod +X /scripts/updatewordpressplugins.sh

Update WordPress Bash Script

sudo nano /scripts/updatewordpress.sh

Contents

!/bin/bash
cd /www
sudo wp core update

Make Executable

chmod +X /scripts/updatewordpress.sh

More Commands

More commands can be found here: https://developer.wordpress.org/cli/commands/

Information on exporting tables can be found here https://developer.wordpress.org/cli/commands/db/export/

Site Wide Search and Replace

wp search-replace 'http://fearby.com' 'https://fearby.com' --dry-run

Results

+------------------+-----------------------+--------------+------+
| Table            | Column                | Replacements | Type |
+------------------+-----------------------+--------------+------+
| wp_commentmeta   | meta_key              | 0            | SQL  |
| wp_commentmeta   | meta_value            | 0            | SQL  |
| wp_comments      | comment_author        | 0            | SQL  |
| wp_comments      | comment_author_email  | 0            | SQL  |
| wp_comments      | comment_author_url    | 72           | SQL  |
| wp_comments      | comment_author_IP     | 0            | SQL  |
| wp_comments      | comment_content       | 0            | SQL  |
| wp_comments      | comment_approved      | 0            | SQL  |
| wp_comments      | comment_agent         | 0            | SQL  |
| wp_comments      | comment_type          | 0            | SQL  |
| wp_links         | link_url              | 0            | SQL  |
| wp_links         | link_name             | 0            | SQL  |
| wp_links         | link_image            | 0            | SQL  |
| wp_links         | link_target           | 0            | SQL  |
| wp_links         | link_description      | 0            | SQL  |
| wp_links         | link_visible          | 0            | SQL  |
| wp_links         | link_rel              | 0            | SQL  |
| wp_links         | link_notes            | 0            | SQL  |
| wp_links         | link_rss              | 0            | SQL  |
| wp_options       | option_name           | 0            | SQL  |
| wp_options       | option_value          | 10           | PHP  |
| wp_options       | autoload              | 0            | SQL  |
| wp_postmeta      | meta_key              | 0            | SQL  |
| wp_postmeta      | meta_value            | 56           | PHP  |
| wp_posts         | post_content          | 2176         | SQL  |
| wp_posts         | post_title            | 0            | SQL  |
| wp_posts         | post_excerpt          | 0            | SQL  |
| wp_posts         | post_status           | 0            | SQL  |
| wp_posts         | comment_status        | 0            | SQL  |
| wp_posts         | ping_status           | 0            | SQL  |
| wp_posts         | post_password         | 0            | SQL  |
| wp_posts         | post_name             | 0            | SQL  |
| wp_posts         | to_ping               | 0            | SQL  |
| wp_posts         | pinged                | 26           | SQL  |
| wp_posts         | post_content_filtered | 0            | SQL  |
| wp_posts         | guid                  | 3928         | SQL  |
| wp_posts         | post_type             | 0            | SQL  |
| wp_posts         | post_mime_type        | 0            | SQL  |
| wp_term_taxonomy | taxonomy              | 0            | SQL  |
| wp_term_taxonomy | description           | 0            | SQL  |
| wp_termmeta      | meta_key              | 0            | SQL  |
| wp_termmeta      | meta_value            | 0            | SQL  |
| wp_terms         | name                  | 0            | SQL  |
| wp_terms         | slug                  | 0            | SQL  |
| wp_usermeta      | meta_key              | 0            | SQL  |
| wp_usermeta      | meta_value            | 0            | PHP  |
| wp_users         | user_login            | 0            | SQL  |
| wp_users         | user_nicename         | 0            | SQL  |
| wp_users         | user_email            | 0            | SQL  |
| wp_users         | user_url              | 0            | SQL  |
| wp_users         | user_activation_key   | 0            | SQL  |
| wp_users         | display_name          | 0            | SQL  |
+------------------+-----------------------+--------------+------+
Success: 6268 replacements to be made.

If you are updating past pages and post links do include https look for www alos

wp search-replace 'http://www.fearby.com' 'https://www.fearby.com' --dry-run
+------------------+-----------------------+--------------+------+
| Table            | Column                | Replacements | Type |
+------------------+-----------------------+--------------+------+
| wp_commentmeta   | meta_key              | 0            | SQL  |
| wp_commentmeta   | meta_value            | 0            | SQL  |
| wp_comments      | comment_author        | 0            | SQL  |
| wp_comments      | comment_author_email  | 0            | SQL  |
| wp_comments      | comment_author_url    | 0            | SQL  |
| wp_comments      | comment_author_IP     | 0            | SQL  |
| wp_comments      | comment_content       | 0            | SQL  |
| wp_comments      | comment_approved      | 0            | SQL  |
| wp_comments      | comment_agent         | 0            | SQL  |
| wp_comments      | comment_type          | 0            | SQL  |
| wp_links         | link_url              | 0            | SQL  |
| wp_links         | link_name             | 0            | SQL  |
| wp_links         | link_image            | 0            | SQL  |
| wp_links         | link_target           | 0            | SQL  |
| wp_links         | link_description      | 0            | SQL  |
| wp_links         | link_visible          | 0            | SQL  |
| wp_links         | link_rel              | 0            | SQL  |
| wp_links         | link_notes            | 0            | SQL  |
| wp_links         | link_rss              | 0            | SQL  |
| wp_options       | option_name           | 0            | SQL  |
| wp_options       | option_value          | 1            | PHP  |
| wp_options       | autoload              | 0            | SQL  |
| wp_postmeta      | meta_key              | 0            | SQL  |
| wp_postmeta      | meta_value            | 42           | PHP  |
| wp_posts         | post_content          | 729          | SQL  |
| wp_posts         | post_title            | 3            | SQL  |
| wp_posts         | post_excerpt          | 0            | SQL  |
| wp_posts         | post_status           | 0            | SQL  |
| wp_posts         | comment_status        | 0            | SQL  |
| wp_posts         | ping_status           | 0            | SQL  |
| wp_posts         | post_password         | 0            | SQL  |
| wp_posts         | post_name             | 0            | SQL  |
| wp_posts         | to_ping               | 0            | SQL  |
| wp_posts         | pinged                | 10           | SQL  |
| wp_posts         | post_content_filtered | 0            | SQL  |
| wp_posts         | guid                  | 0            | SQL  |
| wp_posts         | post_type             | 0            | SQL  |
| wp_posts         | post_mime_type        | 0            | SQL  |
| wp_term_taxonomy | taxonomy              | 0            | SQL  |
| wp_term_taxonomy | description           | 0            | SQL  |
| wp_termmeta      | meta_key              | 0            | SQL  |
| wp_termmeta      | meta_value            | 0            | SQL  |
| wp_terms         | name                  | 0            | SQL  |
| wp_terms         | slug                  | 0            | SQL  |
| wp_usermeta      | meta_key              | 0            | SQL  |
| wp_usermeta      | meta_value            | 0            | PHP  |
| wp_users         | user_login            | 0            | SQL  |
| wp_users         | user_nicename         | 0            | SQL  |
| wp_users         | user_email            | 0            | SQL  |
| wp_users         | user_url              | 0            | SQL  |
| wp_users         | user_activation_key   | 0            | SQL  |
| wp_users         | display_name          | 0            | SQL  |
+------------------+-----------------------+--------------+------+

When you are ready to run the replace remove the

--dry-run

As always, backup your database and files before you make changes.

Success: Made 6270 replacements.
Success: Made 787 replacements.

This was the easiest way to update my WordPress site and force existing links use https links.  Of course, you can downgrade https links if you don’t want to have https anymore.

Troubleshooting

wp needs to be run from the root folder of your web server (or it will report an error). You can specify a path location as a parameter  too ( –path=’/path/to/wordpress’)

Error: This does not seem to be a WordPress install.

All the following the wp command if you are logged in as root (not recommended for security reasons).

--allow-root

Adding “Advertisement” text above Google ads in all WordPress pages and posts, read this guide on setting up AdSense on your blog (unless you go Auto Ads).

sudo wp search-replace '<script async src="//pagead2.googlesyndication.com' 'Advertisement:<br /> <script async="" src="//pagead2.googlesyndication.com'
sudo wp search-replace '<script async="" src="//pagead2.googlesyndication.com' 'Advertisement:<br /> <script async="" src="//pagead2.googlesyndication.com'

Official Troubleshooting guide here

I had an issue where I received error messages running the wp tool, iI fixed this editing my php.ini file and changing this..

memory_limit = 128

to

memory_limit = 128M

The M made all the difference after I restarted PHP/NGINX.

to this

Thank You, Kerry Hoath for the tip on this awesome cli tool.

fyi: WordPress fixed a SQL injection vulnerability and the wp-cli tool helped me update WordPress from the CLI.

Update Themes

sudo wp theme update --all --allow-root

Update Plugins

sudo wp plugins update --all --allow-root

Update WordPress Core

sudo wp core update --allow-root

Donate and make this blog better


Ask a question or recommend an article
[contact-form-7 id=”30″ title=”Ask a Question”]

v1.5 Updating WordPress themes, plugins or core

v1.42 added ‘cd /www’ before calling wp cli.

Filed Under: Advice, CPI, Tech Advice, VM, Website, Wordpress Tagged With: command, core, Interface, line, plugins, theme, wordpress

How to optimize your sites Search Engine Optimization (SEO) and grow customers without paying for Ads

September 9, 2017 by Simon

How to optimize your sites Search Engine Optimization (SEO) and grow customers without paying for Ads.

This guide is a shorter post around setting up SEO (Search Engine Optimization) and driving more traffic to your site without buying ADs.  In a nutshell, to have better SEO you need to jump some technical hurdles in order to drive more traffic to your site from search engines along with understanding your customer’s needs and making things easier for them.

I have blogged about these topics before but these posts are too long in reflection.

  • Setting up Google Analytics on your website
  • How to boost your site’s SEO
  • Improving the speed of WordPress
  • Digital marketing and user engagement 101
  • Add Google AdWords to your WordPress blog
  • etc

Buying Ad’s?

Facebook, Google, Bing and advertising agencies will recommend you set goals around growth and site traffic and pay for those goals to succeed (usually by advertisements).

Don’t get me wrong Advertising works but it is a competitive market, Online sites can easily setup the display of Ad’s on their site (my guide here Add Google AdWords to your WordPress blog, https://fearby.com/article/add-google-adwords-wordpress-blog/ ). You can buy physical billboard ad’s on the side of roads (e.g http://www.buythisspace.com.au/). I tried to enquire about the costs of a physical billboard but the agencies robot verification rejected my enquiry submission so I gave up.  Advertising is buying peoples times and people now how to avoid ad’s and not interact with them (7 Marketing Lessons from Eye-Tracking Studies https://blog.kissmetrics.com/eye-tracking-studies/)

Do more of what works

Spoiler: This guide will recommend you do more of what works over buying millions of ad’s and hoping for new and engaged customers and customer growth.

  • If you don’t already have Google Analytics setup on your site then do it, you cannot identify your customers or identify what is broken or in turn fix it (Setting up Google Analytics on your website, https://fearby.com/article/setting-up-google-analytics-on-your-website/ )
  • Monitor Data – Do review your logs and customer related data (review orders, customers and try and identify what works. Software like https://www.zoho.com/one/applications/web.html will help you connect the dots.
  • Adobe Audience Cloud: http://www.adobe.com/au/experience-cloud.html is a more expensive software suite for driving decisions based on data.
  • Benchmarks – Set goals and work toward them (e.g I want 10x more customers).

SEO Tip’s

This older article on  How to boost your site’s SEO  attempts to mention what you need to do it to get better SEO.

Do run a modern great site

I am a big fan of word of mouth over free/organic traffic over paid customers via advertising (Mostly because I am tight and realize advertising can be a bottomless pit). The single biggest thing you can do to have more organic traffic from search engines is run a modern and fast website, have valuable content and make it as easy for the customer as possible. This is why I moved my site and setup an SSL certificate (link to article).

Search engines like your site to be fast, updated frequently, have sitemaps to make their jobs easier and have an SSL certificate to keep the web safe etc.

Google, Bing and other search engines will not send traffic your way if you do not satisfy them that your site is liked or has valuable content.  Google makes money from Google Analytics by helping people understand their site’s visitors then recommend you pay for ad’s to use on sites that have AdWords on their site ( WordPress to a new self-managed server away from CPanel ).

  • How to boost your site’s SEO https://fearby.com/article/how-to-boost-your-sites-seo/
  • Your website needs to be fast, use sites like https://www.webpagetest.org to measure how fast your site is (Aim for all A’s). Read this page for information on the impact of slow websites https://www.searchenginejournal.com/mobile-page-speed-benchmarks/194511/
  • Mobile friendly – Ensure your site is mobile friendly (or risk being dropped from search engine results)
  • SSL – Do have a secure SSL certificate on your website (view mine here https://www.ssllabs.com/ssltest/analyze.html?d=www.fearby.com&s=45.63.29.217&latest).
  • Incoming links – Having incoming links to your site tell search engines that your site is popular. 

Traffic Source types

  • Organic – An organic visitor to your site is one who found your site by searching something that was relevant to their search term and not by clicking on an advertisement.
  • Paid – A paid user is someone who has clicked an ad to come to your site.
  • Social – A social visitor is one who is known to come from a social media site, using social media sites like Twitter, Facebook or Instagram is a must to driving organic traffic (go where the people are).

Engagement

How engaged are your customers?  Have you asked your customers recently what they value or appreciate about your business or product? Have you asked for feedback recently?

User Engagement Levels

  • None – Do you have landing pages that quickly inform customers of your products or services?
  • Low – What do they need to know about your product or service?
  • Medium – Aware (engaged)
  • High – Can this person be an advocate for your business?
  • Gone – Did you get exit Feedback?

Ways to engage already engaged customers.

  • Setup a free MailChimp Newsletter to allow willing people to be alerted of new communication https://login.mailchimp.com/signup/?source=website&pid=GAW
  • Web Browser popup Alerts can be a great way to engage with users when new content is added to your site (Read the guide here https://documentation.onesignal.com/docs/web-push-setup )
  • Mobile apps or mobile friendly website are a no brainer given 2 billion people use mobile phones ( http://www.smartinsights.com/mobile-marketing/mobile-marketing-analytics/mobile-marketing-statistics/ ).

What can you do to help understand your customer’s needs and make their purchase processes easier?

Why are your customers leaving?

Understand more about your customers reasons for leaving and act upon preventing others from leaving.

  • Trying something new (Does your website need to be simpler?)
  • Are your products too expensive?.
  • Your site (or ordering) is not convenient (Do you need to setup online ordering/subscriptions and delivery?)
  • etc

Who are your customers

  • Personas – Do setup customer personas in order to focus on your customer segments (get a free customer persona template here https://blog.hubspot.com/blog/tabid/6307/bid/33491/everything-marketers-need-to-research-create-detailed-buyer-personas-template.aspx )
  • Does your website match these personas?

Are your customers.

  • Engaged
  • Informed
  • Advocates

Feedback

  • Do you have feedback loops (A simple feedback form can solve this)?

What do you know about your customers?

  • Product Satisfaction
  • Product Loyalty
  • Product Awareness

Paid Traffic (Ad’s)

  • Google Ad’s – Signup Here http://www.google.com.au/adwords/get-started/
  • Bing – Advertise on Bing here https://advertise.bingads.microsoft.com/
  • Facebook – Advertise on Facebook here https://www.facebook.com/business/products/ads

Free Traffic (SEO + Organic Ad’s)

  • Blog Posts (Sharing value/passion)
  • Social Media Posts (use hashtags)
  • Instagram (Post value/passion)

Most importantly Do what works (Measure and replicate).

Focus on Business Value

Generate a  SWOT Analysis ( Free tool here https://xtensio.com/ )

  • What are your Strengths?
  • What are your Weaknesses?
  • What are your Opportunities?
  • What are your Threats?

Goals

Goals allow you to investigate, learn, act and measure I order to improve.

  • Investigate – Data.
  • Learn/Insight – Make Assumptions.
  • Act – Act and measure.

Read more about customer engagement here https://en.wikipedia.org/wiki/Customer_engagement

Bonus

 Do ensure your website is compliant with accessibility and technical standards

  • Test our sites Accessibility – https://achecker.ca/checker/index.php
  • Test your sites HTML5 Compliance – https://validator.w3.org
  • Test your Google PageSpeed Test – https://developers.google.com/speed/pagespeed/insights/
  • Do A B testing to determine the statistical significance of changes to your site.

Conclusion

The more you know the better you can connect, Do set goals and as a minimum setup Google Analytics, SSL certificate and submit your site to search engines, then focus on a fast site that makes things simple for your customers.

Donate and make this blog better


Ask a question or recommend an article
[contact-form-7 id=”30″ title=”Ask a Question”]

v1.0 Initial version

Filed Under: Ads, Analytics, Business, LetsEncrypt, SEO, ssl, Website Tagged With: analytics, seo, ssl

  • Go to page 1
  • Go to page 2
  • Go to Next Page »

Primary Sidebar

Poll

What would you like to see more posts about?
Results

Support this Blog

Create your own server today (support me by using these links

Create your own server on UpCloud here ($25 free credit).

Create your own server on Vultr here.

Create your own server on Digital Ocean here ($10 free credit).

Remember you can install the Runcloud server management dashboard here if you need DevOps help.

Advertisement:

Tags

2FA (9) Advice (17) Analytics (9) App (9) Apple (10) AWS (9) Backup (21) Business (8) CDN (8) Cloud (49) Cloudflare (8) Code (8) Development (26) Digital Ocean (13) DNS (11) Domain (27) Firewall (12) Git (7) Hosting (18) IoT (9) LetsEncrypt (7) Linux (21) Marketing (11) MySQL (24) NGINX (11) NodeJS (11) OS (10) Performance (6) PHP (13) Scalability (12) Scalable (14) Security (45) SEO (7) Server (26) Software (7) SSH (7) ssl (17) Tech Advice (9) Ubuntu (39) Uncategorized (23) UpCloud (12) VM (45) Vultr (24) Website (14) Wordpress (25)

Disclaimer

Terms And Conditions Of Use All content provided on this "www.fearby.com" blog is for informational purposes only. Views are his own and not his employers. The owner of this blog makes no representations as to the accuracy or completeness of any information on this site or found by following any link on this site. Never make changes to a live site without backing it up first.

Advertisement:

Footer

Popular

  • Backing up your computer automatically with BackBlaze software (no data limit)
  • How to back up an iPhone (including photos and videos) multiple ways
  • Add two factor auth login protection to WordPress with YubiCo hardware YubiKeys and or 2FA Authenticator App
  • Setup two factor authenticator protection at login on Ubuntu or Debian
  • Using the Yubico YubiKey NEO hardware-based two-factor authentication device to improve authentication and logins to OSX and software
  • I moved my domain to UpCloud (on the other side of the world) from Vultr (Sydney) and could not be happier with the performance.
  • Monitor server performance with NixStats and receive alerts by SMS, Push, Email, Telegram etc
  • Speeding up WordPress with the ewww.io ExactDN CDN and Image Compression Plugin
  • Add Google AdWords to your WordPress blog

Security

  • Check the compatibility of your WordPress theme and plugin code with PHP Compatibility Checker
  • Add two factor auth login protection to WordPress with YubiCo hardware YubiKeys and or 2FA Authenticator App
  • Setup two factor authenticator protection at login on Ubuntu or Debian
  • Using the Yubico YubiKey NEO hardware-based two-factor authentication device to improve authentication and logins to OSX and software
  • Setting up DNSSEC on a Namecheap domain hosted on UpCloud using CloudFlare
  • Set up Feature-Policy, Referrer-Policy and Content Security Policy headers in Nginx
  • Securing Google G Suite email by setting up SPF, DKIM and DMARC with Cloudflare
  • Enabling TLS 1.3 SSL on a NGINX Website (Ubuntu 16.04 server) that is using Cloudflare
  • Using the Qualys FreeScan Scanner to test your website for online vulnerabilities
  • Beyond SSL with Content Security Policy, Public Key Pinning etc
  • Upgraded to Wordfence Premium to get real-time login defence, malware scanner and two-factor authentication for WordPress logins
  • Run an Ubuntu VM system audit with Lynis
  • Securing Ubuntu in the cloud
  • No matter what server-provider you are using I strongly recommend you have a hot spare ready on a different provider

Code

  • How to code PHP on your localhost and deploy to the cloud via SFTP with PHPStorm by Jet Brains
  • Useful Java FX Code I use in a project using IntelliJ IDEA and jdk1.8.0_161.jdk
  • No matter what server-provider you are using I strongly recommend you have a hot spare ready on a different provider
  • How to setup PHP FPM on demand child workers in PHP 7.x to increase website traffic
  • Installing Android Studio 3 and creating your first Kotlin Android App
  • PHP 7 code to send object oriented sanitised input data via bound parameters to a MYSQL database
  • How to use Sublime Text editor locally to edit code files on a remote server via SSH
  • Creating your first Java FX app and using the Gluon Scene Builder in the IntelliJ IDEA IDE
  • Deploying nodejs apps in the background and monitoring them with PM2 from keymetrics.io

Tech

  • Backing up your computer automatically with BackBlaze software (no data limit)
  • How to back up an iPhone (including photos and videos) multiple ways
  • US v Huawei: The battle for 5G
  • Check the compatibility of your WordPress theme and plugin code with PHP Compatibility Checker
  • Is OSX Mojave on a 2014 MacBook Pro slower or faster than High Sierra
  • Telstra promised Fibre to the house (FTTP) when I had FTTN and this is what happened..
  • The case of the overheating Mac Book Pro and Occam’s Razor
  • Useful Linux Terminal Commands
  • Useful OSX Terminal Commands
  • Useful Linux Terminal Commands
  • What is the difference between 2D, 3D, 360 Video, AR, AR2D, AR3D, MR, VR and HR?
  • Application scalability on a budget (my journey)
  • Monitor server performance with NixStats and receive alerts by SMS, Push, Email, Telegram etc
  • Why I will never buy a new Apple Laptop until they fix the hardware cooling issues.

Wordpress

  • Replacing Google Analytics with Piwik/Matomo for a locally hosted privacy focused open source analytics solution
  • Setting web push notifications in WordPress with OneSignal
  • Telstra promised Fibre to the house (FTTP) when I had FTTN and this is what happened..
  • Check the compatibility of your WordPress theme and plugin code with PHP Compatibility Checker
  • Add two factor auth login protection to WordPress with YubiCo hardware YubiKeys and or 2FA Authenticator App
  • Monitor server performance with NixStats and receive alerts by SMS, Push, Email, Telegram etc
  • Upgraded to Wordfence Premium to get real-time login defence, malware scanner and two-factor authentication for WordPress logins
  • Wordfence Security Plugin for WordPress
  • Speeding up WordPress with the ewww.io ExactDN CDN and Image Compression Plugin
  • Installing and managing WordPress with WP-CLI from the command line on Ubuntu
  • Moving WordPress to a new self managed server away from CPanel
  • Moving WordPress to a new self managed server away from CPanel

General

  • Backing up your computer automatically with BackBlaze software (no data limit)
  • How to back up an iPhone (including photos and videos) multiple ways
  • US v Huawei: The battle for 5G
  • Using the WinSCP Client on Windows to transfer files to and from a Linux server over SFTP
  • Connecting to a server via SSH with Putty
  • Setting web push notifications in WordPress with OneSignal
  • Infographic: So you have an idea for an app
  • Restoring lost files on a Windows FAT, FAT32, NTFS or Linux EXT, Linux XFS volume with iRecover from diydatarecovery.nl
  • Building faster web apps with google tools and exceed user expectations
  • Why I will never buy a new Apple Laptop until they fix the hardware cooling issues.
  • Telstra promised Fibre to the house (FTTP) when I had FTTN and this is what happened..

Copyright © 2023 · News Pro on Genesis Framework · WordPress · Log in

Some ads on this site use cookies. You can opt-out if of local analytics tracking by scrolling to the bottom of the front page or any article and clicking "You are not opted out. Click here to opt out.". Accept Reject Read More
GDPR, Privacy & Cookies Policy

Privacy Overview

This website uses cookies to improve your experience while you navigate through the website. Out of these cookies, the cookies that are categorized as necessary are stored on your browser as they are essential for the working of basic functionalities of the website. We also use third-party cookies that help us analyze and understand how you use this website. These cookies will be stored in your browser only with your consent. You also have the option to opt-out of these cookies. But opting out of some of these cookies may have an effect on your browsing experience.
Necessary
Always Enabled
Necessary cookies are absolutely essential for the website to function properly. This category only includes cookies that ensures basic functionalities and security features of the website. These cookies do not store any personal information.
Non-necessary
Any cookies that may not be particularly necessary for the website to function and is used specifically to collect user personal data via analytics, ads, other embedded contents are termed as non-necessary cookies. It is mandatory to procure user consent prior to running these cookies on your website.
SAVE & ACCEPT