Here is a quick guide to show you how to add two-factor auth login protection to WordPress with YubiCo hardware YubiKeys and or 2FA authenticator app
I have a number of guides on moving away from CPanel, Setting up VM’s on AWS, Vultr or Digital Ocean along with installing and managing WordPress from the command line.
Why Secure WordPress
WordPress CMS is a widely targeted CMS for hackers. View the official WordPress stats on WordPress Version/PHP and MySQL Version. View WordPress vulnerabilities here.
Read the Sucuri 2017 report on reported WordPress Hacks here (spoiler 34,371 infected websites in 2017).
Plugins exist to secure and scan WordPress. Read my blog post here on the now-retired Gravityaity Scan plugin and the awesome WordFence security plugin.
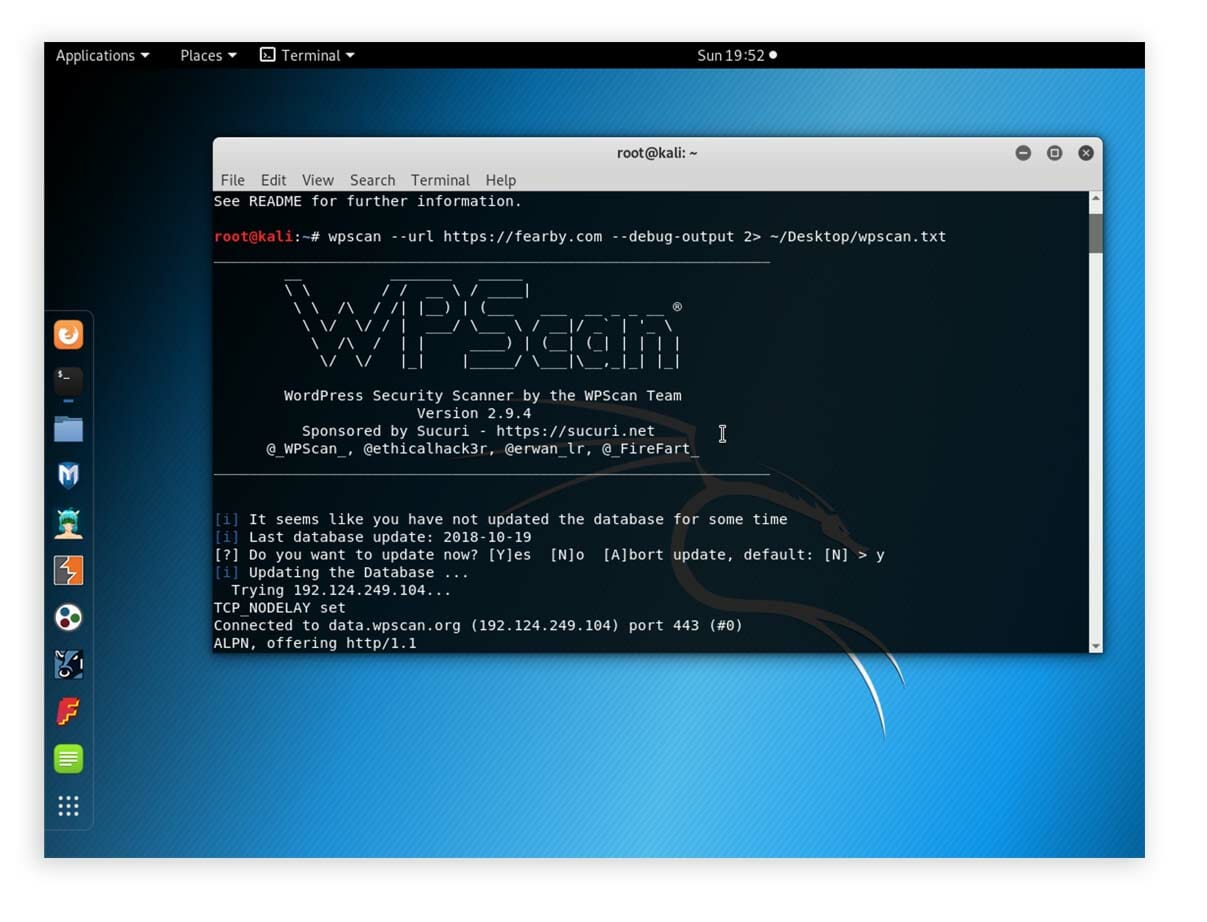
You (and hackers) can scan your site with https://wpscans.com/ or other open-source tools like wp-scan from OWASP ZAP. If you manage a WordPress site I’d recommend you install Kali Linux to scan your site.
Running a wp scan in Kali Linux is easy.
The output from the Kali Linux wpscan tool
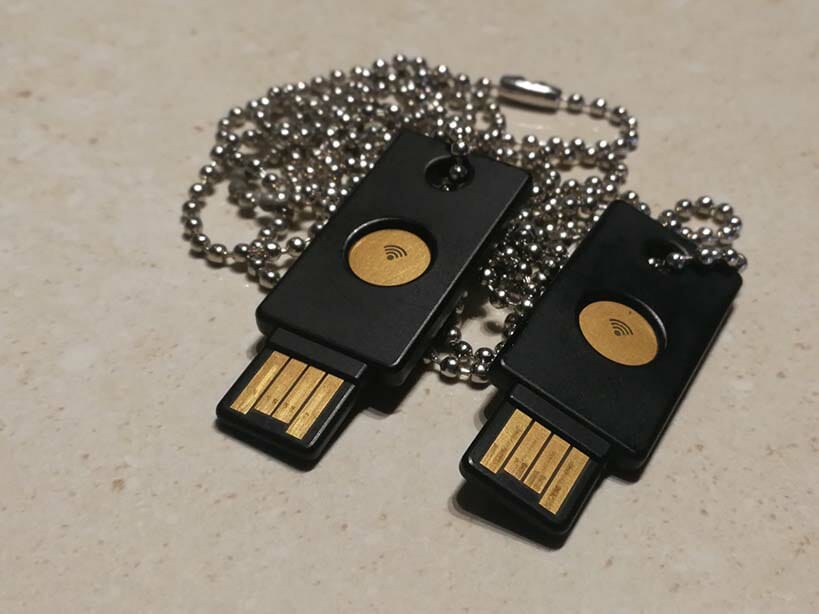
What are Hardware YubiCo YubiKeys
Read my guide here to see what YubiCo YubiKeys are and how to use them.
Get the Two-Factor Plugin for WordPress Plugin
Plugin: https://en-au.wordpress.org/plugins/two-factor/
Plugin Page at WordPress.org
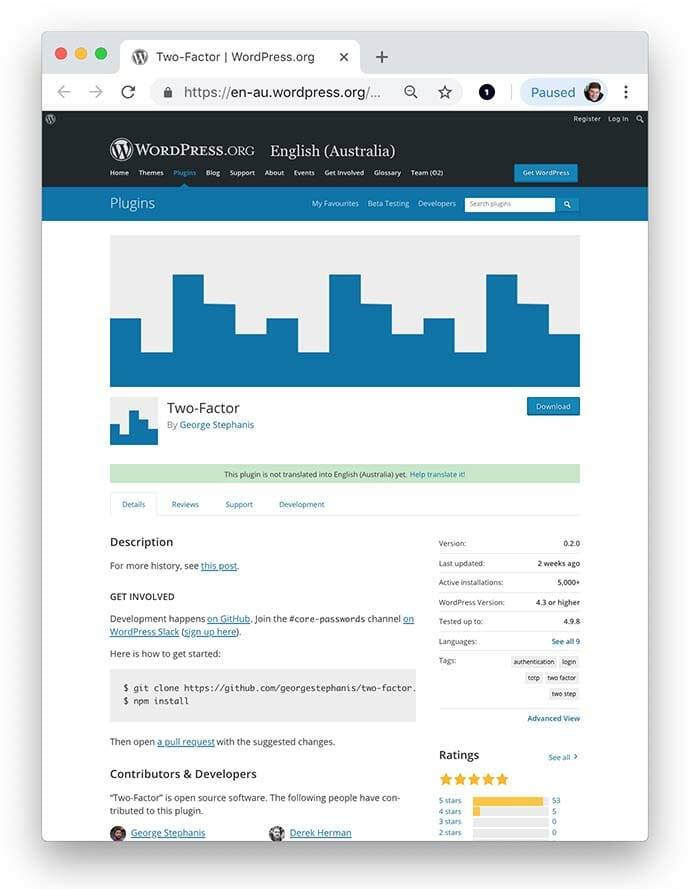
The source code for this plugin is available (nice): https://github.com/georgestephanis/two-factor. This plugin was updated 2 weeks ago (nice).
Downloading the Plugin
FYI: I do not allow downloading or updating of plugins in WordPress (via FTP), I prefer SSH manual downloading. FTP plugin installation and updating are not allowed on my site.
I got the latest download URL (e.g. https://downloads.wordpress.org/plugin/two-factor.zip) by copying the URL from the download button above.
I connected to my server via SSH and navigated to my WordPress plugin folder
I download the plugin.
I extracted the plugin zip file
Enable the Plugin
Don’t forget to update the plugin in WordPress.

Once the plugin is enabled I can setup Two-factor authentication
Edit your Users
To setup two-factor authentication open your WordPress users screen (/wp-admin/users.php).
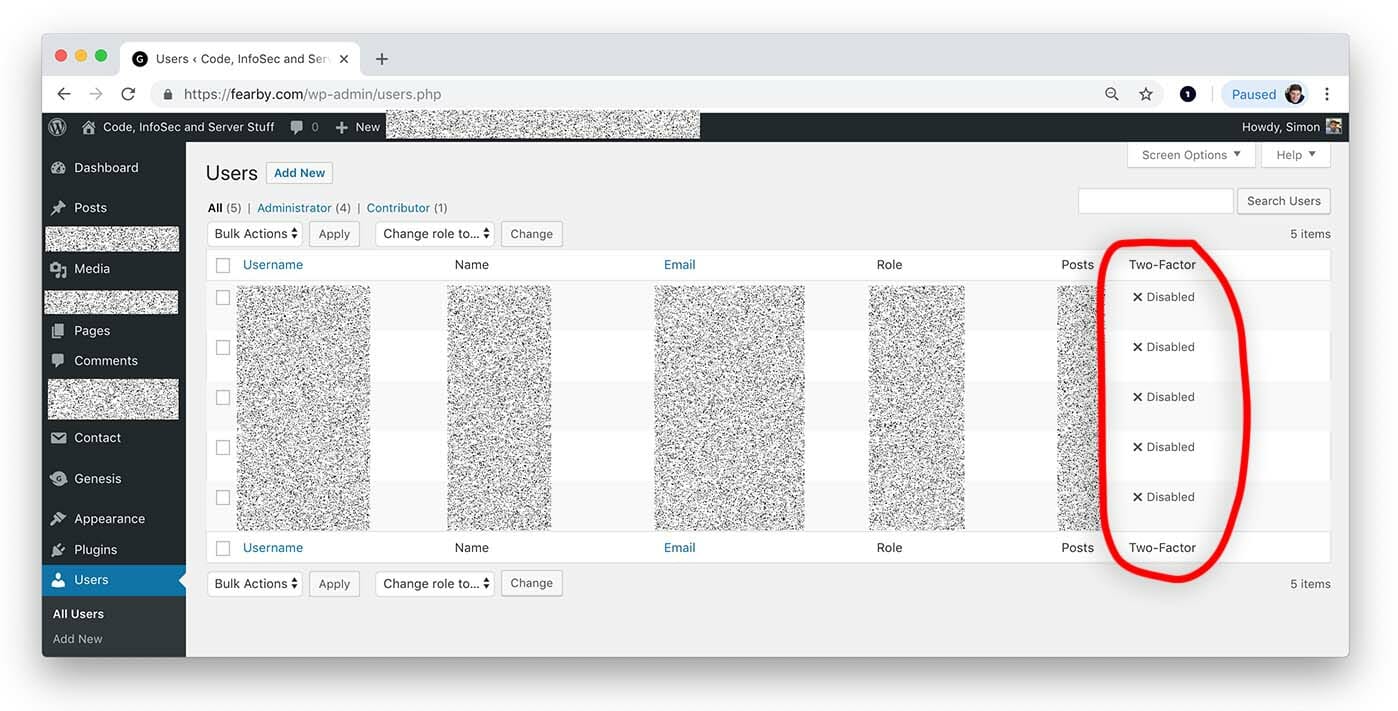
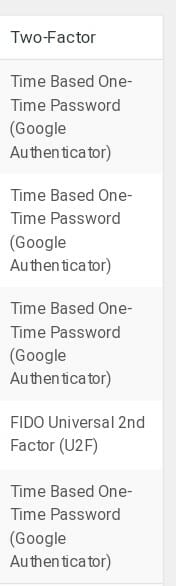
Notice the Two-Factor column
Edit your desired user to enable two-factor login options
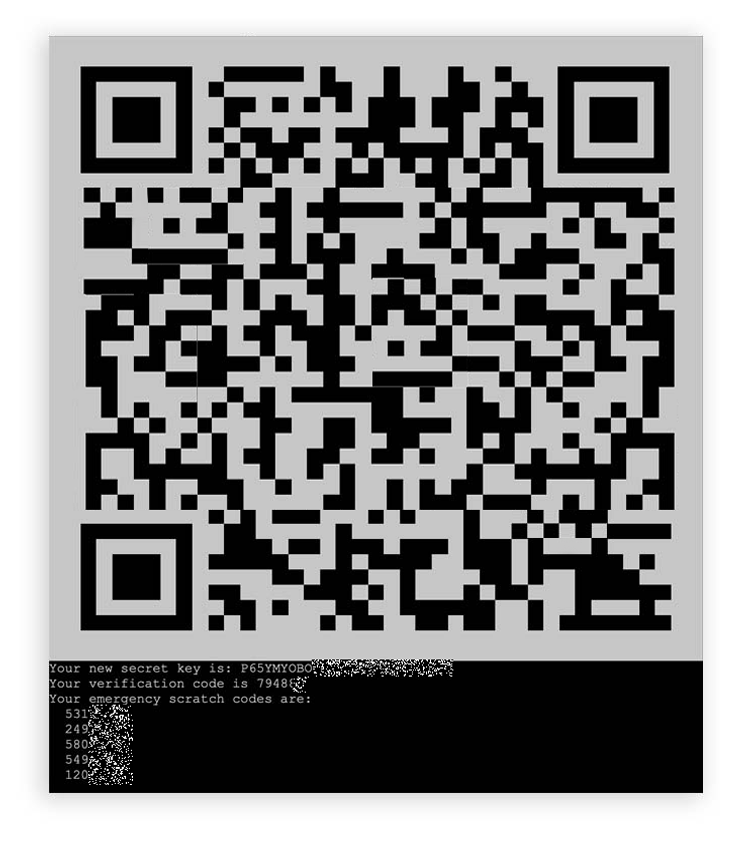
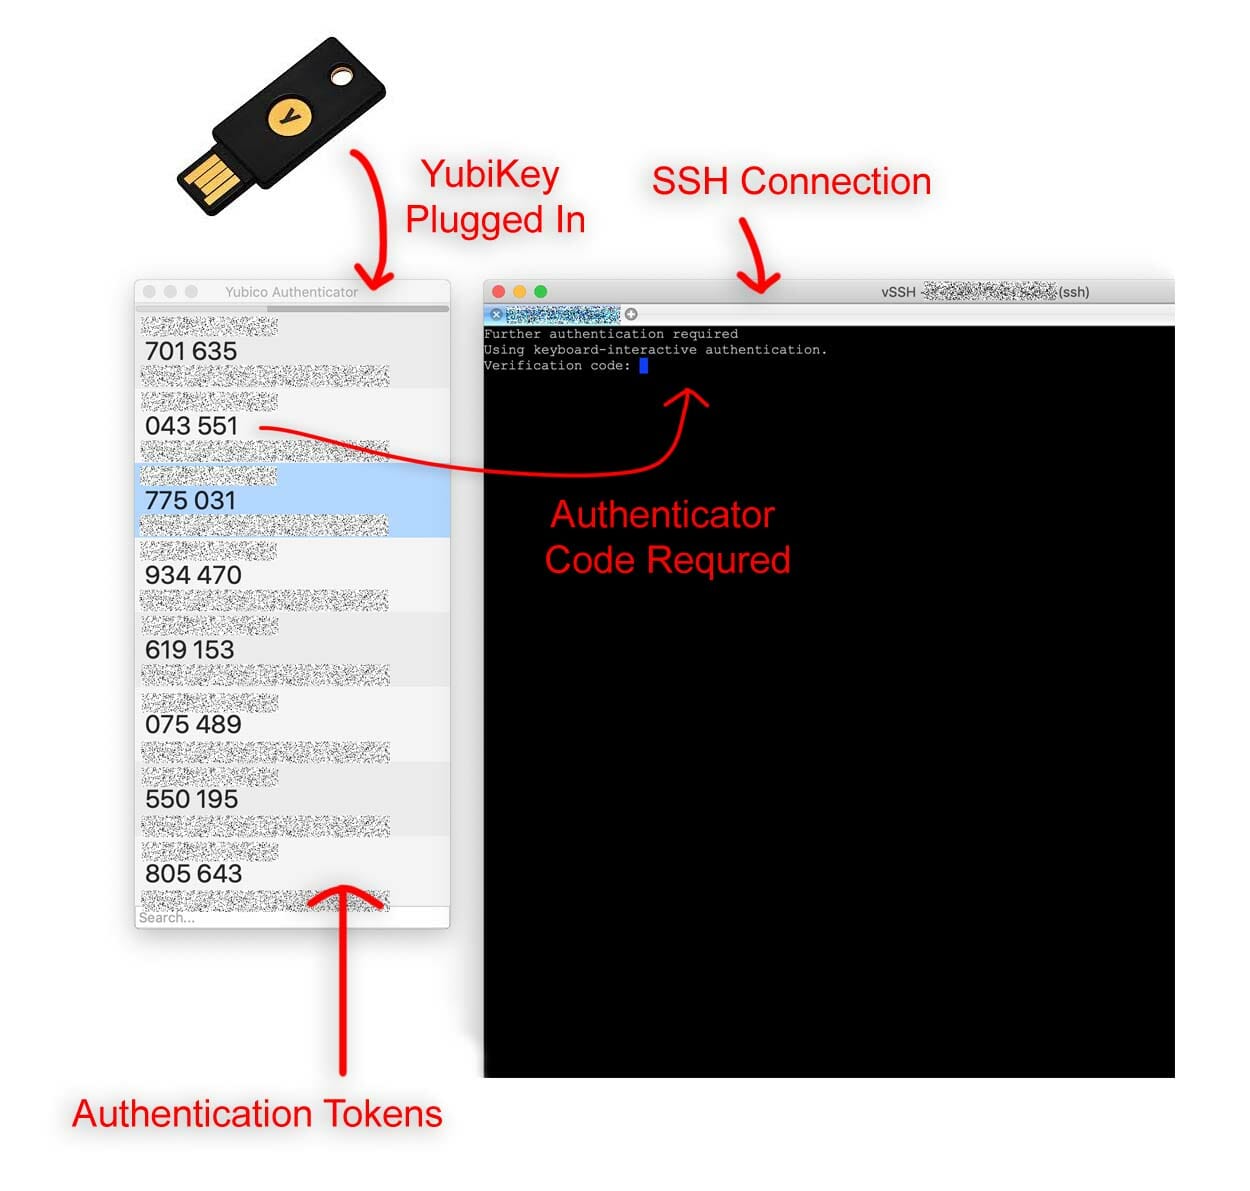
Scroll down to Two Factor Options header, you will see a QR code that you can scan with your two-factor authentication app (e.g Google Authenticator or YubiCo Authenticator).
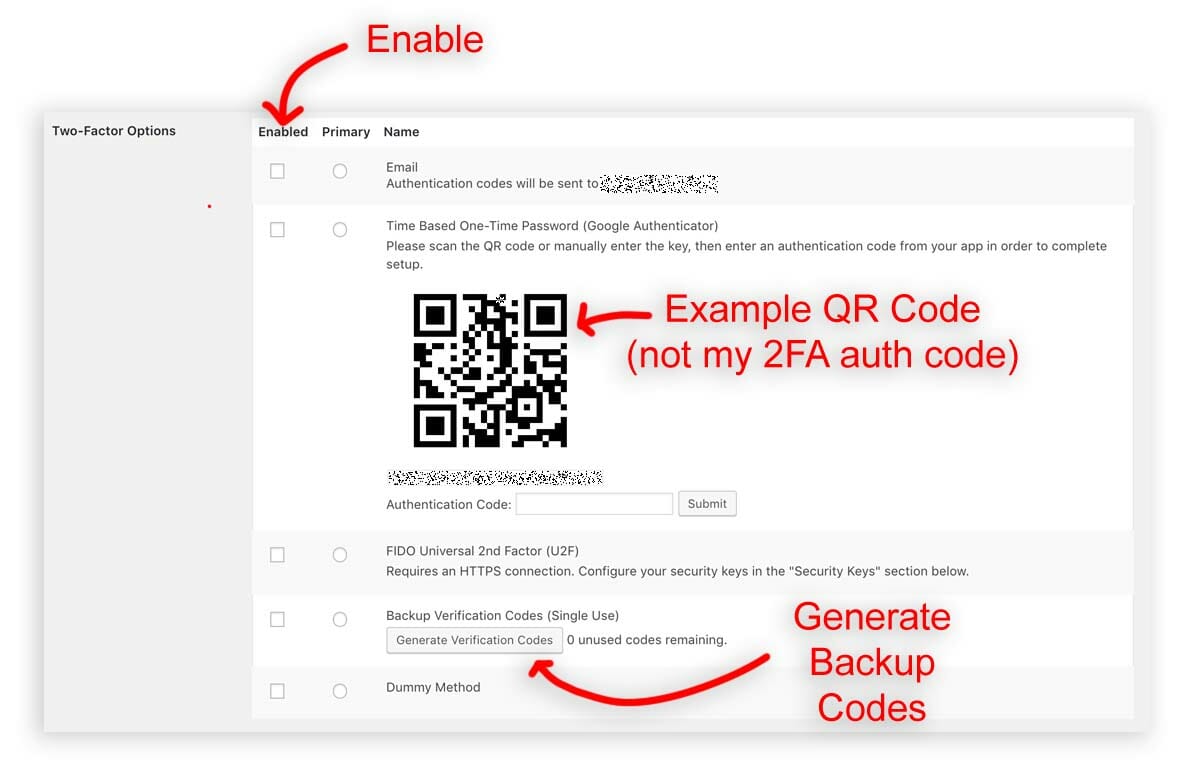
Always generate and save backup codes in case you lose your YubiKeys or authenticator app.
You can enable authentication methods as required.
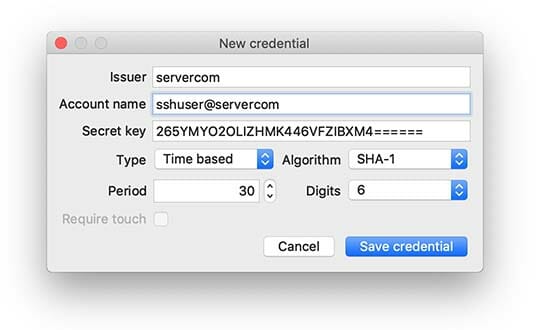
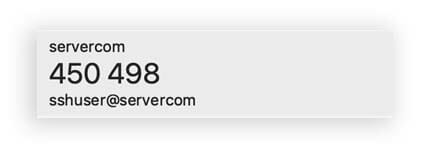
Add the code to your Authenticator app. I will add mine to my Yubico Authenticator app that requires the insertion of a physical YubiKey. I can read my YubiKey via NFC and use my mobile phone to generate one time passwords too. Read here to learn about YubiKey 2FA (touch) devices. I have secured my Ubuntu/Debian and macOSX with these keys,
TIP: Don’t forget to save the user after editing.
Add the YubiKey 2FA (touch) to WordPress logins.
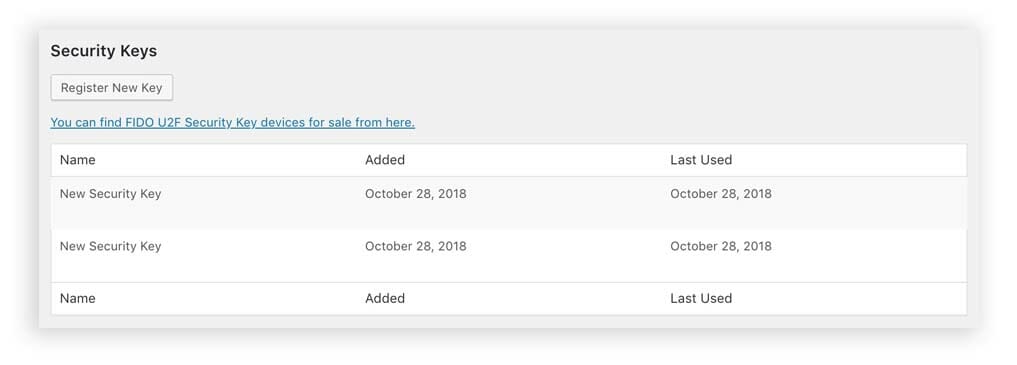
While editing a user click Register New Key under Security Keys

Add your primary and backup YubiKey as required (I added both of mine).
Enable all desired 2FA options
- Email (OFF)
- Time based One-Time Password (Authenticator App) (ON)
- FIDO Universal 2nd Factor (U2F) – YubiKey Insertion and touch (ON)
- Backup Codes (ON)
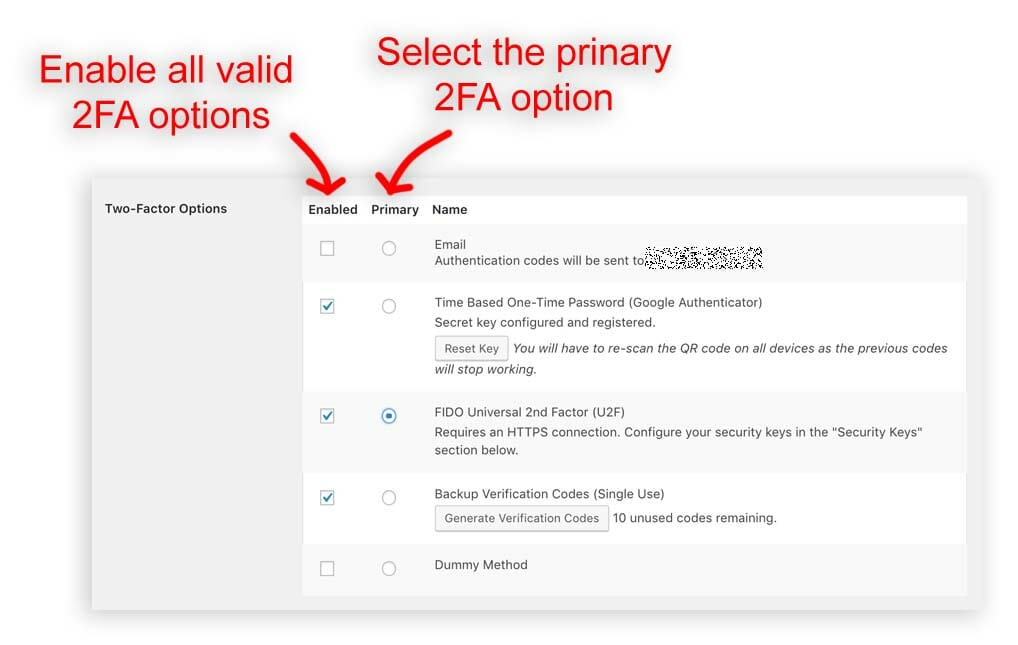
TIP: Don’t forget to save the user after editing.
Users Table
Aim to set up every user who has access to your WordPress to use 2FA.
Mobile 2FA login
I tested logos via mobile and I was prompted to tab my YubiKey to my phone. Nice.
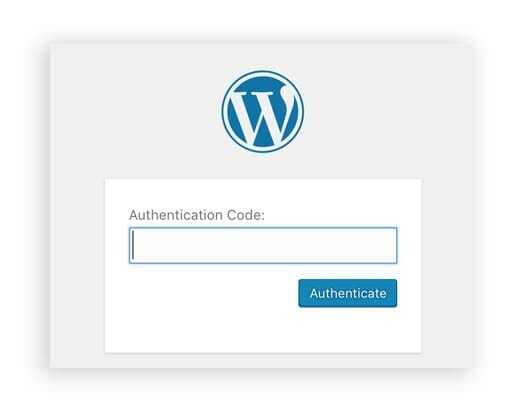
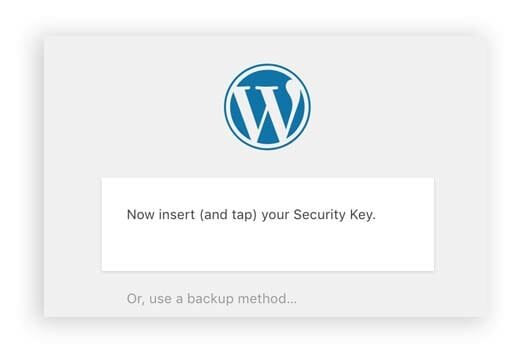
What happens at login?
When One Time Password is enabled as the primary authentication method I am prompted for a one-time password after entering my username and password. I then need to insert my YubiKey (or tap the YubiKey to my phone (via NFC)) to generate a one time password.
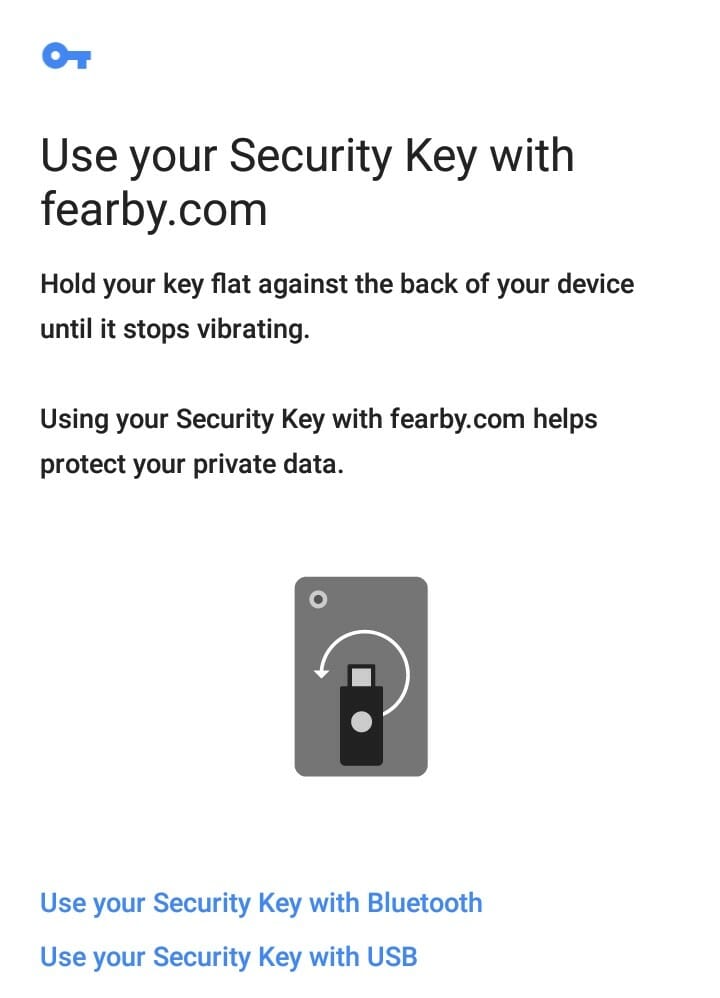
When FIDO is enabled I need to insert my YubiKey and press the button.
Conclusion
I can now secure my WordPress site with 2FA protections without expensive security plugins.
I hope this guide helps someone.
More
Read more here
Ask a question or recommend an article
[contact-form-7 id=”30″ title=”Ask a Question”]
Revision History
v1.1 Added Mobile login details
v1.0 Initial post